Shopware - v5
Scalapay provides a ready-to-install extension for your Shopware store.
⇲ Plugin Installation
✔ Plugin Configuration
❤ Scalapay Widget
⚠ Category Restriction
✈ Countries & Languages
⇲ Plugin Installation
Download the latest version and follow the steps to get started!
Simply upload “Scalapay” plugin folder into custom plugins folder on the server.
❶ Login to your admin backend
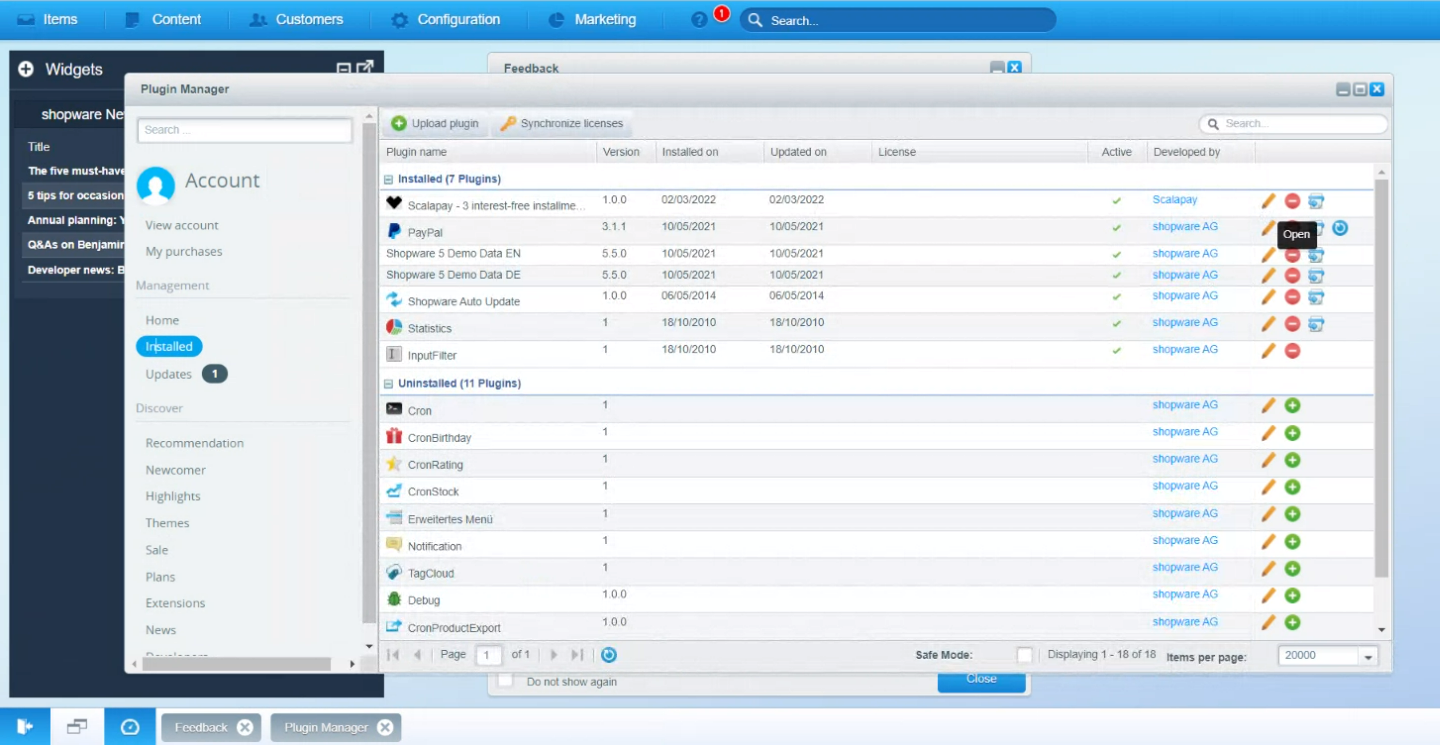
❷ Go to Configurations -> and select Plugin Manager
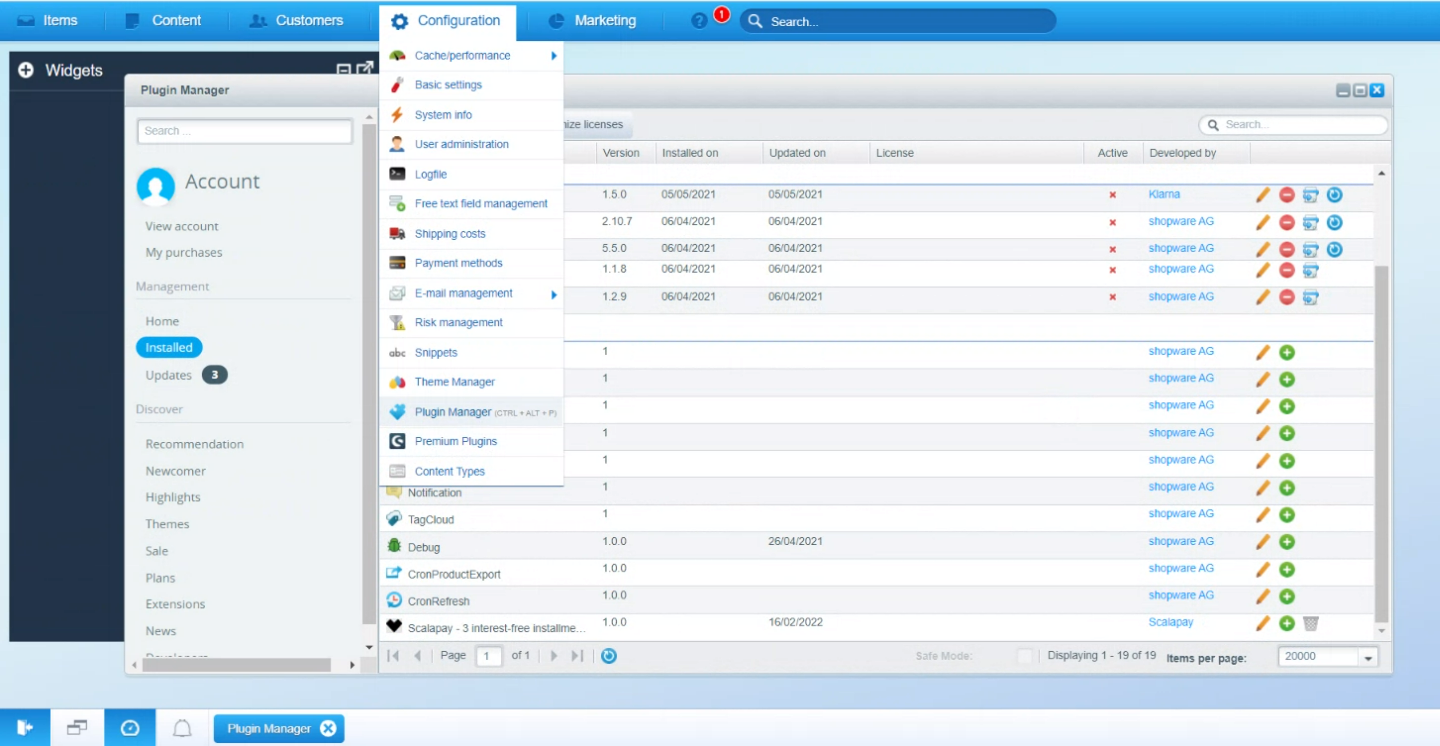
❸ On the left menu, look for "Uninstalled". On the main page scroll down until you find the "Uninstalled" section and look for "Scalapay"
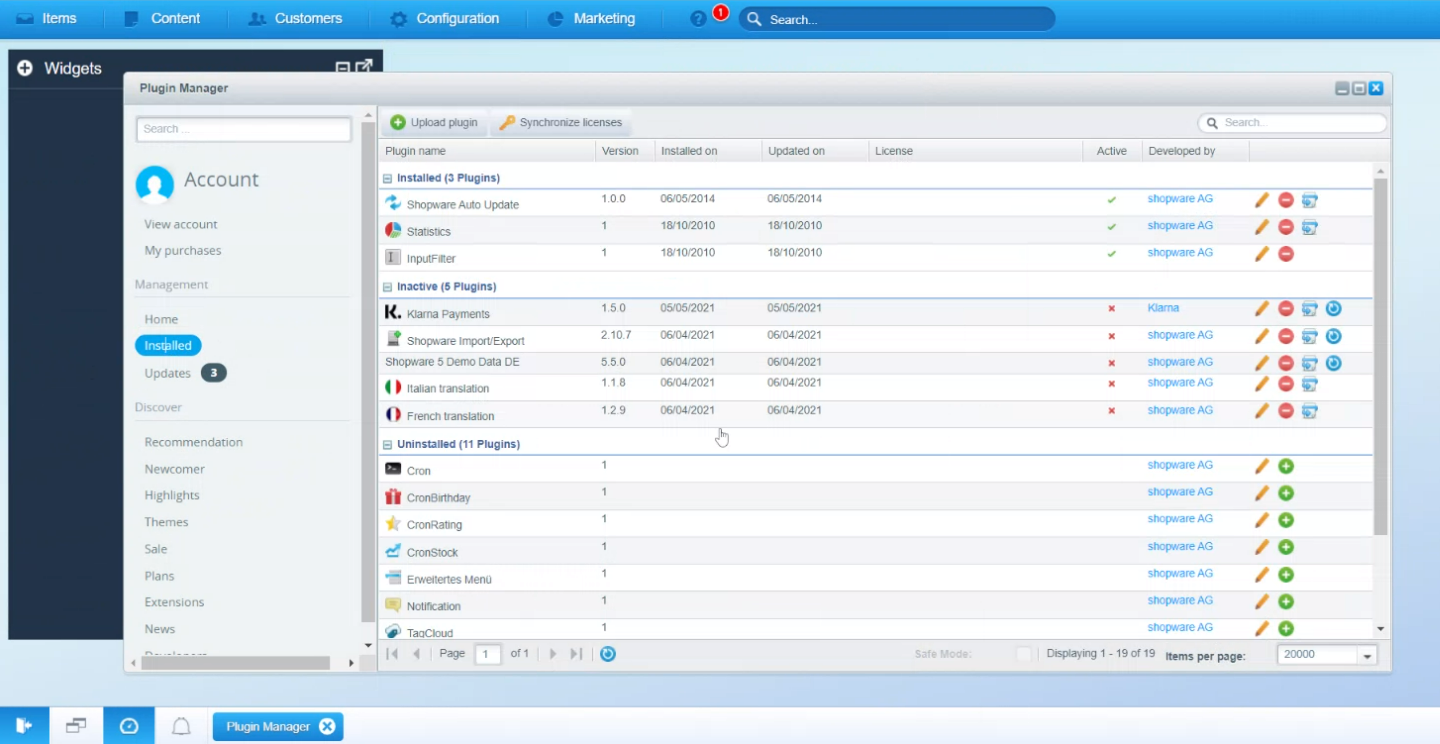
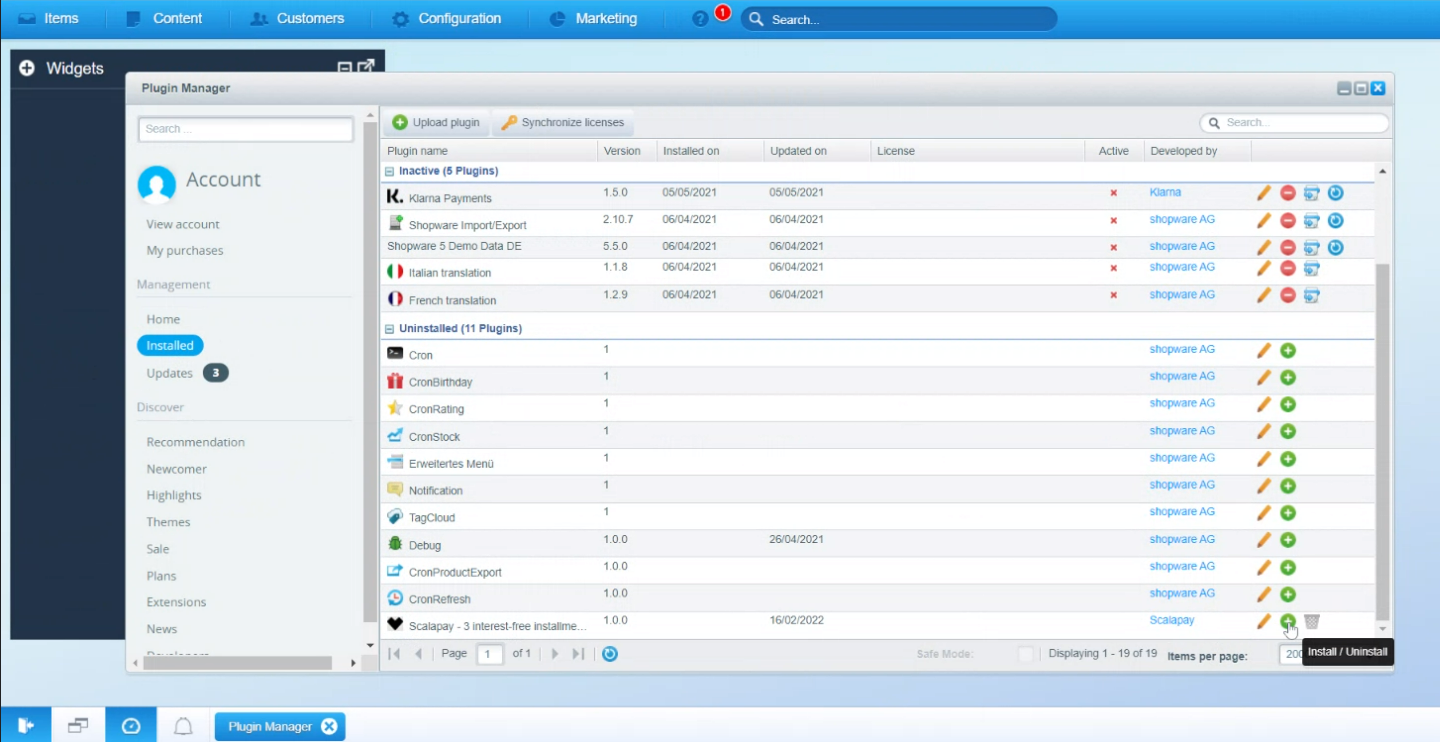
❹ Once you found Scalapay, click on the right green "+" to start the configuration
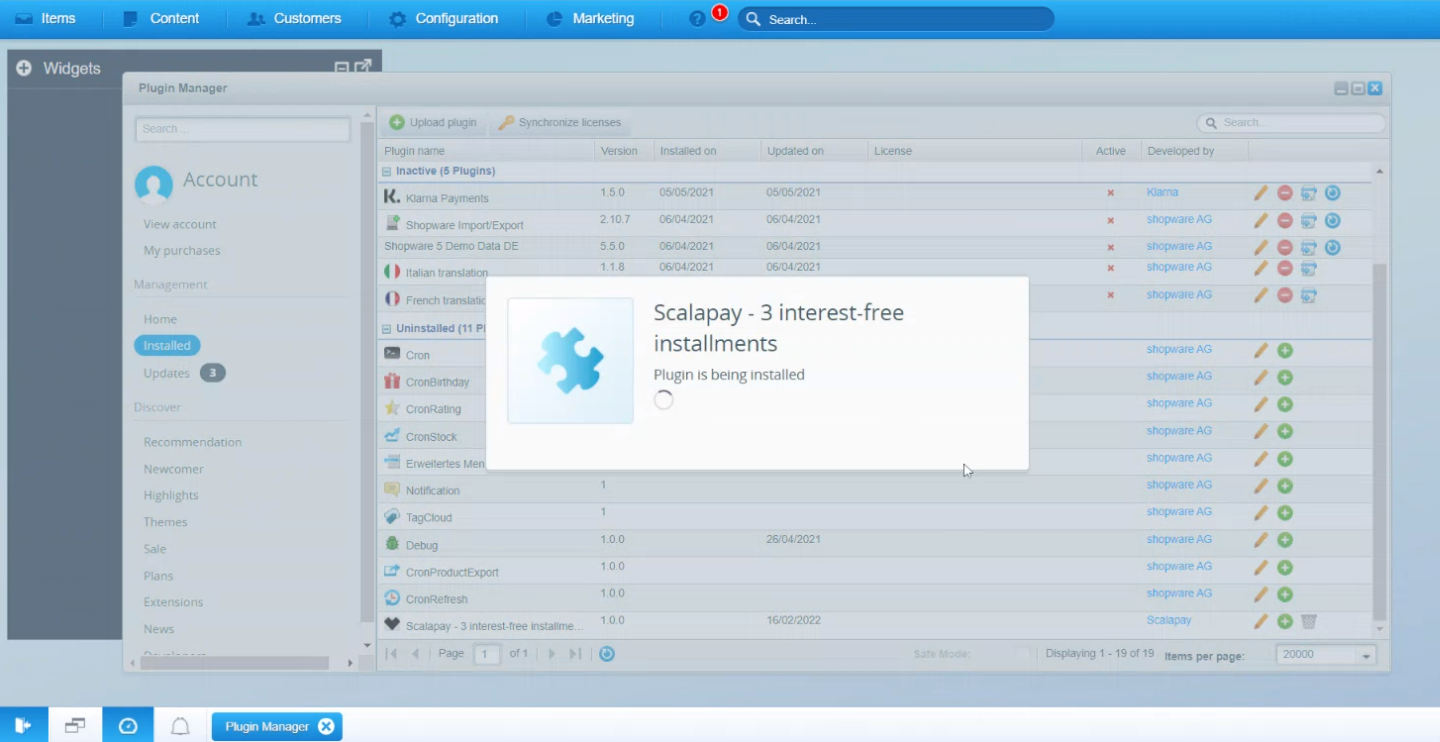
❺ At this point, you should be able to see the Scalapay plugin on the above part of the page, in the "Installed" section. Click on "Open".
✔ Plugin Configuration
Follow this paragraph to learn how to correctly configure your Shopware plugin.
Once you have correctly installed the plugin, you should be able to open it as mentioned above.
Scroll down until you find the Configurations.
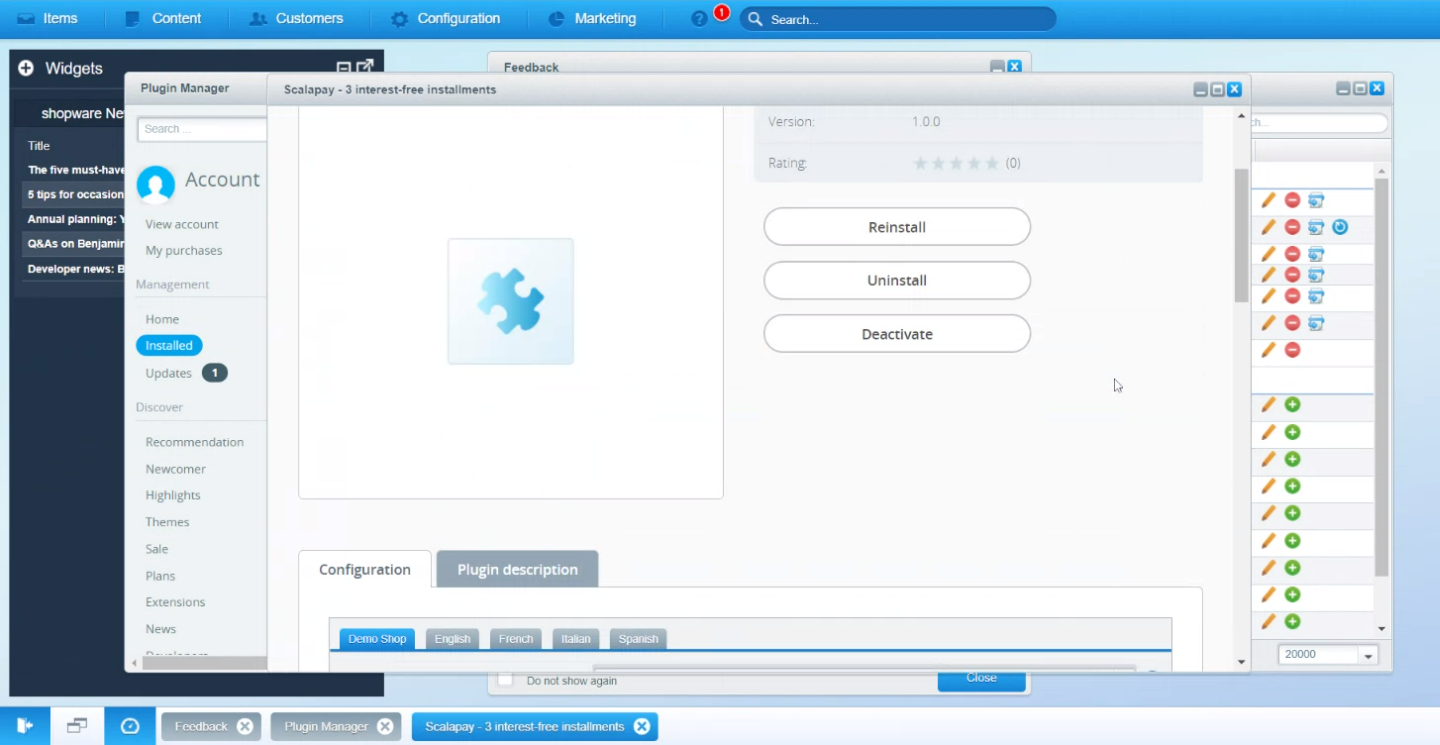
SCALAPAY ENABLING SETTINGS
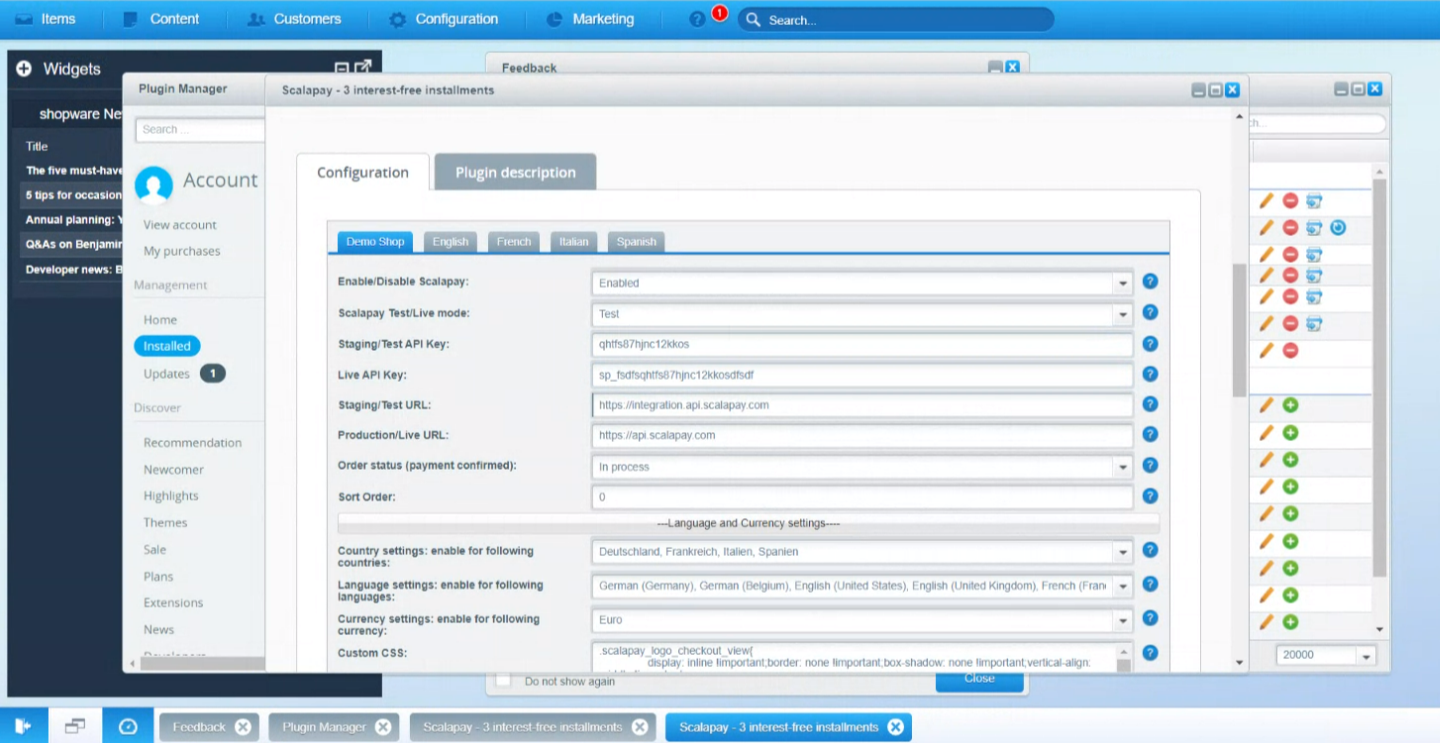
Select Enabled/Disabled option on dropdown menu to show or hide Scalapay. Scalapy is enabled by default.
Select Live/Test mode to switch from production to staging. Scalapay is in test mode by default. Test API key is already inserted
Live mode
When LIVE mode is active, a LIVE Api key must be present and active in its proper box. Scalapay won't work if the api key is absent or inactive
❤ Scalapay Widget
On the settings page, there are many options available to correctly customize and implement our Scalapay widget on product and cart page.
CUSTOM CSS
Sometimes external tags like div, p or span tags styles override our default styles. To handle these types of issues you can use the Custom CSS field to facilitate design processes. You can also use it to define inline style classes, such as font, size or alignment. These styles will apply for Scalapay description across all pages: product, cart and checkout pages.
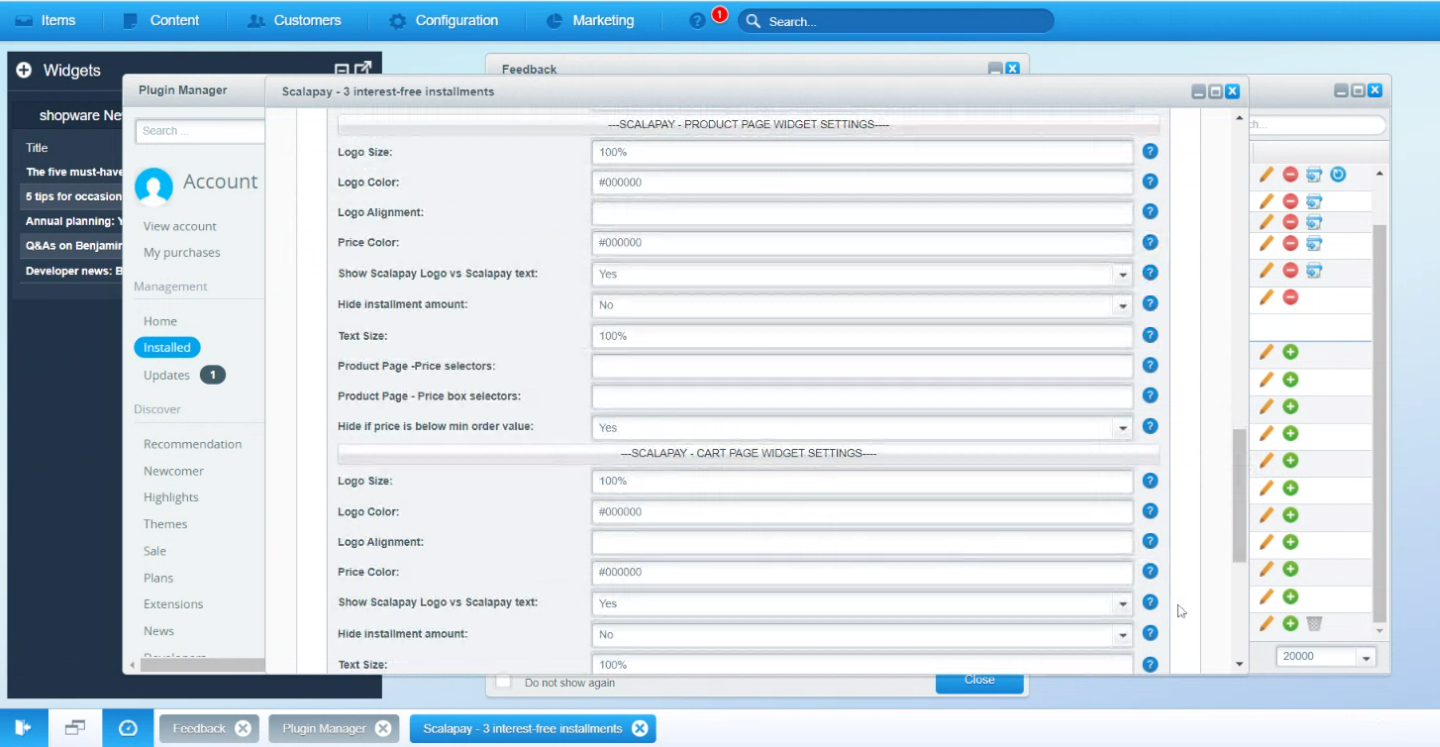
PRODUCT AND CART PAGE SETTINGS
You could customize Scalapay description on Product and Cart pages in the following ways:
● Display as a text instead of a logo (not recommended)
● The text size
● The logo size and alignment
● The price color (not recommended according to Scalapay brand identity)
● The logo color (not recommended according to Scalapay brand identity)
PRODUCT AND CART PAGE DETAILS
Follow these steps to configure the widget on the product page and cart. Find more information about our widget here.
The Price Selectors field is used to add class or combination of class pairs to get the final product price on which to apply Scalapay installments.
- Inspect the price element to retrieve the correct price class name
PRICE
To select the correct price to use for the installment calculation add the appropriate selectors in the Product Page - Price Selectors box.
To add new price css selector add new selectors in order of priority to use. Find all your price selectors (normal price, special price etc) and paste them in the box, separated by comma.
Use the second box Product Page - Price Selector when prices are loaded by ajax. We recommend using the selector that doesn’t change dynamically.
POSITION
To change Scalapay widget position change the css selector in Product Page - Text Position text area. It will show Scalapay description after the css selector.
CHECKOUT PAGE
By Default, Scalapay description is already set on the Checkout page. No changes are needed. However if you want to update the text you can simply go to module files located at modules/scalapay/translations/, edit the file and save after updating text.
⚠ Category Restriction
MIN AND MAX AMOUNT
In Scalapay plugin configuration, a minimum and maximum amount are set, as default, for displaying and authorizing Scalapay payment on your e-commerce platform.
The minimum amount for displaying the Scalapay plugin and accepting payments is set to 5€. This amount cannot be modified.
Set the maximum amount based on your contract..

✈ Countries & Languages
In Scalapay module configuration, you can set authorized countries, languages and currencies.
Be aware that:
● The only authorized countries are Austria, Belgium, Holland, Finland, France, Germany, Italy, Portugal, Spain. Contact your account manager for more information.
● The only authorized currency is Euro.
● Enable the languages according to the countries you operate in.

Now it's time to test your plugin!
Updated over 1 year ago
