
Shopify - Scalapay widget
Install the App for the widget on Product page and Cart page
Configure the App for the widget on Product page
Configure the App for the widget on Cart page
Install the App for the widget on Product page and Cart page
Download here the Scalapay App to install the widget on Product page and Cart page: Scalapay widget for Shopify.
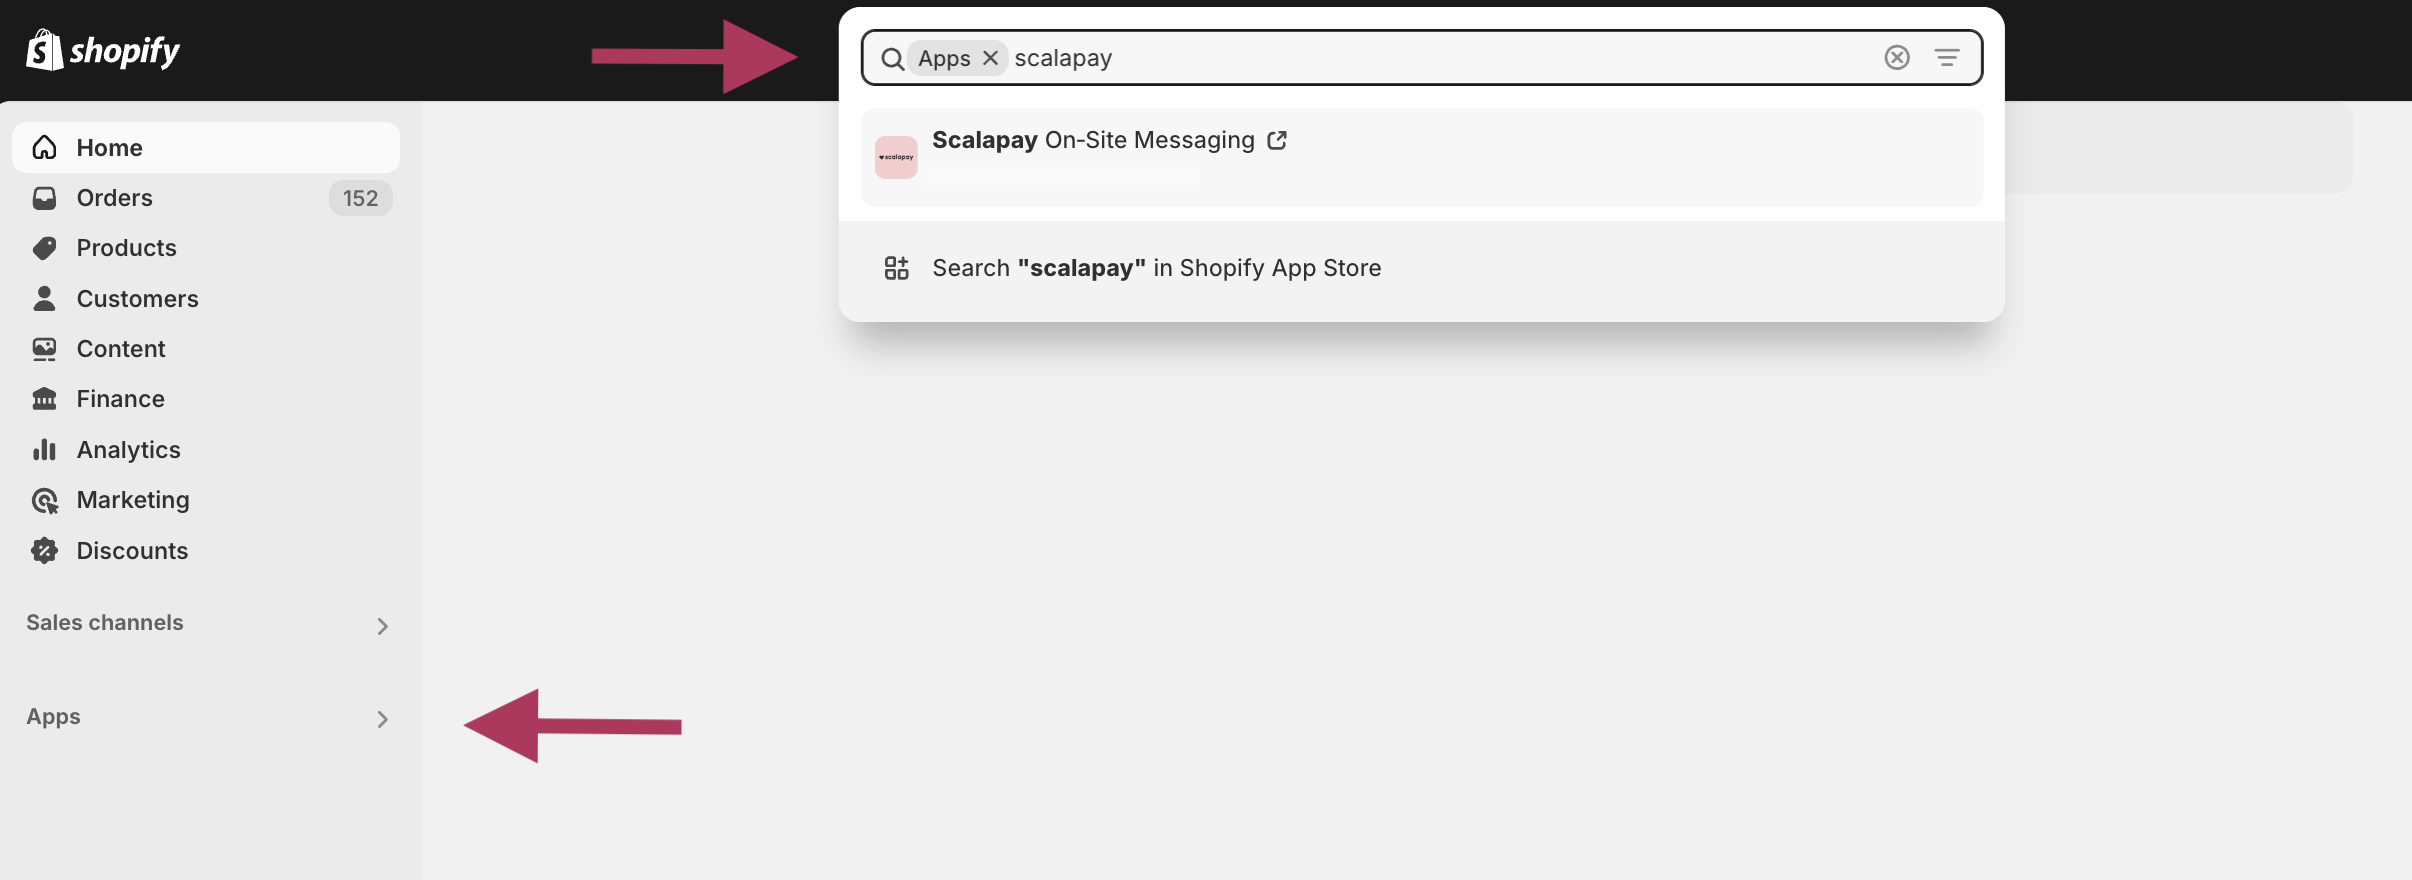
Go to the "Apps" section of your Shopify backend, click on it and type "Scalapay" in the search bar at the top of the page. Choose the result "On-Site Messaging" from the pop-up that will appear.
Install the App to have Scalapay on Product page and Cart page
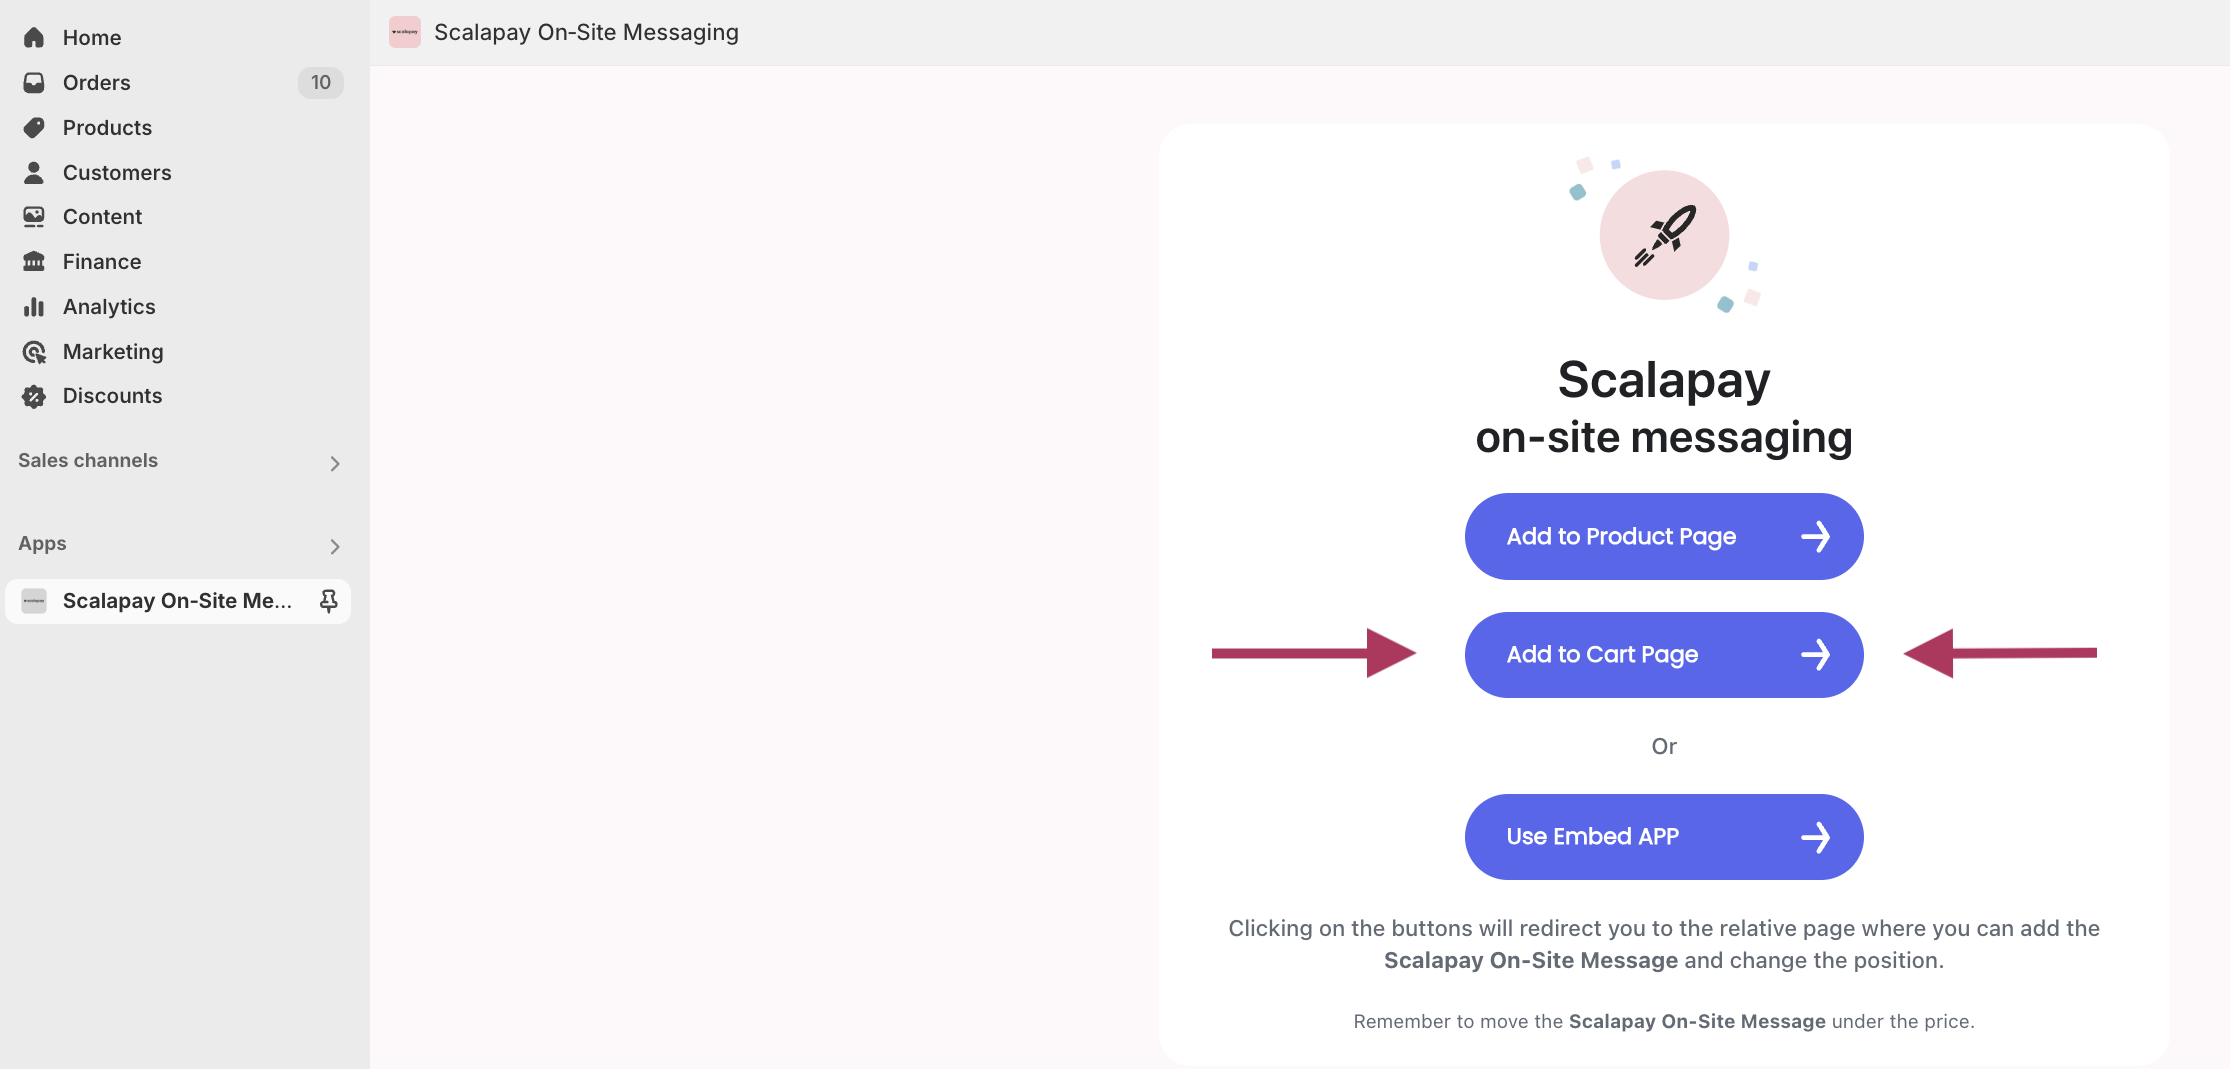
COMPATIBILITY OF THE SHOPIFY THEMEIf your Shopify theme is compatible with the Scalapay on-site messaging App, you can click on the first two buttons to install the widget automatically on Product page and Cart page.
If your Shopify theme is not compatible, a message on the page will inform you. In this case, click on the button "Use Embed App" and go to our guide to discover how to install the widget on Product page and Cart page.

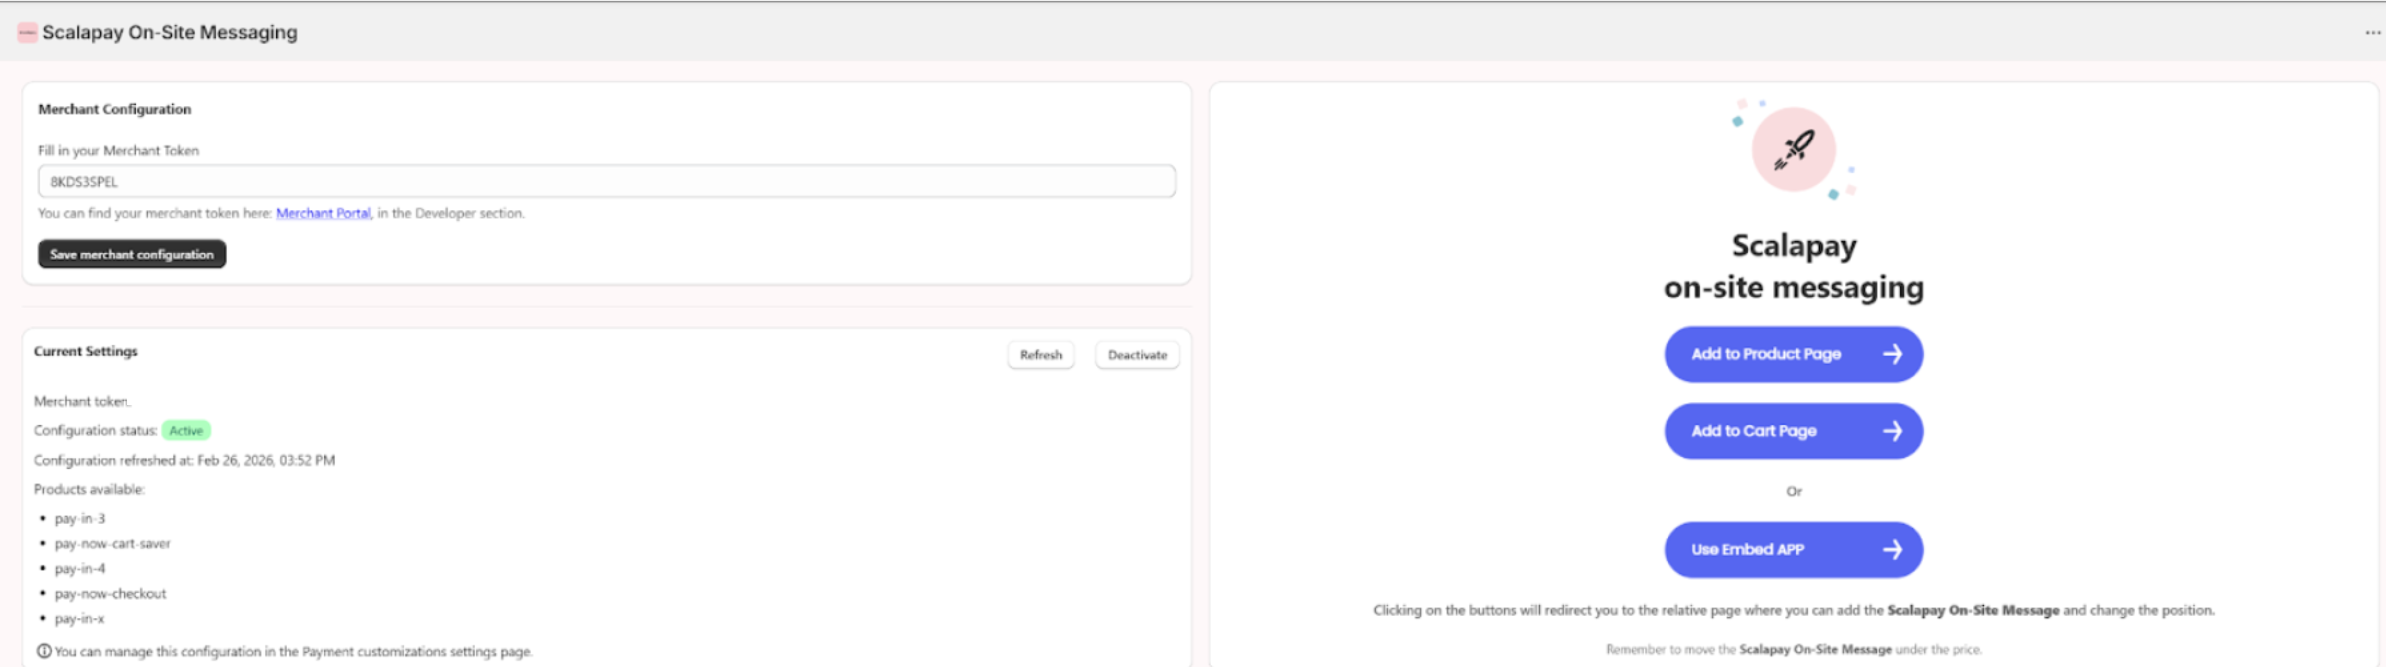
Enter the Merchant Token in the appropriate field "Fill in your Merchant Token" and click on “Save merchant configuration” (you can find the Merchant Token in the Developer section of the Merchant Portal).
Click on the “Refresh” button to view all active payment methods. This will ensure that the wording at checkout is configured correctly.
Here is the result after the refresh:
Configure the App for the widget on Product page
The Scalapay widget has to appear on the Product page of all items on your eCommerce site.
The text and pop-up are set by Scalapay but there are some fields that allow you to configure the widget.
Here are the steps to install the Scalapay widget.
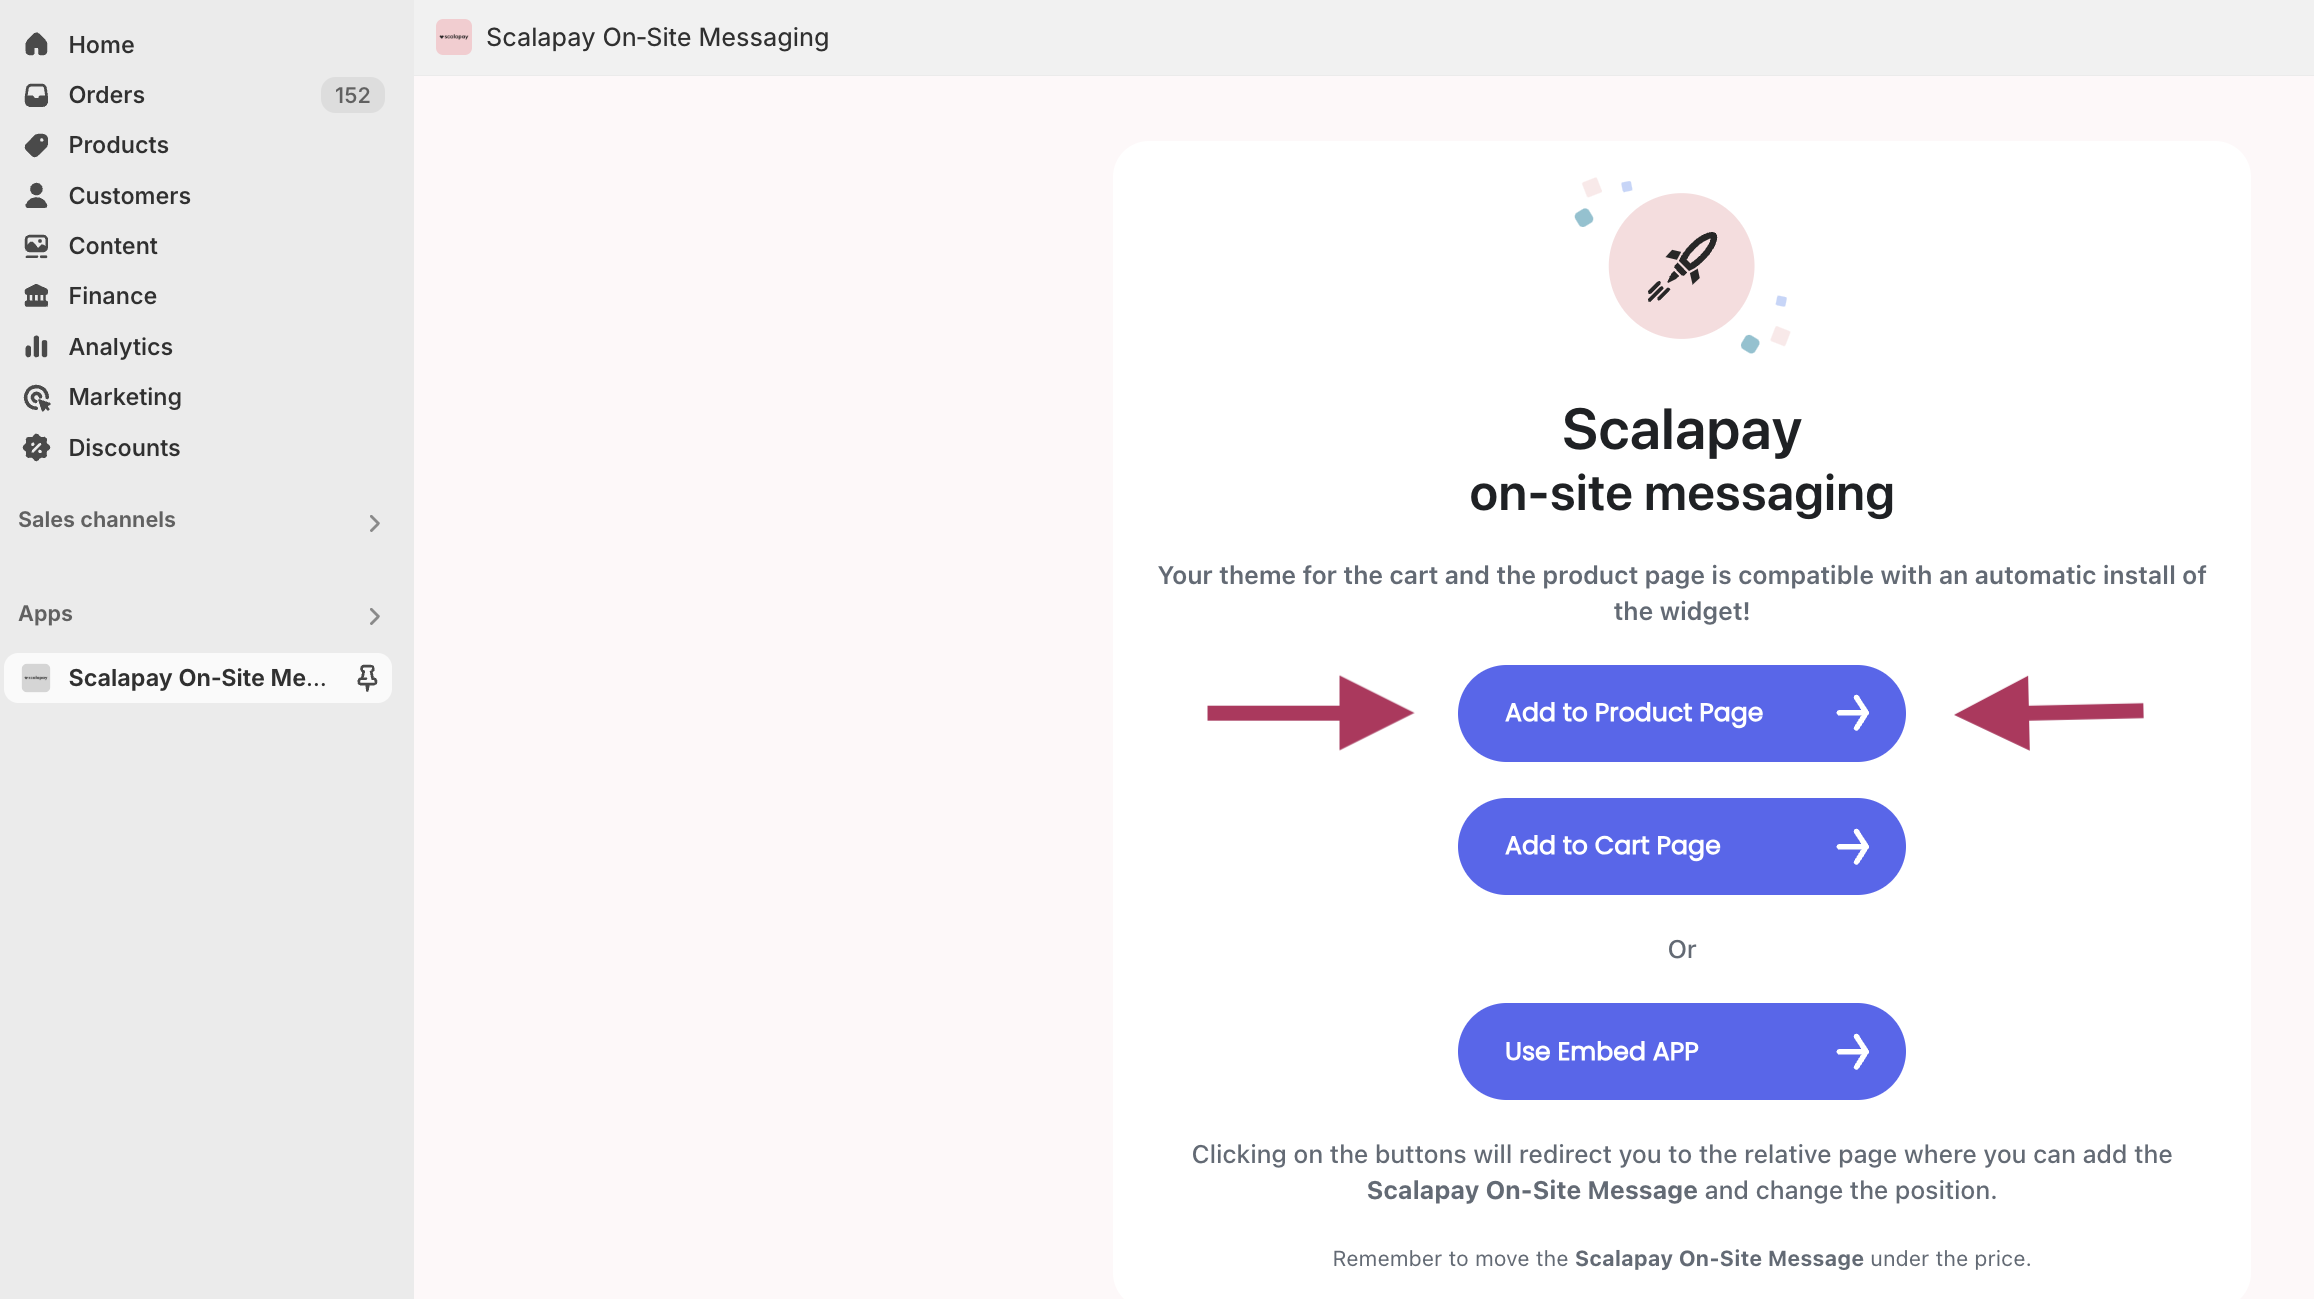
- Click on "Add to Product page".
- The backend of your Product page will appear.
- On the left column there are all the sections of the Product page including one called "Scalapay on-page message": it represents the widget that will appear on the Product page and collects its configurations.
- If the Scalapay on-page message section does not appear or you wish to add a new one, you can add it by clicking on Add block and then Apps and you will find it.
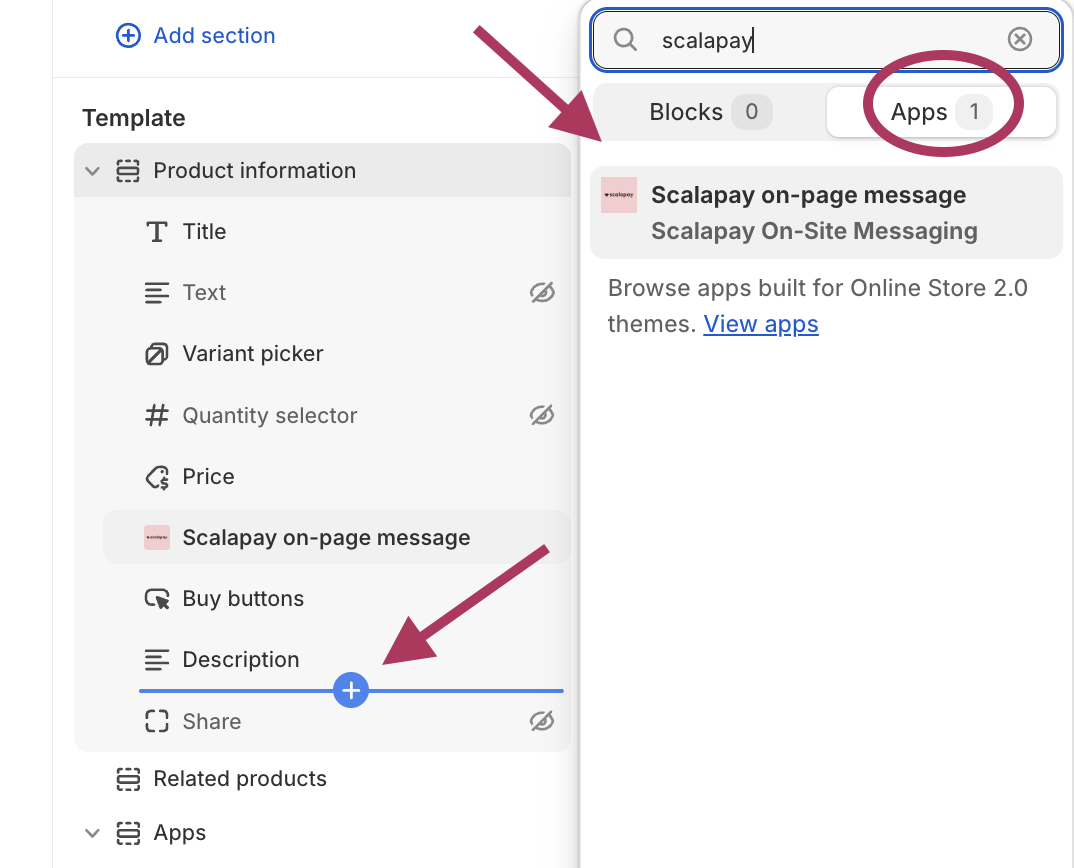
- Drag the widget block below the section Price (the product price).
- If you click on "Scalapay on-page message" a new menu appears. You will be able to modify the widget parameters.
- ENTER YOUR MERCHANT TOKEN
You will have to enter your Merchant token in the section Merchant Token in order to show your correct Scalapay products on the widget. You will find your Merchant token in your Scalapay Merchant Portal in the "Developer" section.
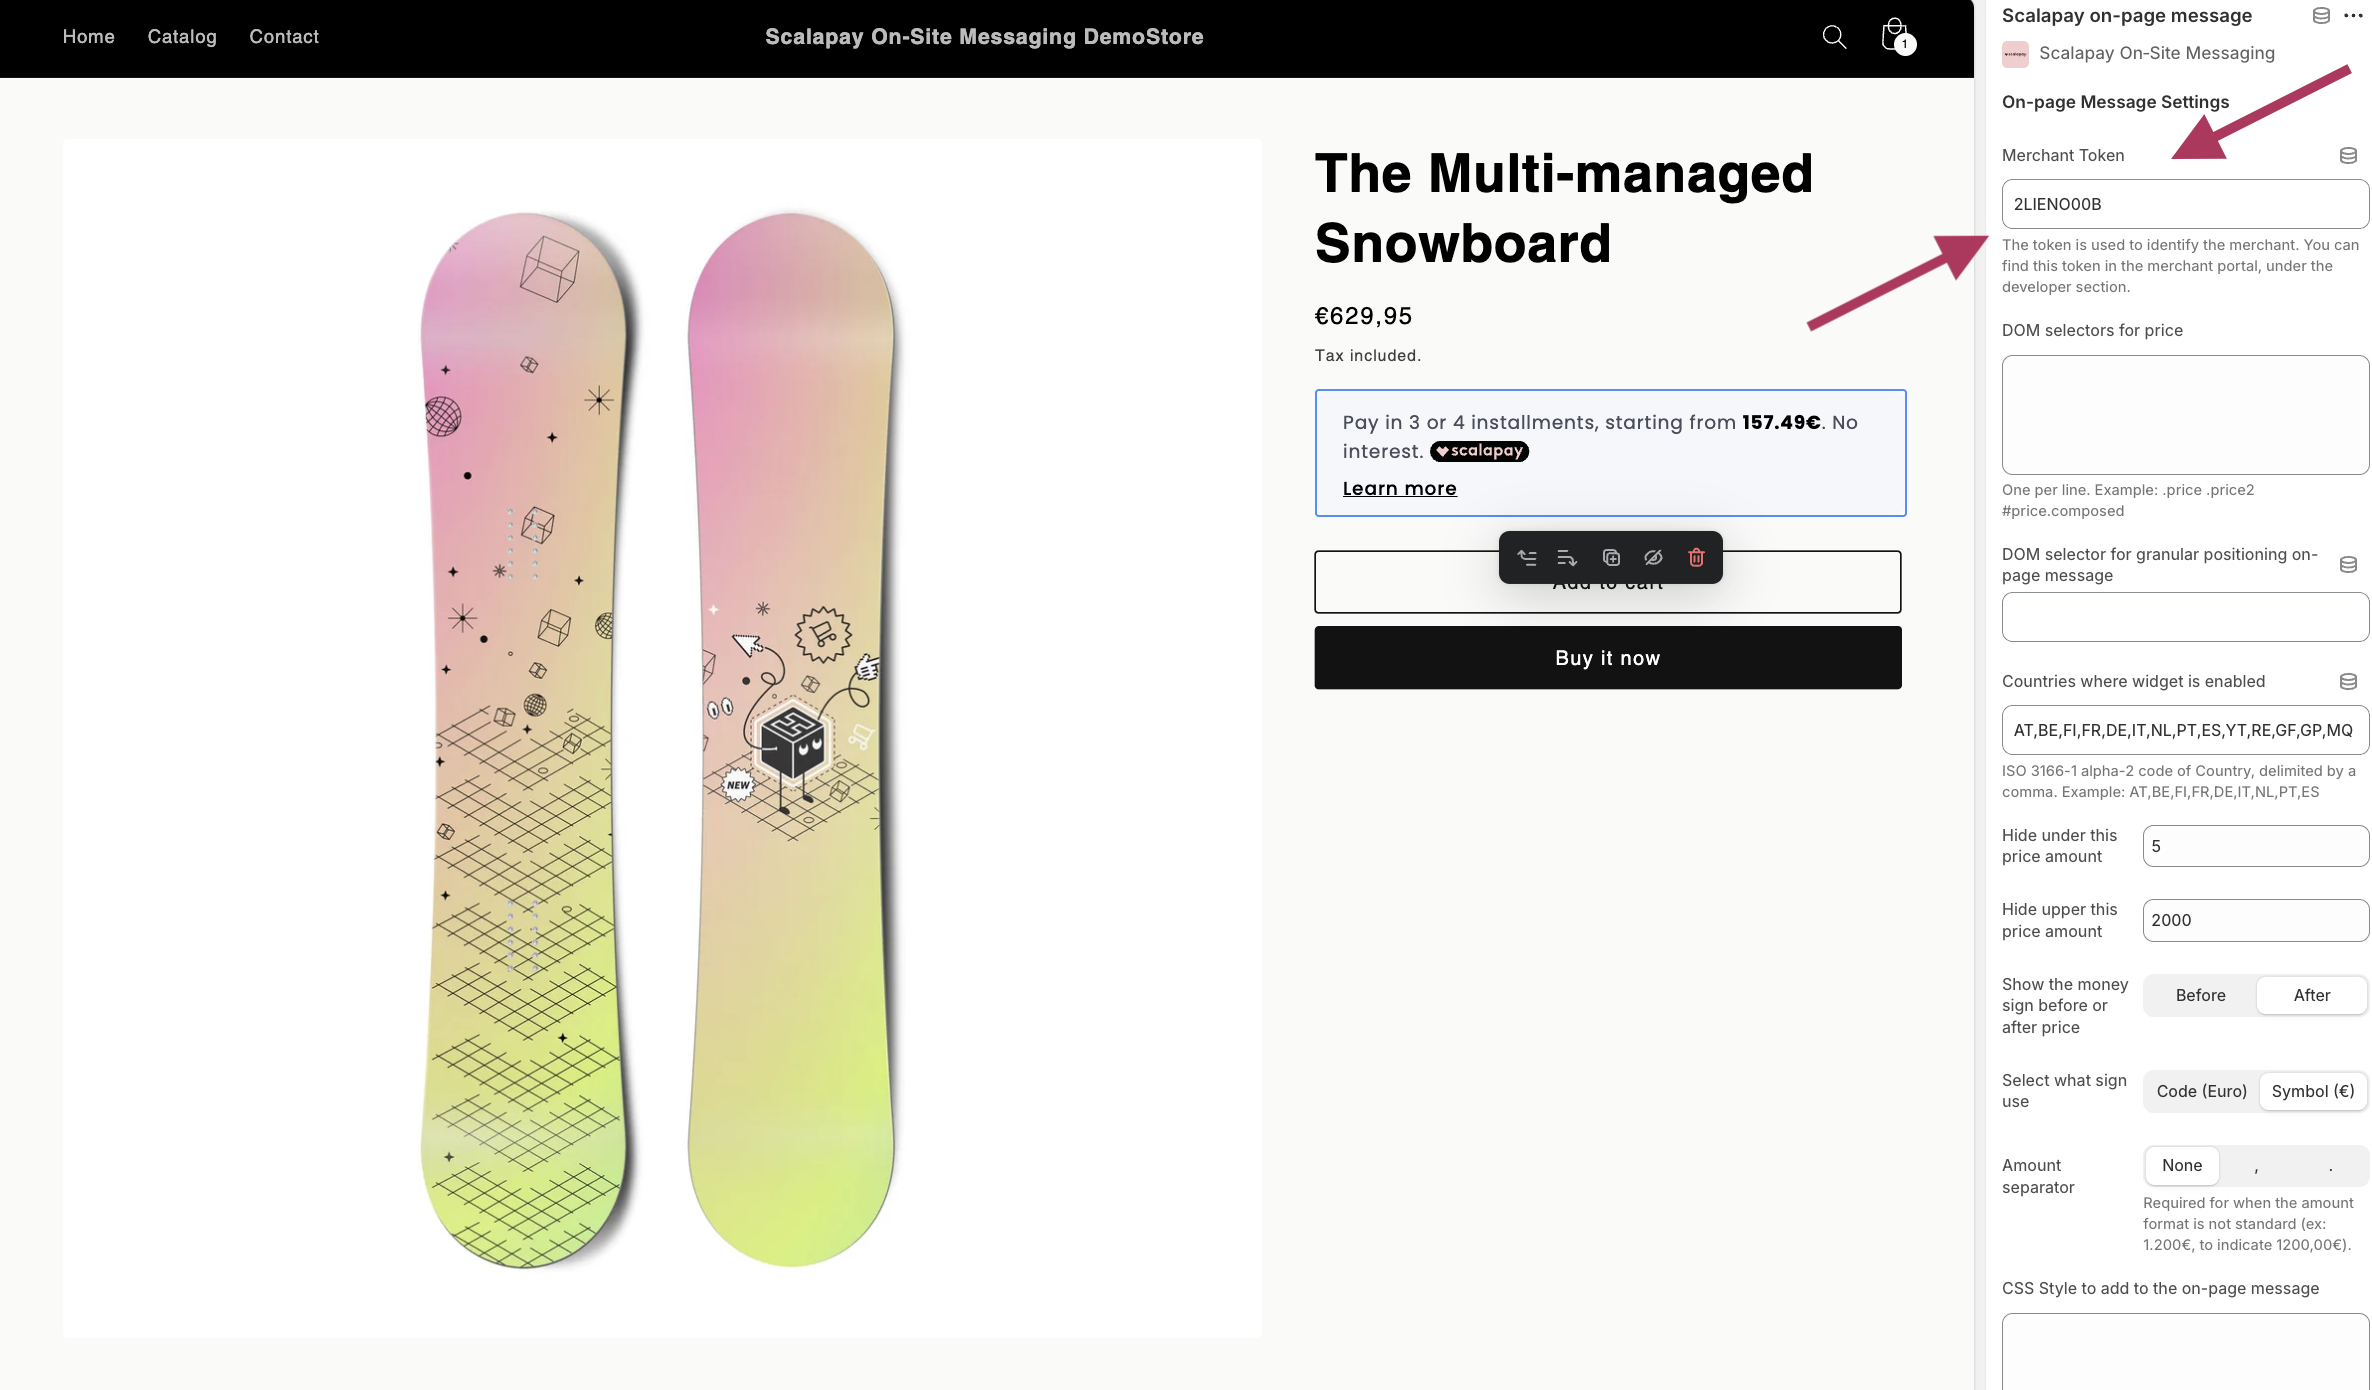
Scalapay widget configurations on Product page: remember to add your Merchant token
| Parameter | Options | Description |
|---|---|---|
| Merchant Token | The Merchant token has to be added in order to display the correct Scalapay products | The Merchant token is available in the Scalapay Merchant Portal in the "Developer" section. |
| DOM selectors for price | Add all your price selectors (normal price, special price etc.) separated by comma | |
| DOM selectors for granular positioning | Add the CSS selector to change the position of the Scalapay widget (copy and paste the code). | |
| Countries where widget is enabled | Set as default (full list of allowed countries): AT, BE, FI, FR, DE, IT, NL, PT, ES, YT, RE, GF, GP, MQ | The list of the country codes where the on-site message will be shown. |
| Hide below this price amount | Set as default: 5€ | Minimum amount to display the widget. It is set by default to 5€. Make sure to modify it accordingly to your contract. |
| Hide above this price amount | Set as default: 2000€ | Maximum amount to display the widget. Make sure to modify it accordingly to your contract. |
| CSS Style to add to the on-page message | Customise the on-site message via CSS (e.g. font size, margin, position) |
If you use different Product page templates on your backend, you have to make sure to add the Scalapay widget on all of them: in this case, use the Embed Scalapay App for Shopify.
Configure the App for the widget on Cart page
After installing the widget on Product page, go back to the Scalapay App and click on "Add to Cart page".
Go back to the App to add Scalapay to the Cart page
To configure the widget on Cart page, you will have to add a product to the Cart in your backend.
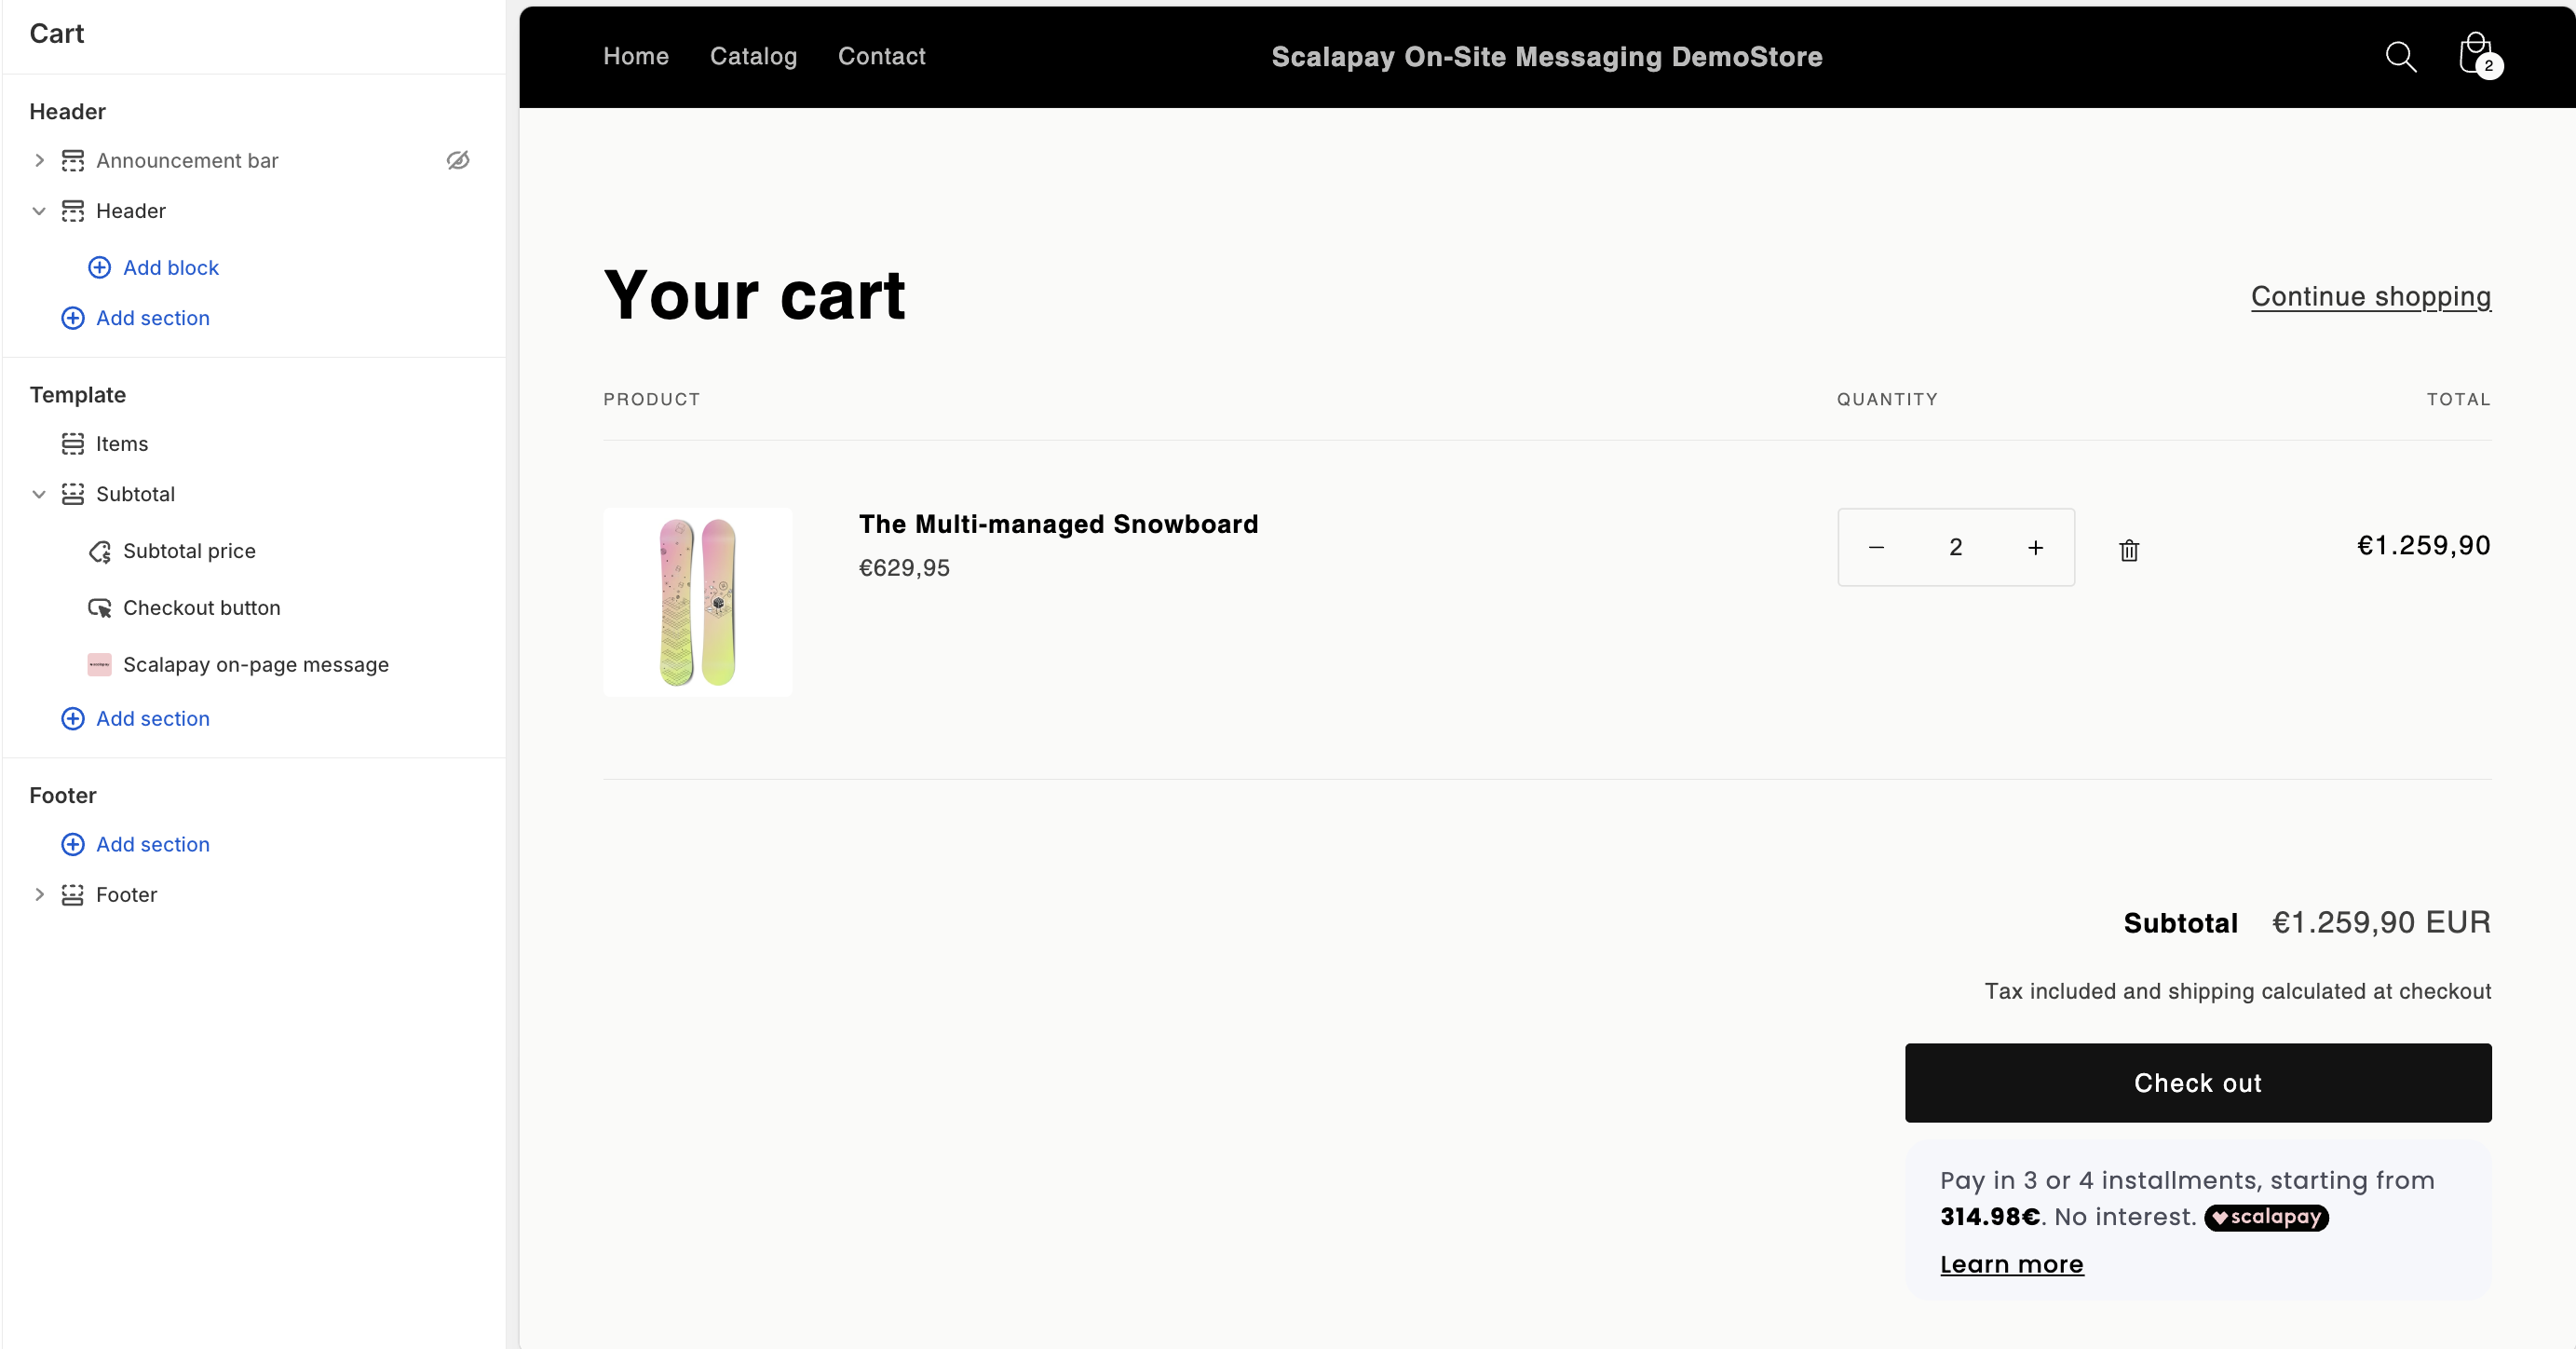
As for the Product page, on the left column there are all the sections of the Cart page including one called "Scalapay on-page message": it represents the widget that will appear on the Cart page and collects its configurations.
If the Scalapay on-page message section does not appear or you wish to add a new one, you can add it by clicking on Add block and then Apps and you will find it.
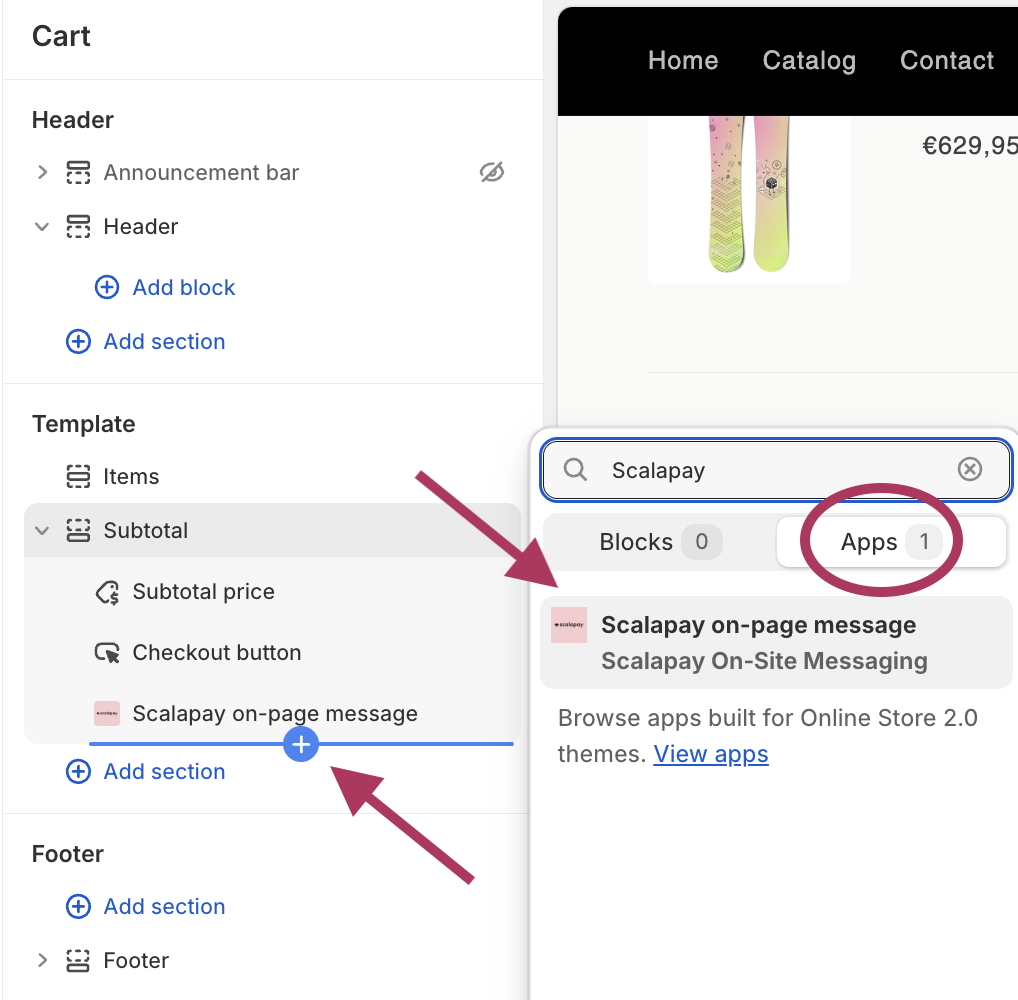
- Drag the widget block below the section Checkout button.
- If you click on "Scalapay on-page message" a new menu appears. You will be able to modify the widget parameters.
- ENTER YOUR MERCHANT TOKEN
You will have to enter your Merchant token in the section Merchant Token in order to show your correct Scalapay products on the widget. You will find your Merchant token on your Scalapay Merchant Portal in the "Developer" section.

Scalapay widget configurations on Cart page: remember to add your Merchant token
Updated 5 months ago