JTL 4
Scalapay provides a ready-to-install extension for JTL 4 stores.
❤ Plugin installation
❤ Plugin configuration
❤ Scalapay widget
❤ Restriction settings
❤ Plugin installation
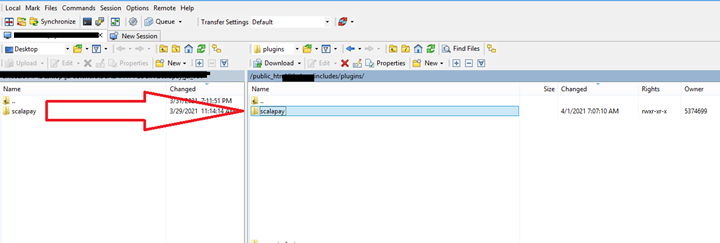
Please follow these steps to install the Scalapay module by FTP/SFTP.
Login on server by FTP/SFTP.
Copy all the Scalapay folders and files and upload them on the following path: includes/plugins 720.
❤ Plugin configuration
Login to your Admin platform.
Go to Plugins at the top of the page and select Pluginverwaltung.
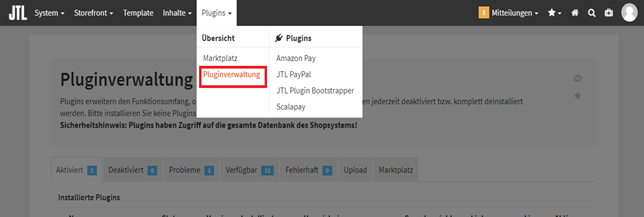
ENABLE SCALAPAY
Under Pluginverwaltung list, open the Verfügbar tab, look for Scalapay plugin and install it.

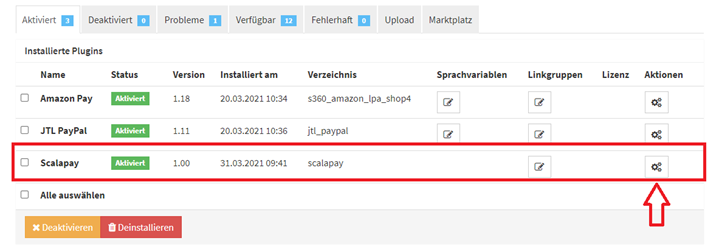
Open the Aktiviert tab, look for Scalapay plugin and open Settings.
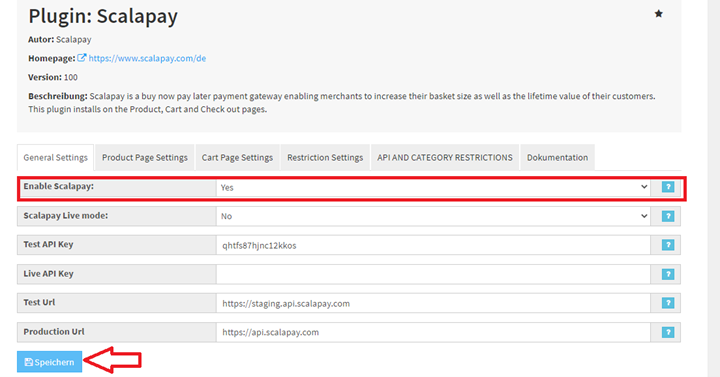
Select Enable Scalapay and Save the settings.
Enable the Scalapay Payment method for shipping methods.
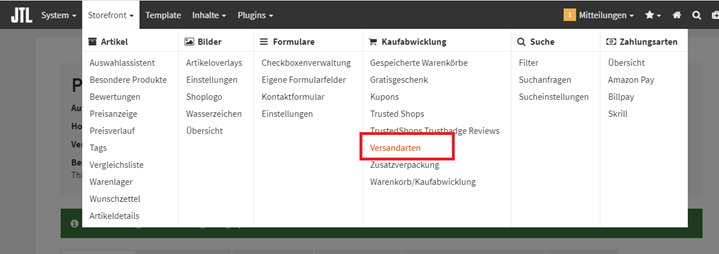
Under the Storefront menu go to Versandarten.
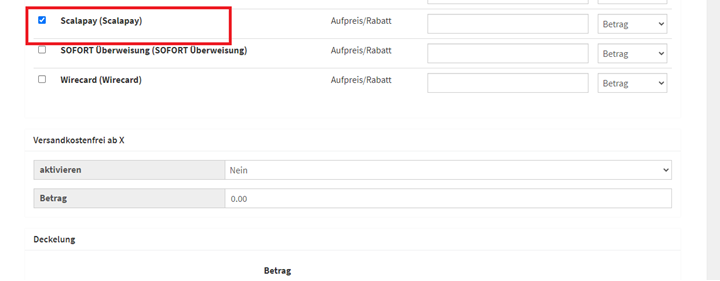
Enable the Scalapay Payment method and save it by clicking on Versandart ändern at the bottom.
The authorised countries are Austria, Belgium, Finland, France, Germany, Holland, Italy, Portugal and Spain.
We strongly suggest to set only German, Italian and French languages which are already translated as default in the Scalapay module.
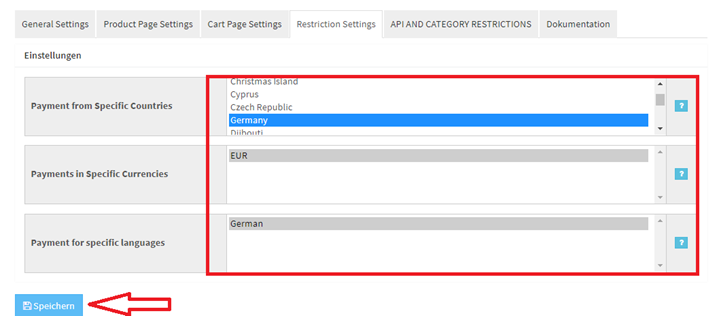
In order to display the Scalapay payment method only for Germany follow these steps.
- Go to Restriction Settings tab
- Select Payment from Specific Countries → Germany
- Select Payment for specific languages → German as a language
- Select Payments in Specific Currencies → Euro
- Save the configuration
❤ Scalapay widget
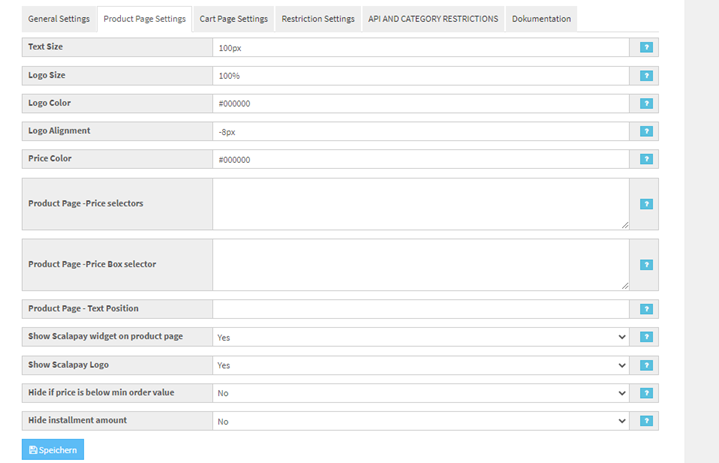
Go to the Product Page Settings tab.
PRICE
To select the correct price to use for the instalments calculation, add the appropriate selectors on Product Page - Price selectors box.
To add a new price css selector, add new selectors in order of priority to use. Find all your price selectors (normal price, special price etc) and paste them in the box separated by comma.
Use the second box Product Page - Price Box selector when prices are loaded by ajax. Remember to use the selector that doesn’t change dynamically.
POSITION
To change the Scalapay widget position, change the css selector in Product Page - Text Position text area. Selector .price_wrapper is selected by default.
To hide the Scalapay widget on product page, select No on Show Scalapay widget on product page dropdown.
CART PAGE
For the Cart Page Settings, follow the same instructions as above.
❤ Restriction settings
Here you can set your minimum and maximum amount, according to your contract.
You can also specify or restrict Scalapay for certain categories.

Updated 5 months ago
