Magento 1
Scalapay provides a ready-to-install extension for Magento 1 stores.
❤ Plugin installation
❤ Plugin configuration
❤ Scalapay widget
❤ Checkout page
❤ Category restriction
❤ Plugin installation
Download here the latest version of our plugin for Magento 1: Scalapay for Magento 1.
Follow these steps to install the Scalapay module by FTP/SFTP/SSH:
- Login to your server by FTP/SFTP/SSH.
- Copy all the Scalapay folders and files and upload them on the Magento root folder.
❤ Plugin configuration
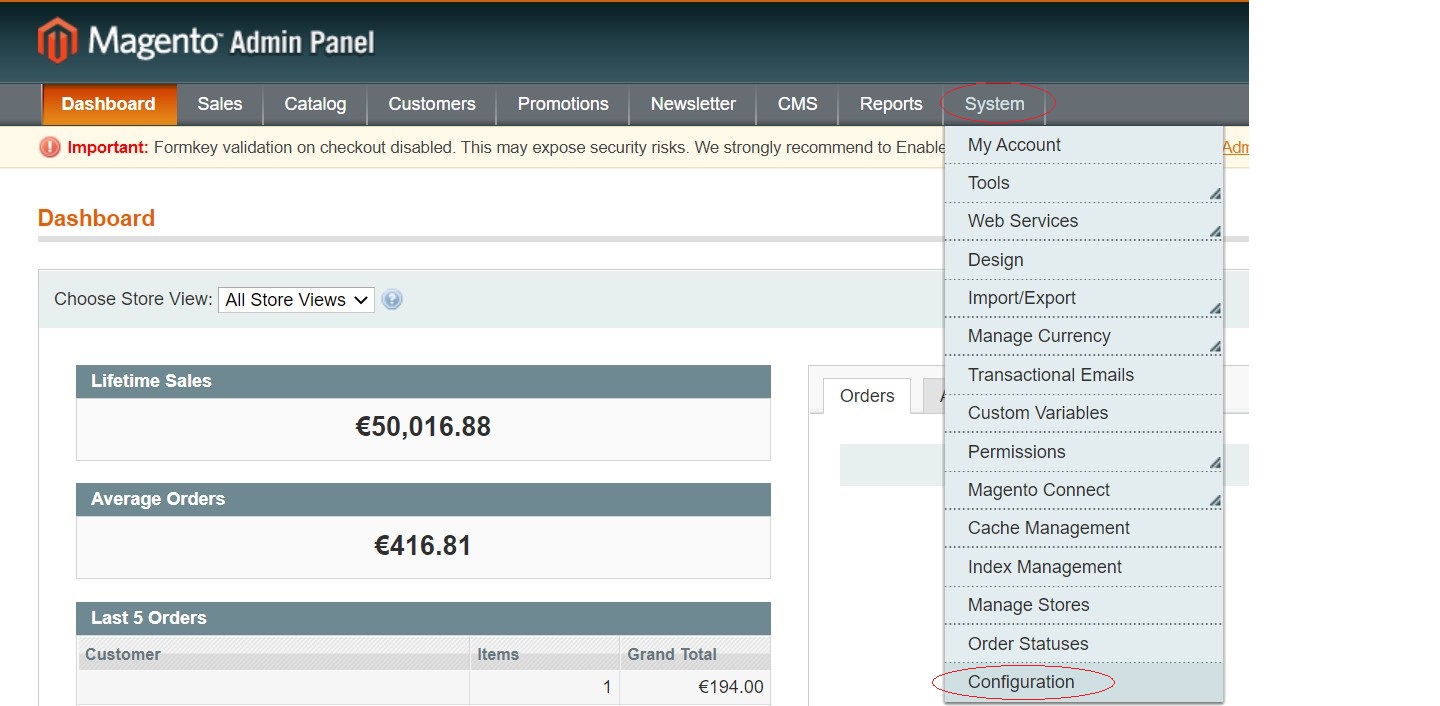
- Click on System on the menu at the top of the page
- Select Configuration
- Go to Sales on the left menu
- Select Payment Methods
Enable Scalapay
In the list of the Payment Methods:
- Open the Scalapay payment tab
- Select Yes in the drop down to Enable Scalapay
- Click on Save Config at the top of the page
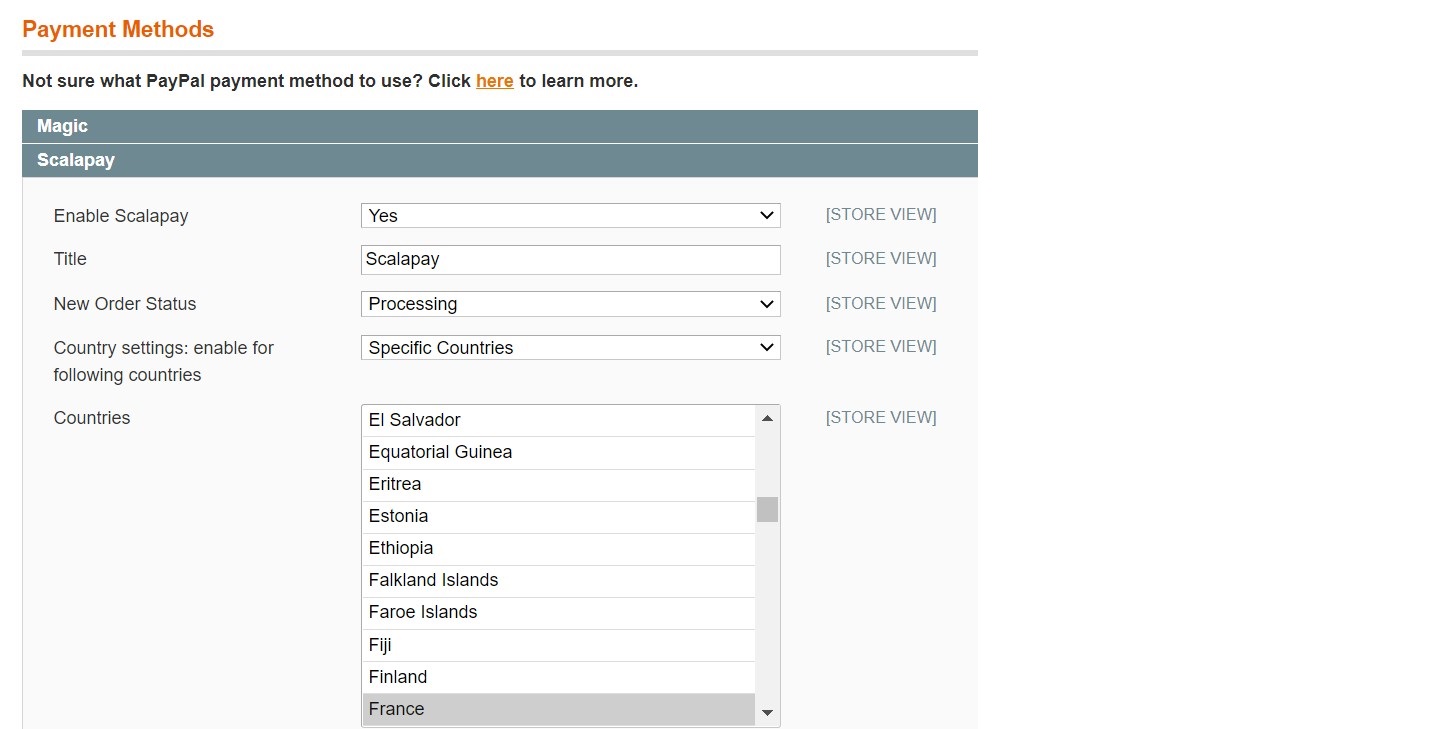
- Click on System on the menu at the top of the page → Configuration → Sales → Payment Methods
- Click on "Country settings: enable for following countries" and select the desired countries
- Select "Language settings: enable for following languages" and select the desired languages
- Select "Currency" and choose Euro
- Save the configurations at the top of the page
❤ Scalapay widget
Product page
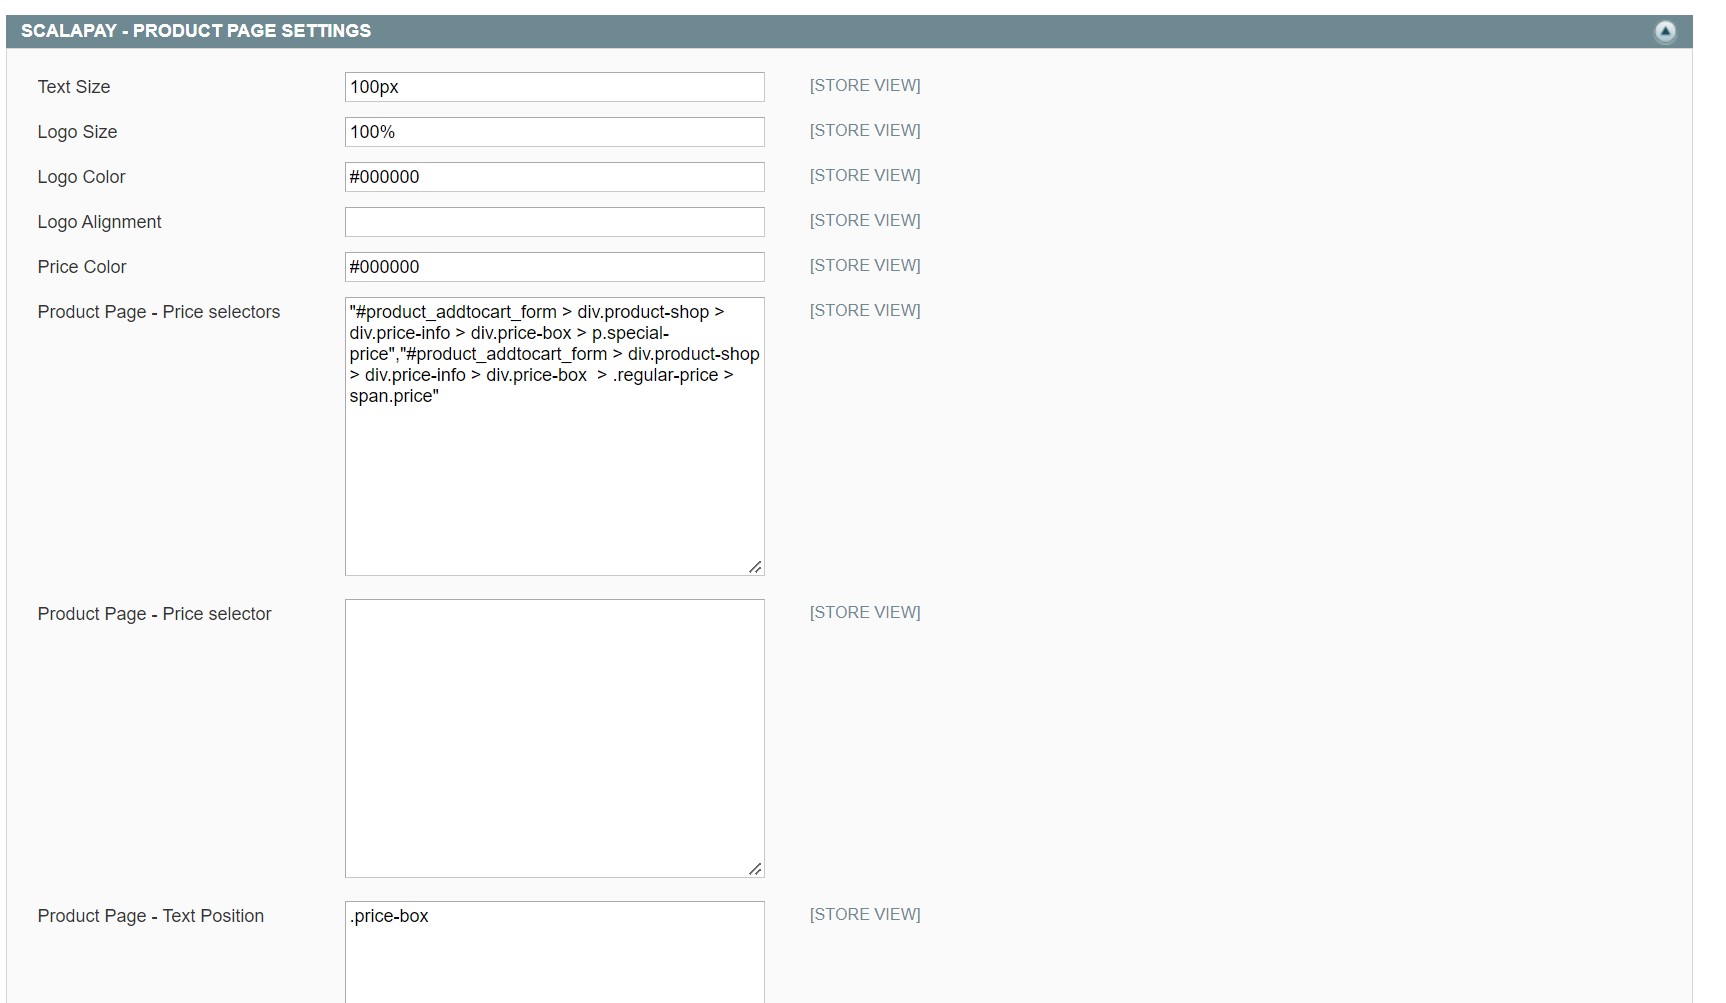
Click on System on the menu at the top of the page → Configuration → Sales → Scalapay settings → Product page Settings
Price
In order to select the correct price to use for the instalments calculation, add the appropriate selectors in the box Product page - Price selectors.
To add new price css selectors, add the new selectors in order of priority to use. Find all your price selectors (normal price, special price etc) and paste them in the box separated by a comma.
Use the second box Product page - Price selector when prices are loaded by ajax. Remember to use the selector that doesn’t change dynamically.
Position
To change the position of the Scalapay widget, change the css selector in the Product Page - Text Position section. Selector .price-box is set by default.
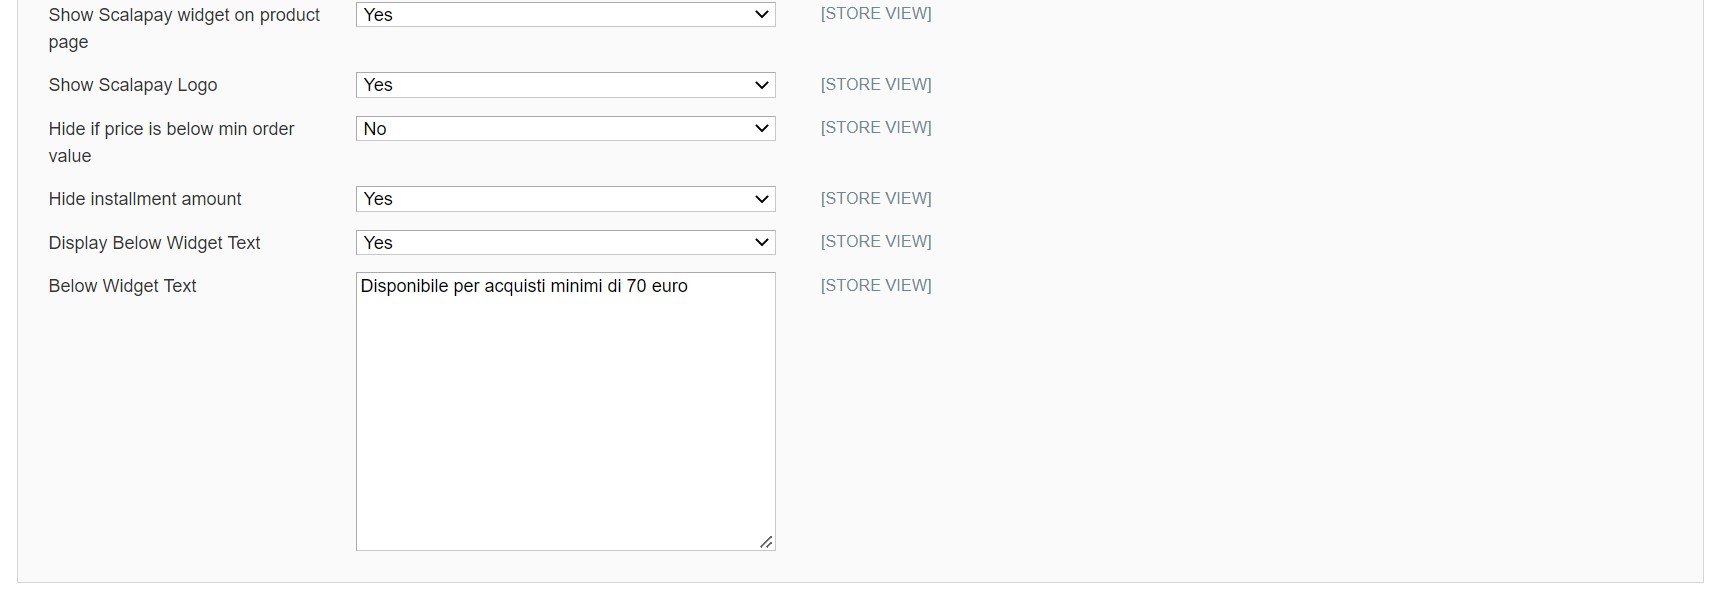
To hide the Scalapay widget on Product page, choose "No" on the "Show Scalapay widget on product page" dropdown menu.
Logo
Choose whether or not to display the Scalapay logo.
Text below the widget
To display an additional text below the widget:
Cart page
For the Cart page settings, follow the same instructions as above.
❤ Checkout page
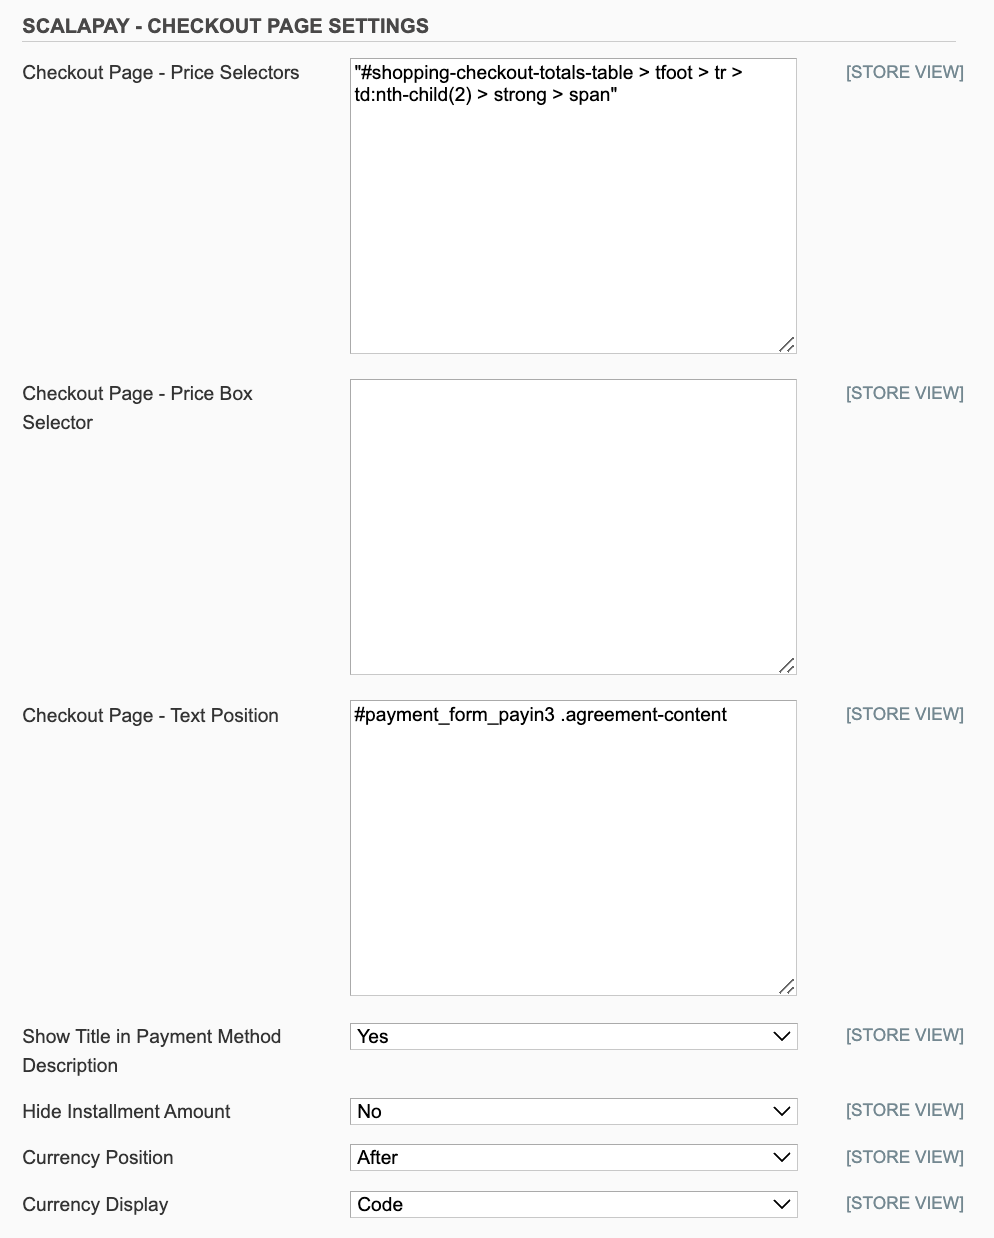
Please do not change the texts in the default settings: the translation will not apply. If you wish to change the text for a specific language, please select a specific configuration from the dropdown menu on the left.
When you use the configurations available for the checkout page, you can choose to enable the Show Title in Payment Method Description and, for Pay in 3 and Pay in 4 products, to enable the Hide Instalment Amount field.
According to how you configure the above mentioned fields, you will be able to update the way Scalapay payment method is visualised at checkout.
❤ Category restrictions
Go to the API and category restrictions to set up:
- The maximum order amount (based on your contract)
- The minimum order amount (fixed to 5€)
- The number of instalments (based on your contract)
- The categories on which you want to show Scalapay's widget and the payment method

Updated 5 months ago
