Magento 2.2.6 < 2.3 versions
Scalapay provides a ready-to-install extension for your Magento 2 store. Setting up Scalapay it's fast and easy: just follow this steps!
⇲ [Plugin Installation] (https://developers.scalapay.com/docs/pluginstall-magento-2-26-23#-install-your-plugin)
✔ [Plugin Configuration] (https://developers.scalapay.com/docs/pluginstall-magento-2-26-23#-configure-your-plugin)
⚠ [Category Restriction] (https://developers.scalapay.com/docs/pluginstall-magento-2-26-23#-category-restriction)
❤ Scalapay Widget
⇲ Install your plugin
N.B: This procedure is not compatible with Magento versions greater than or equal to 2.3.
- Login via SSH into your server
- Go to Magento root
- Run
composer require scalapay/scalapay-magento2 - Run
php bin/magento module:enable Scalapay_Scalapay - Run
php bin/magento setup:upgrade - Run
php bin/magento setup:static-content:deploy - Run
php bin/magento setup:di:compile - Run
php bin/magento cache:clean
✔ Configure your plugin
To configure Scalapay plugin, please follow this path: Stores(in left side menu header) → Configuration → Sales→ Scalapay
You will find 4 sections.
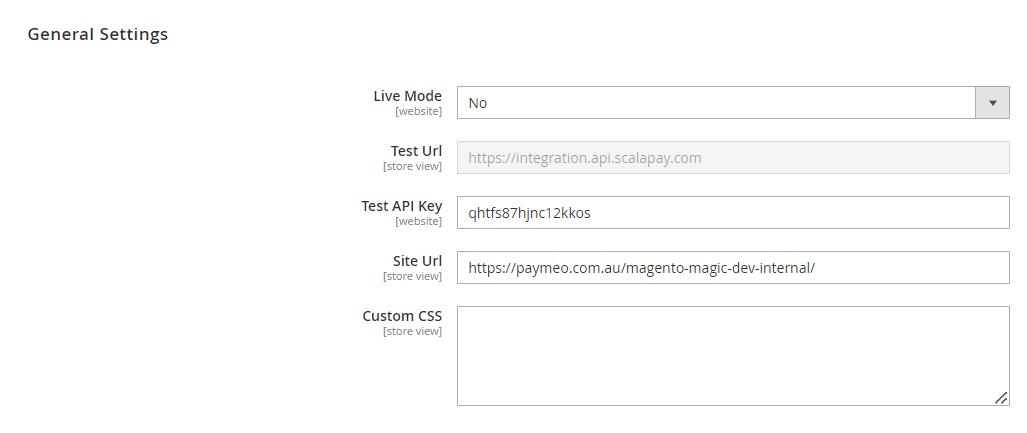
GENERAL SETTINGS
This tab features the general settings for Scalapay plugin.
The Test API key is present by Default and will allow you to test the correct plugin functioning.
Once the testing phase is completed, you will be provided with the Live API Key and therefore you will be able to activate the plugin in Live mode.
CUSTOM CSS GENERAL
Sometimes external tags like div, p or span tags styles override our default styles. To handle these types of issues you can use the Custom CSS field to facilitate design processes. You can also use it to define inline style classes, such as font, size or alignment. These styles will apply for Scalapay description across all pages: product, cart and checkout pages.
PAY IN 3
This tab features all useful settings to correctly configure and test the plugin for Pay in 3 product.
PAY IN 4
This tab features all useful settings to correctly configure and test the plugin for Pay in 4 product.
PAY LATER
This tab features all useful settings to correctly configure and test the plugin for Pay Later product.
All the tabs mentioned above include the following sections.
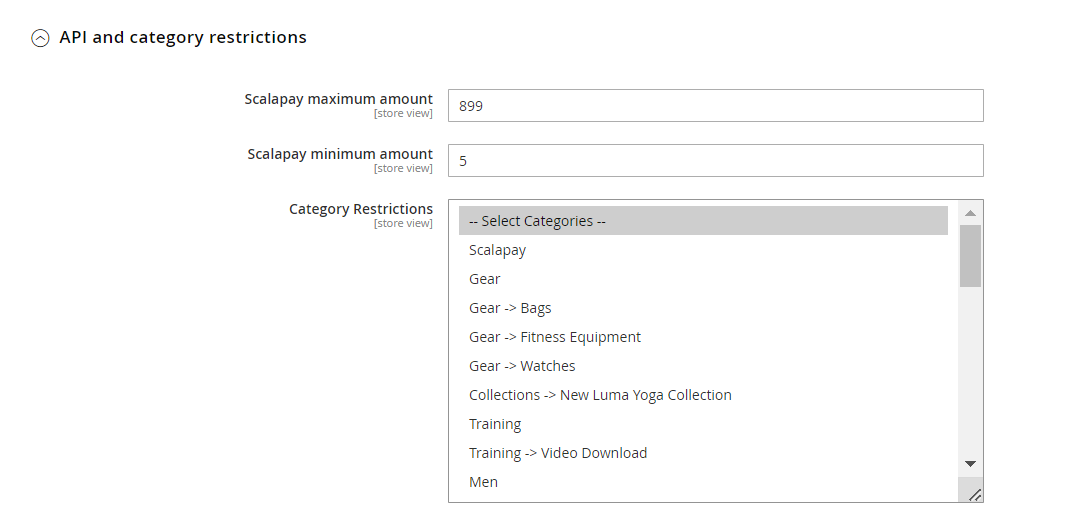
⚠ Category Restriction
This section allows you to:
● adjust the default minimum and maximum amount, according to your contractual terms. The minimum amount for displaying the Scalapay plugin and accepting payments is set to €5,
● select the categories you want Scalapay to be activated on (we suggest that you activate Scalapay on all categories).
❤ Scalapay Widget
PRODUCT PAGE SETTINGS
This section allows you to configure and customize Scalapay widget in Product page.
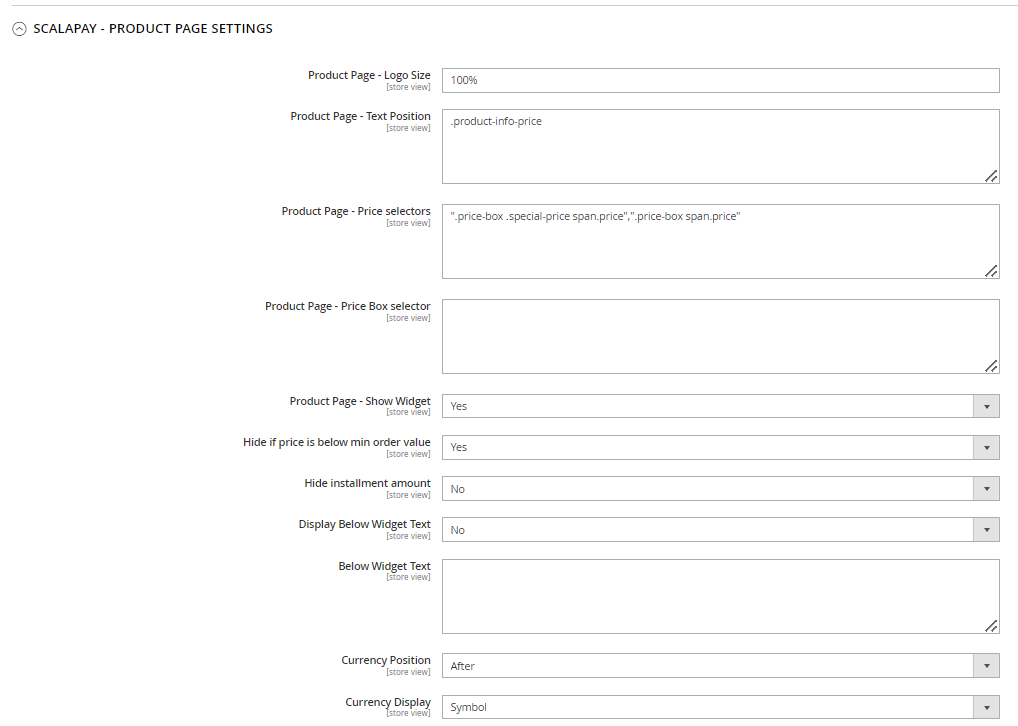
To configure the widget the product page use the fields Price selectors and/or Price Box Selector.
Product page - Price selectors
Price selctors field is used to add class or combination of class pairs to get the final product price on which to apply Scalapay installments.
To identify and set correct selectors, inspect the price element to retrieve the correct price class name: current-price > span.
In the example case, Scalapay module will get the price within the span tag which is 28,72 and divide it by the number of installments to be displayed in the Scalapay installments description. You can also add multiple price selectors by separating them with commas.
To add new price css selector add new selectors in order of priority to use. Find all your price selectors (normal price, special price etc) and paste them in the box, separated by comma.
Use the second box Product Page - Price Selector when prices are loaded by ajax. We recommend using the selector that doesn’t change dynamically.
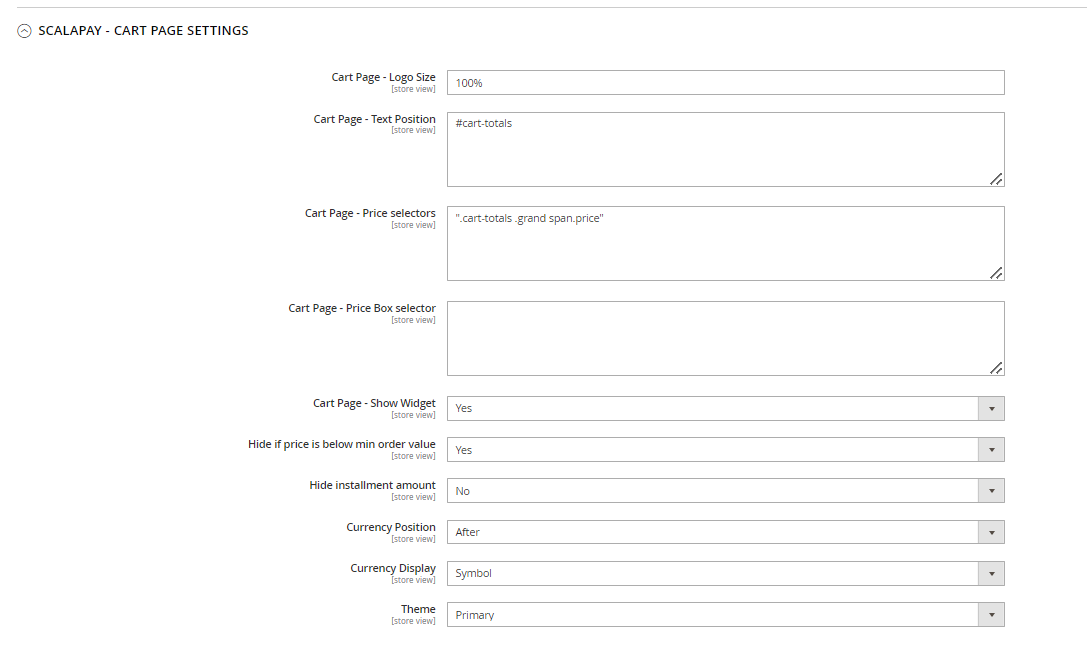
CART PAGE SETTINGS
Refer to the instructions above to configure and customize Scalapay widget in Cart page.
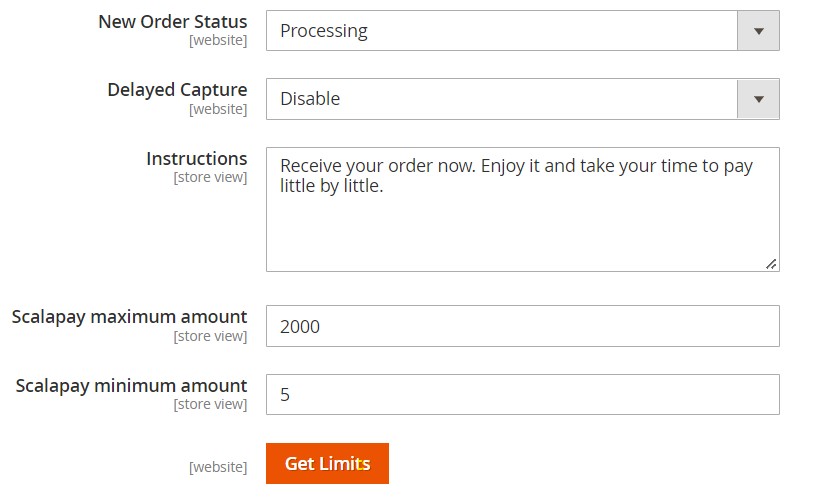
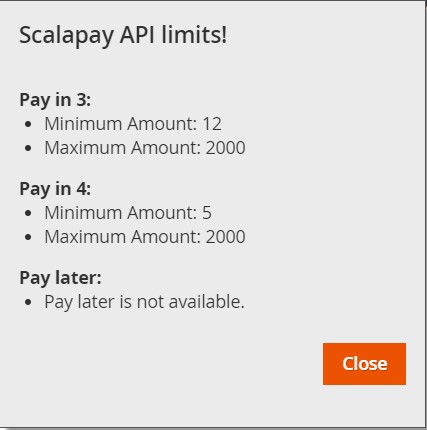
Please click on Get Limits to know the min and the max amount allowed that you agreed for contract,
In the popup you can check which are the Scalapay API Limits that you should add in your backend.
Please be sure to align these limits in your backend to avoid malfunctioning of Scalapay
CHECKOUT PAGE
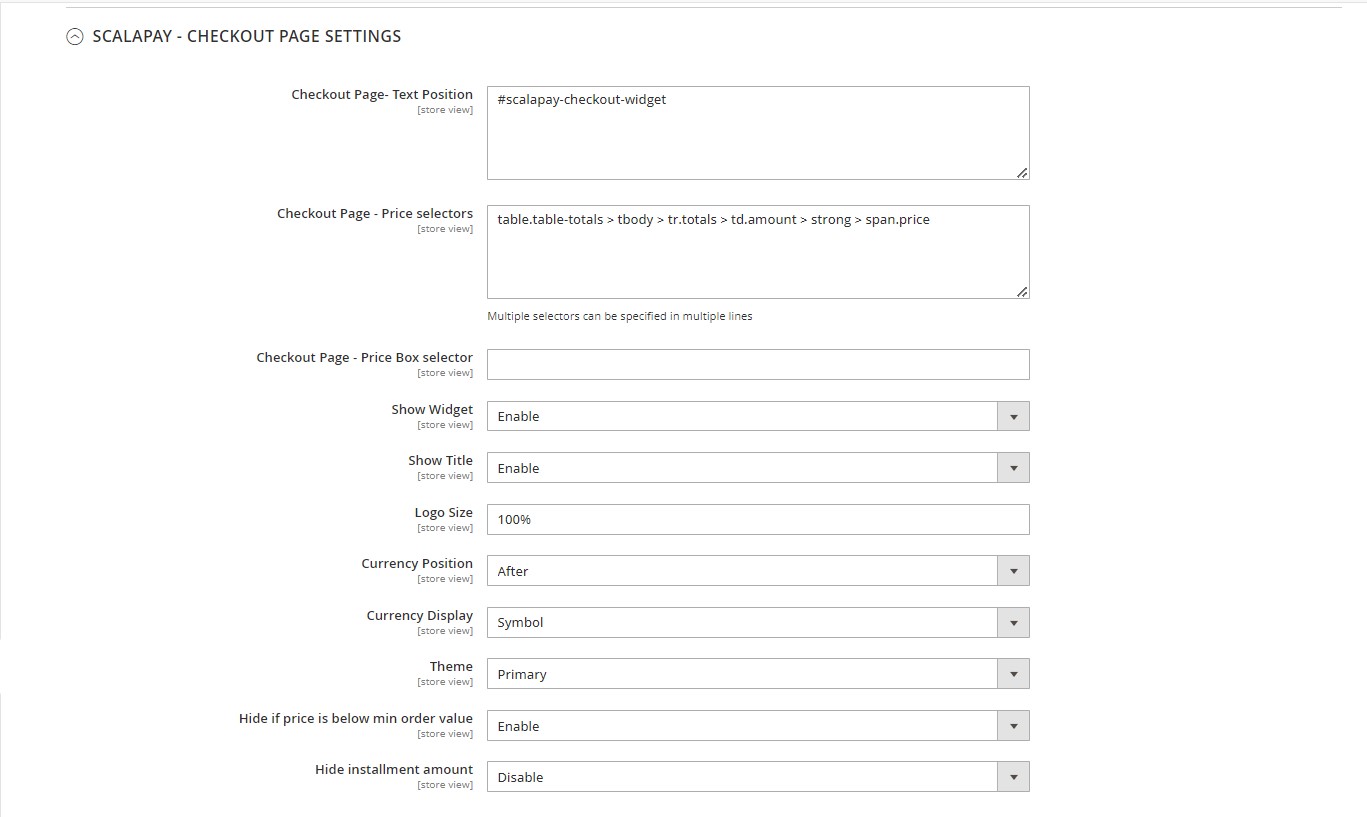
The Checkout page text is set by default and cannot be modified but could be customized with the aid of Custom CSS box.
For Magento it is possible to add the widget also in the checkout page.
After the Cart and Product Page Settings section, you can find the settings related to the widget in checkout Page.
How to Enable Scalapay Plugin
To enable Scalapay plugin after configurations have been set, please follow this path: Stores(in left side menu header) → Configuration → Sales→ Payment Methods
There you will find a dedicated dropdown section for each of the Scalapay available products: Pay in 3, Pay in 4 and Pay Later.
This section allows you will to enable the Scalapay plugin allowing you to configure, test and then, activate the plugin in live mode (refer to the How to Configure Scalapay Plugin section above to learn more about configuration).
Enabling Scalapay will activate the plugin on the website and Scalapay will start appearing as a payment method at checkout.
Please, note!
When the plugin is installed, as Default, the plugin is Disabled.
You need to enter the product the tab/s of your interest (as per contractual terms), Enable the product, configure it and test the plugin.
Once the testing phase is completed, you will be provided with the Live API Key and therefore you will be able to activate the plugin in Live mode.
Updated about 1 year ago
