OpenCart v1
Scalapay offers a ready-to-install extension for OpenCart v1 stores.
Plugin installation
Plugin configuration
Language & currency settings
Scalapay widget
Restriction settings
Plugin installation
Download here the latest version of our plugin for OpenCart v1: Scalapay for OpenCart v1.
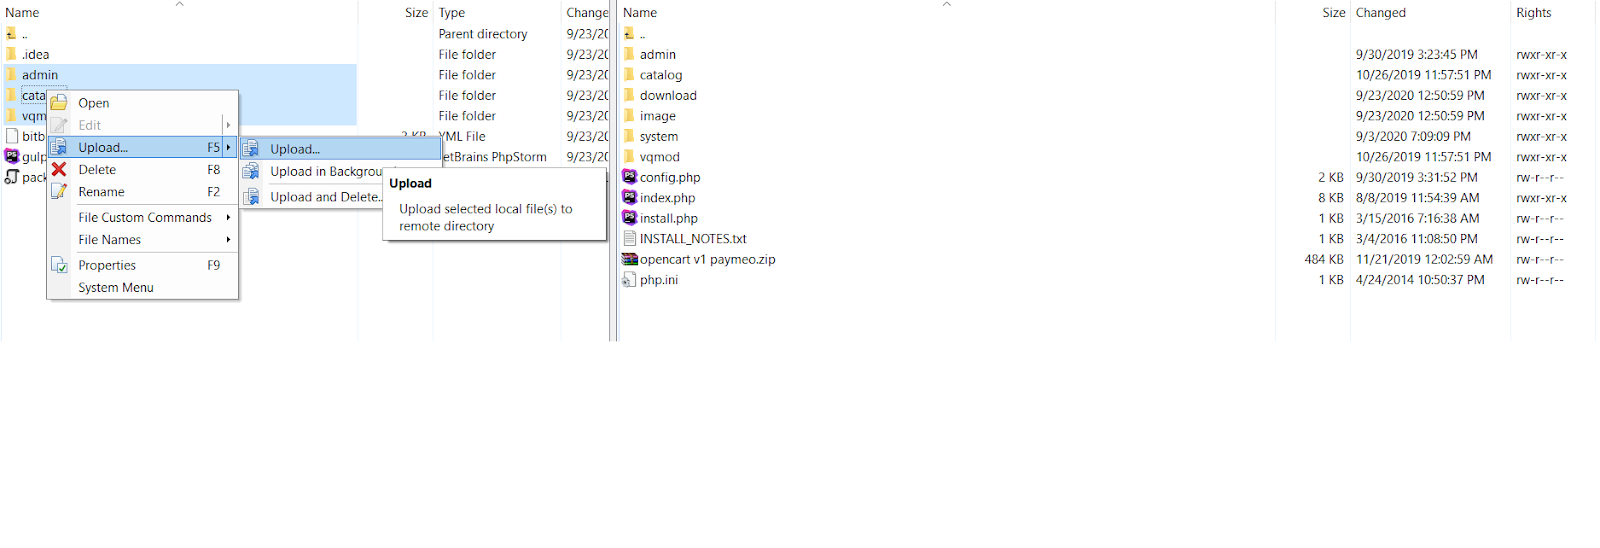
Upload the Scalapay folders to the respected folders.
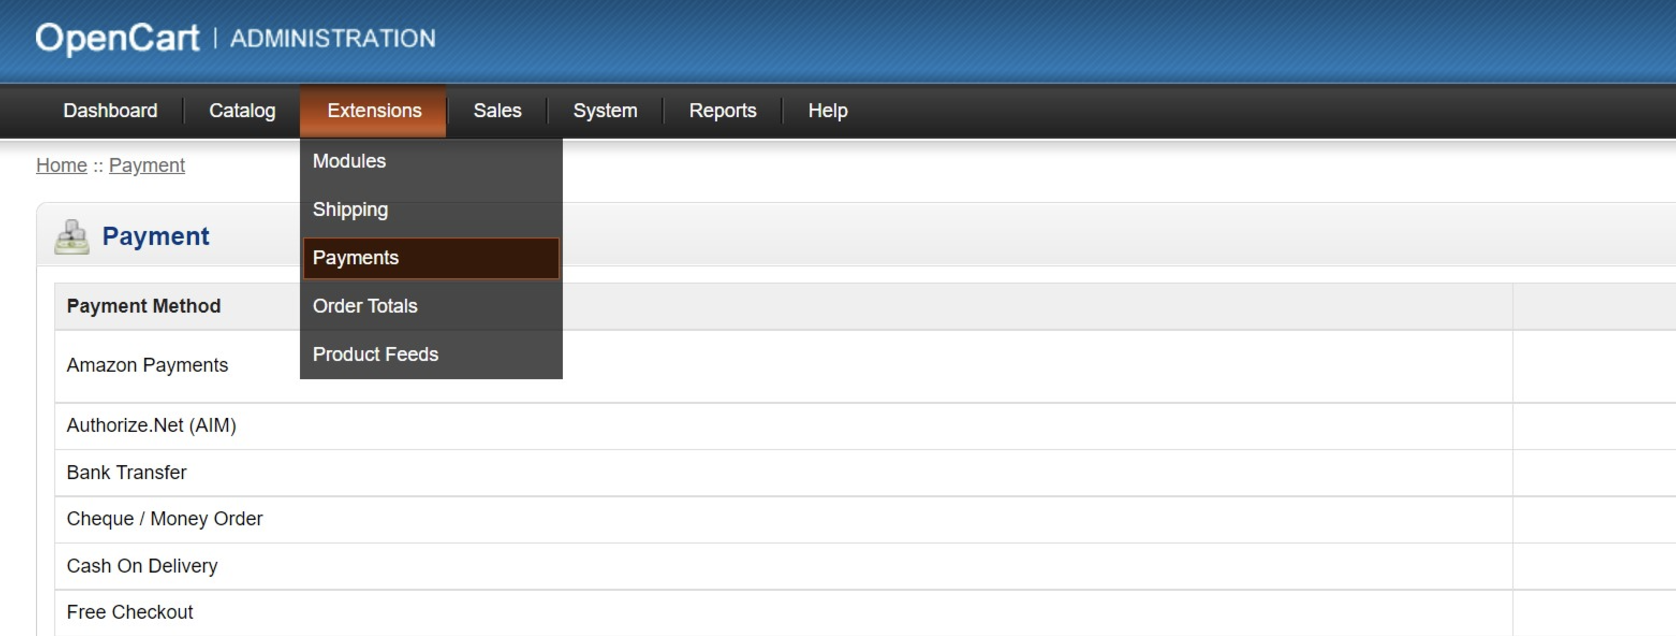
Click on "Extensions" on the top menu and select "Payments".
Search for the Scalapay payment method in the payment methods list and click on "Install".
Click on "Edit" to modify the configurations.
Plugin configuration
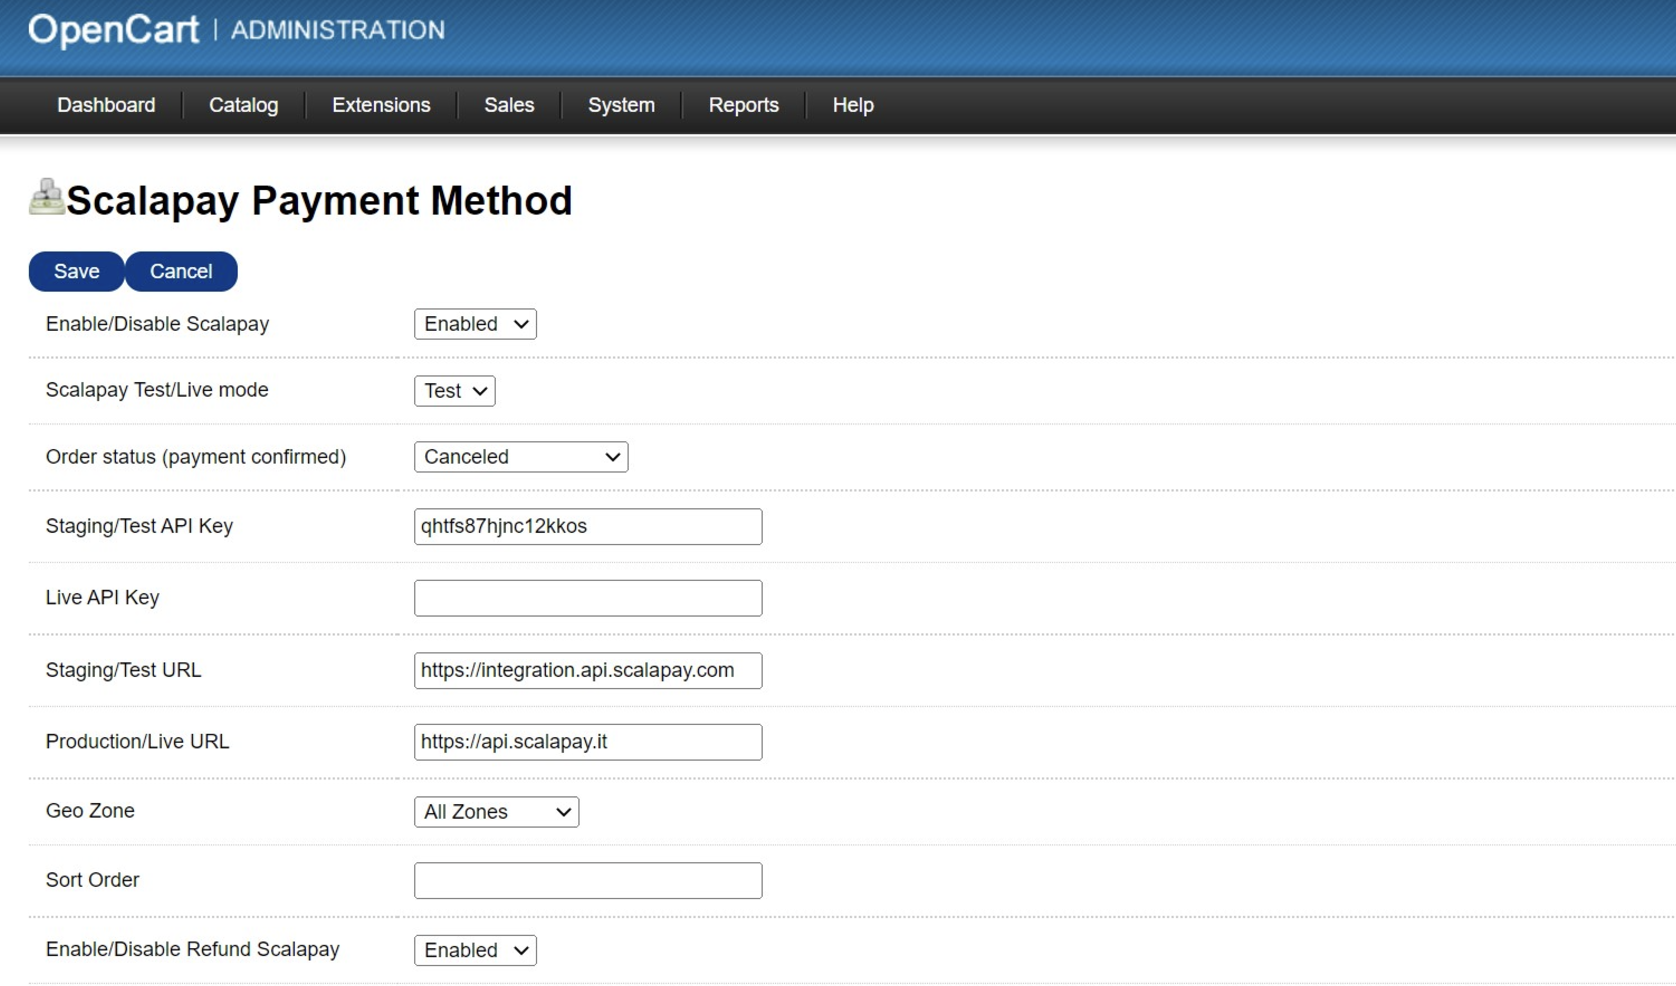
In order to enable or disable Scalapay, select "Enabled" or "Disabled" from the dropdown menu.
To enable the Test mode or the Live mode, select "Test" or "Live" from the dropdown menu.
Plugin configuration
If you want to test Scalapay, use the following settings.
- Scalapay Test/Live mode: Test
- Staging/Test API key: qhtfs87hjnc12kkos
- Staging/Test URL: https://integration.api.scalapay.com
When you are ready to go Live, use the following settings.
- Scalapay Test/Live mode: Live
- Staging/Test API key: qhtfs87hjnc12kkos
- Live API key: once the testing phase has been completed, you will be provided with the Live API key.
- Staging/Test URL: https://integration.api.scalapay.com
- Production/Live URL: https://api.scalapay.com
Language & currency settings
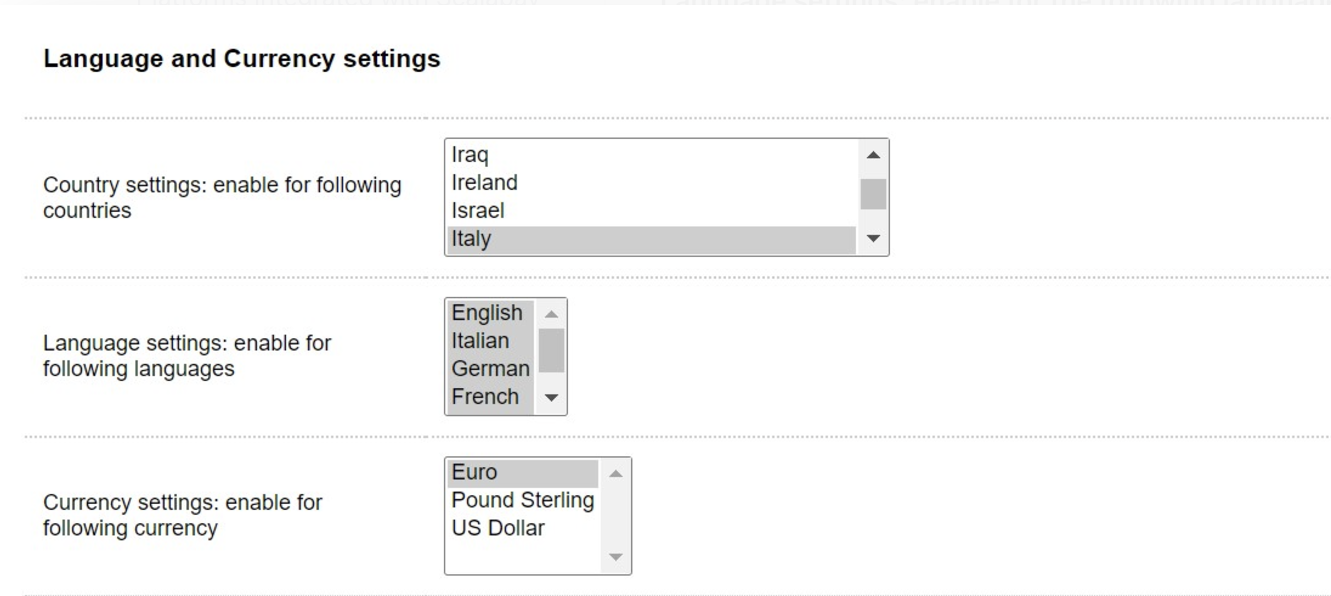
Country settings: enable for the following countries
The authorised countries are Austria, Belgium, Finland, France, Germany, Holland, Italy, Portugal and Spain.
Language settings: enable for the following languages
Enable the languages according to the countries you operate in.
Currency settings: enable for the following currency
The only authorised currency is Euro.
Scalapay widget
You can modify the following fields on Product page, Cart page and Checkout.
- The logo size, color and alignment
- The price color
- The Price selectors fields are set by default. If your theme is customised, please verify the correct selectors.
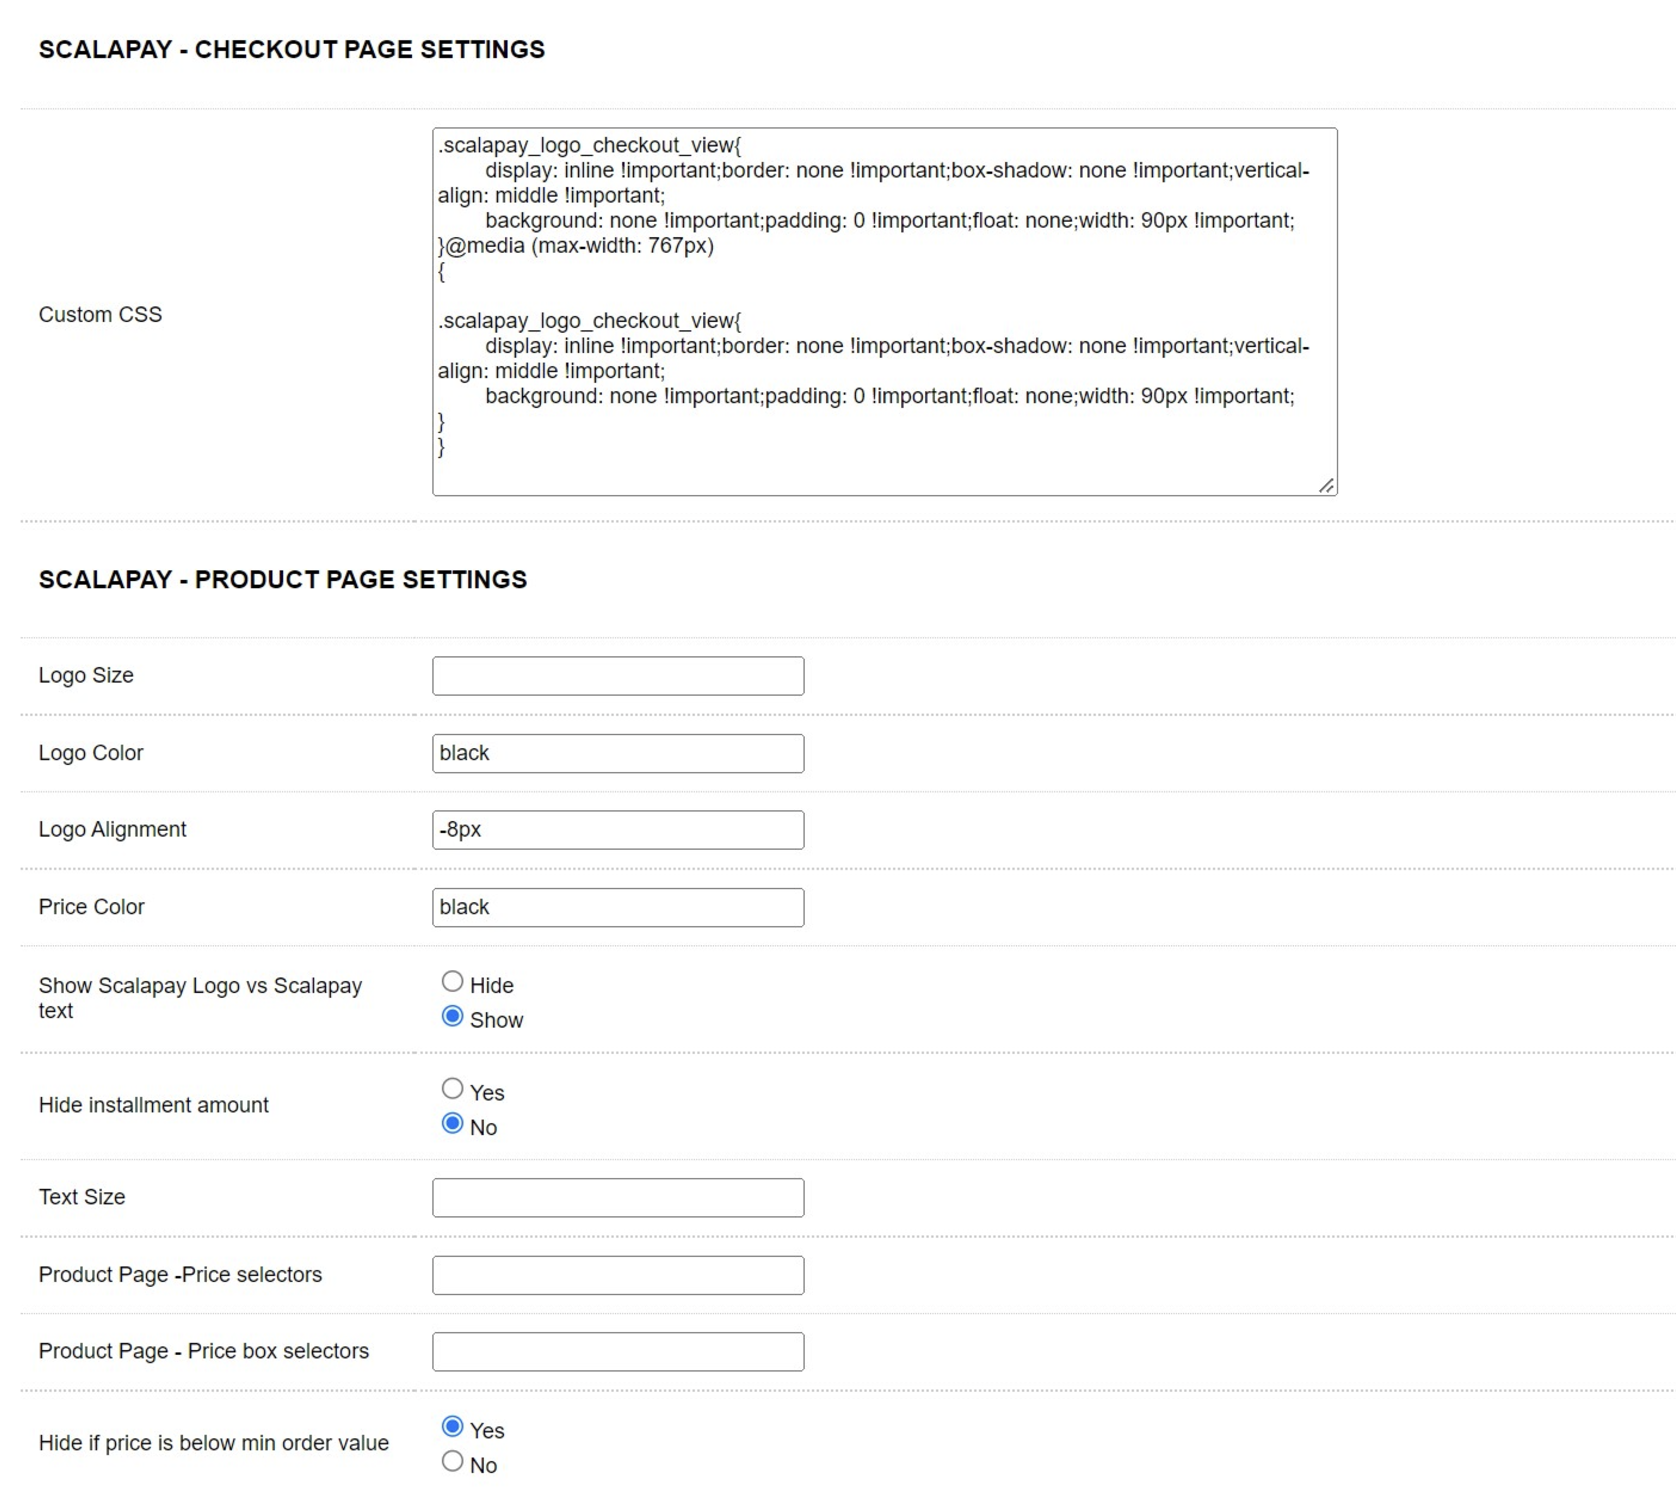
Checkout and Product page settings
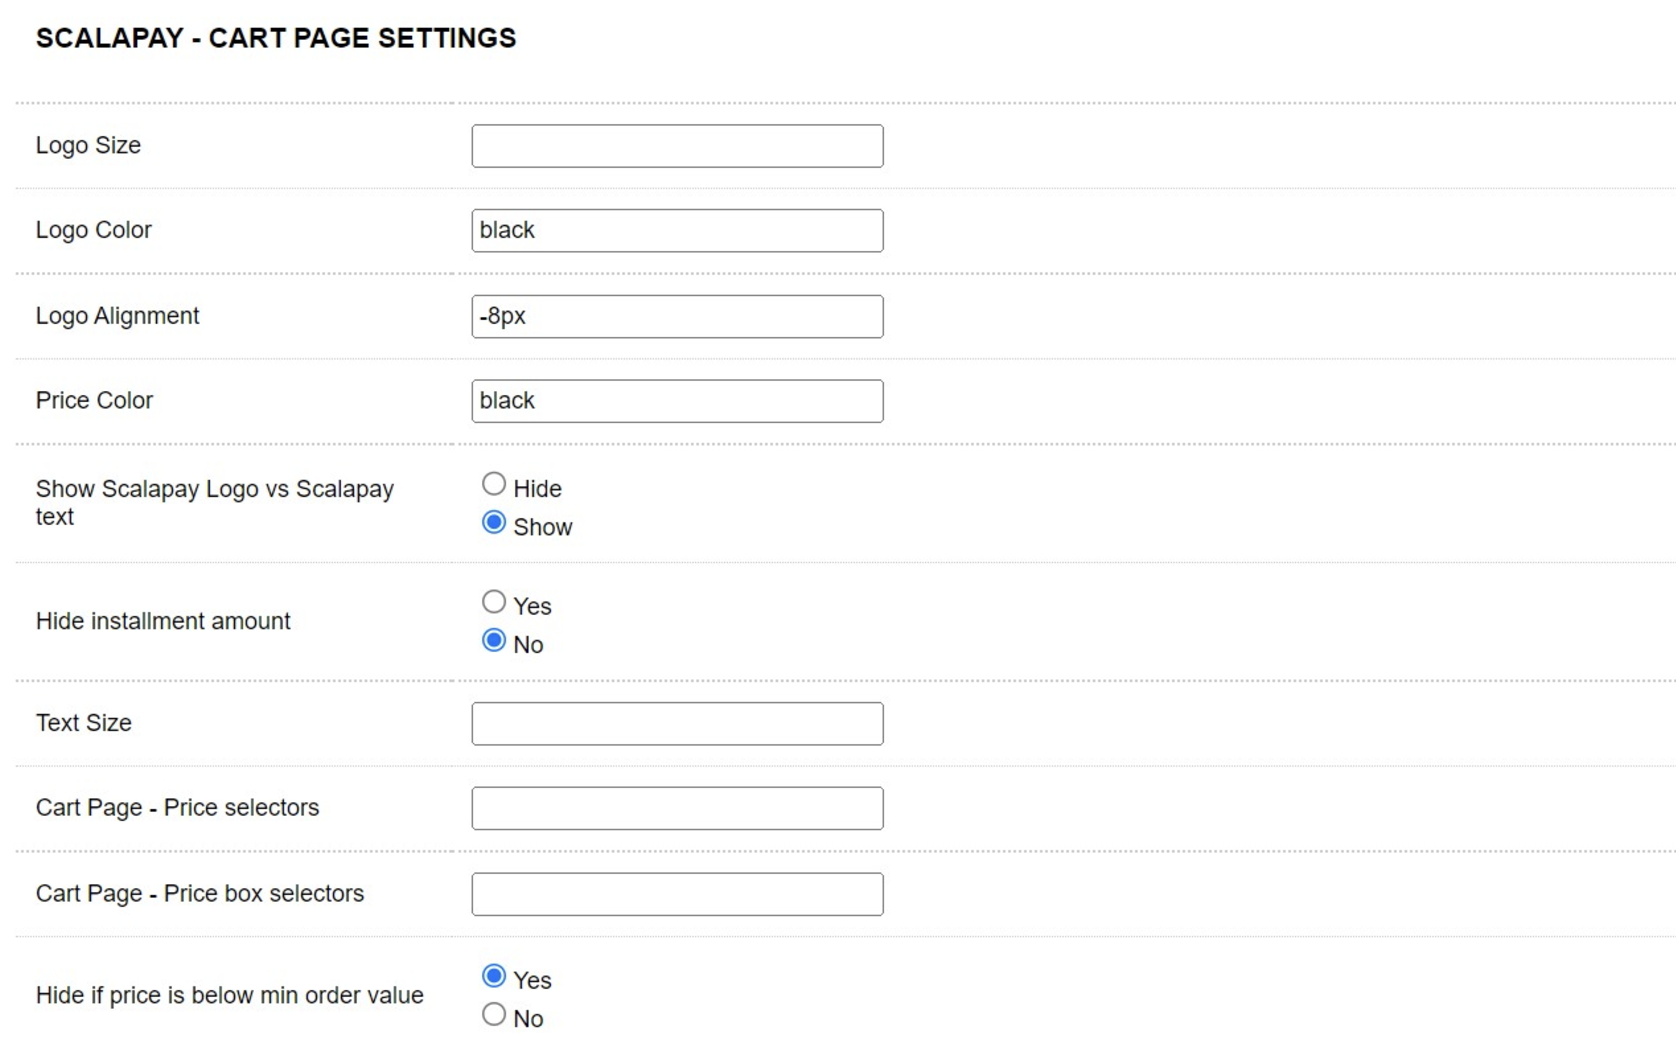
Cart page settings
Restriction settings
Scalapay minimum order amount and Scalapay maximum order amount
These fields allow you to adjust the default minimum and maximum amount, according to your contractual terms. The minimum amount for displaying the Scalapay plugin and accepting payments is set to 5€. If you would like to modify the maximum amount, contact your Sale referent or the Integration Manager.

Restriction settings
Updated 4 months ago
