WooCommerce
Scalapay provides a ready-to-install extension for WooCommerce stores.
Plugin installation
Plugin configuration
General settings
Payment configurations
Widget settings
Plugin installation
Download the latest version of our plugin for WooCommerce here: Scalapay for WooCommerce.
Plugin configuration
Follow these steps to configure the plugin.
- Log in to the admin panel on WooCommerce. The URL should follow this path: yoursitename.com/wp-admin/
WooCommerce backend login
- To proceed with the Scalapay module configuration, select Plugins → Add Plugin in the left menu.
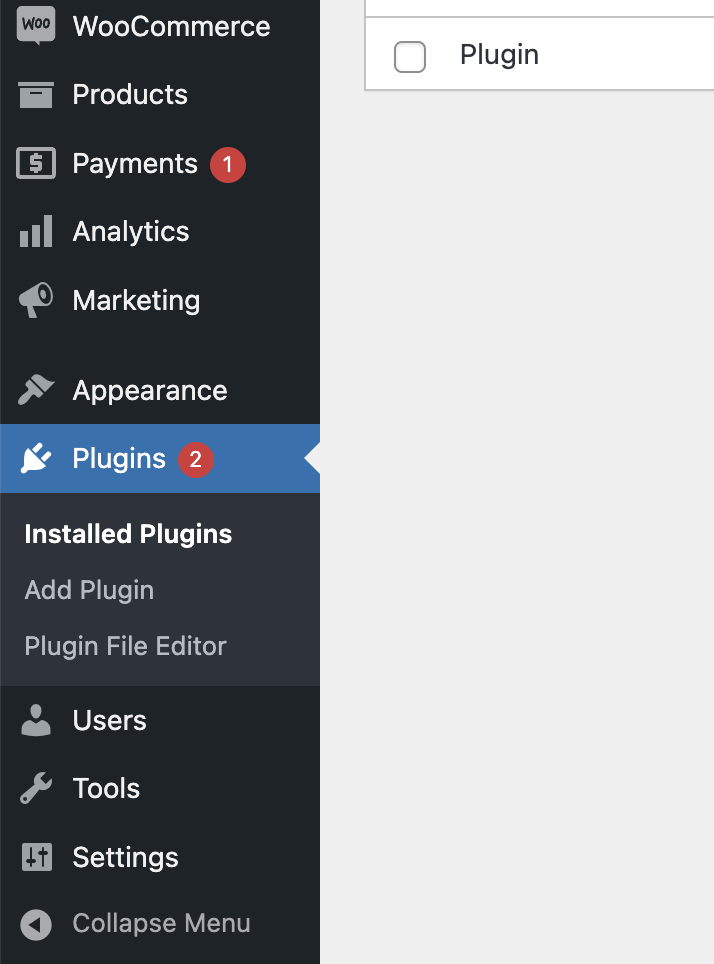
Add Plugin in the WooCommerce backend
- The following screen will appear. Click on Upload Plugin.
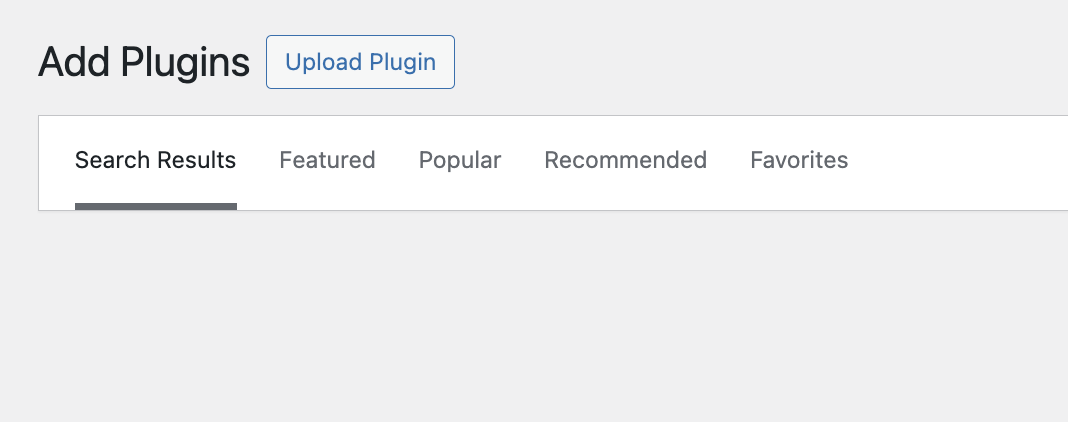
Upload plugin in the WooCommerce backend
- Click on the navigation button and select the Scalapay zip file using the popup window.
- Once Install now is clicked, the plugin will be uploaded and installed, but not yet activated.

Install the Scalapay plugin
- Click on Activate plugin to be redirected to the plugin configuration page. From there, the plugin can be configured according to the contract and specific requirements. Save the settings.
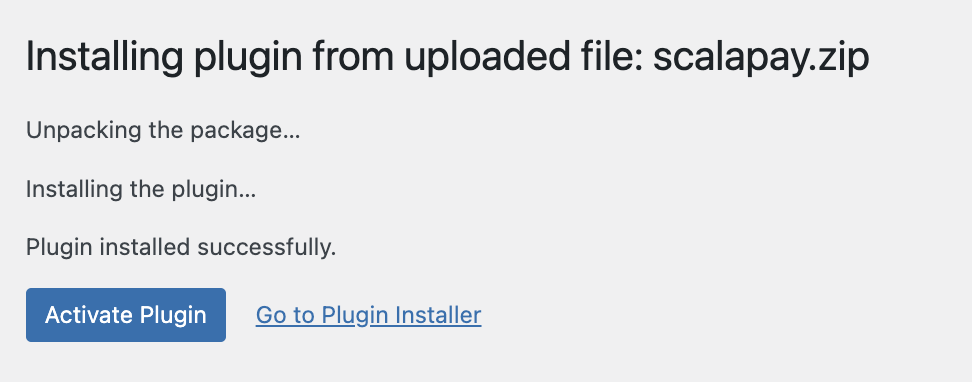
Activate the Scalapay plugin
Alternatively, the plugin can be configured by navigating to the list of plugins, locating Scalapay, and clicking Settings.
The plugin is divided into three tabs:
- General settings: this tab contains the general plugin settings, and the Live API key can be added once the plugin has been correctly installed, configured, and tested.
- Payment configurations: here is the list of all configurations necessary to set up, test, and then activate the plugin in Live mode.
- Widget configurations: this section explains the detailed settings for the Product page, Cart page, and Checkout page.
General settings
This section contains the plugin's general settings, and the Live API key can be added once the plugin has been correctly installed, configured, and tested.
- Test merchant token
When the plugin is installed, the general test merchant token is set by default: 8KDS3SPEL. - Test API key
When the plugin is installed, the general test API key is set by default: qhtfs87hjnc12kkos. - Live merchant token
Once the testing phase has been completed, the Live merchant token will be provided, allowing activation of the plugin in Live mode. The merchant token can be found on the Scalapay Merchant Portal, in the "Developer" section. - Live API key
Once the testing phase has been completed, the Live API key will be provided, enabling activation of the plugin in Live mode. The Live API key can be found on the Scalapay Merchant Portal, in the "Developer" section.
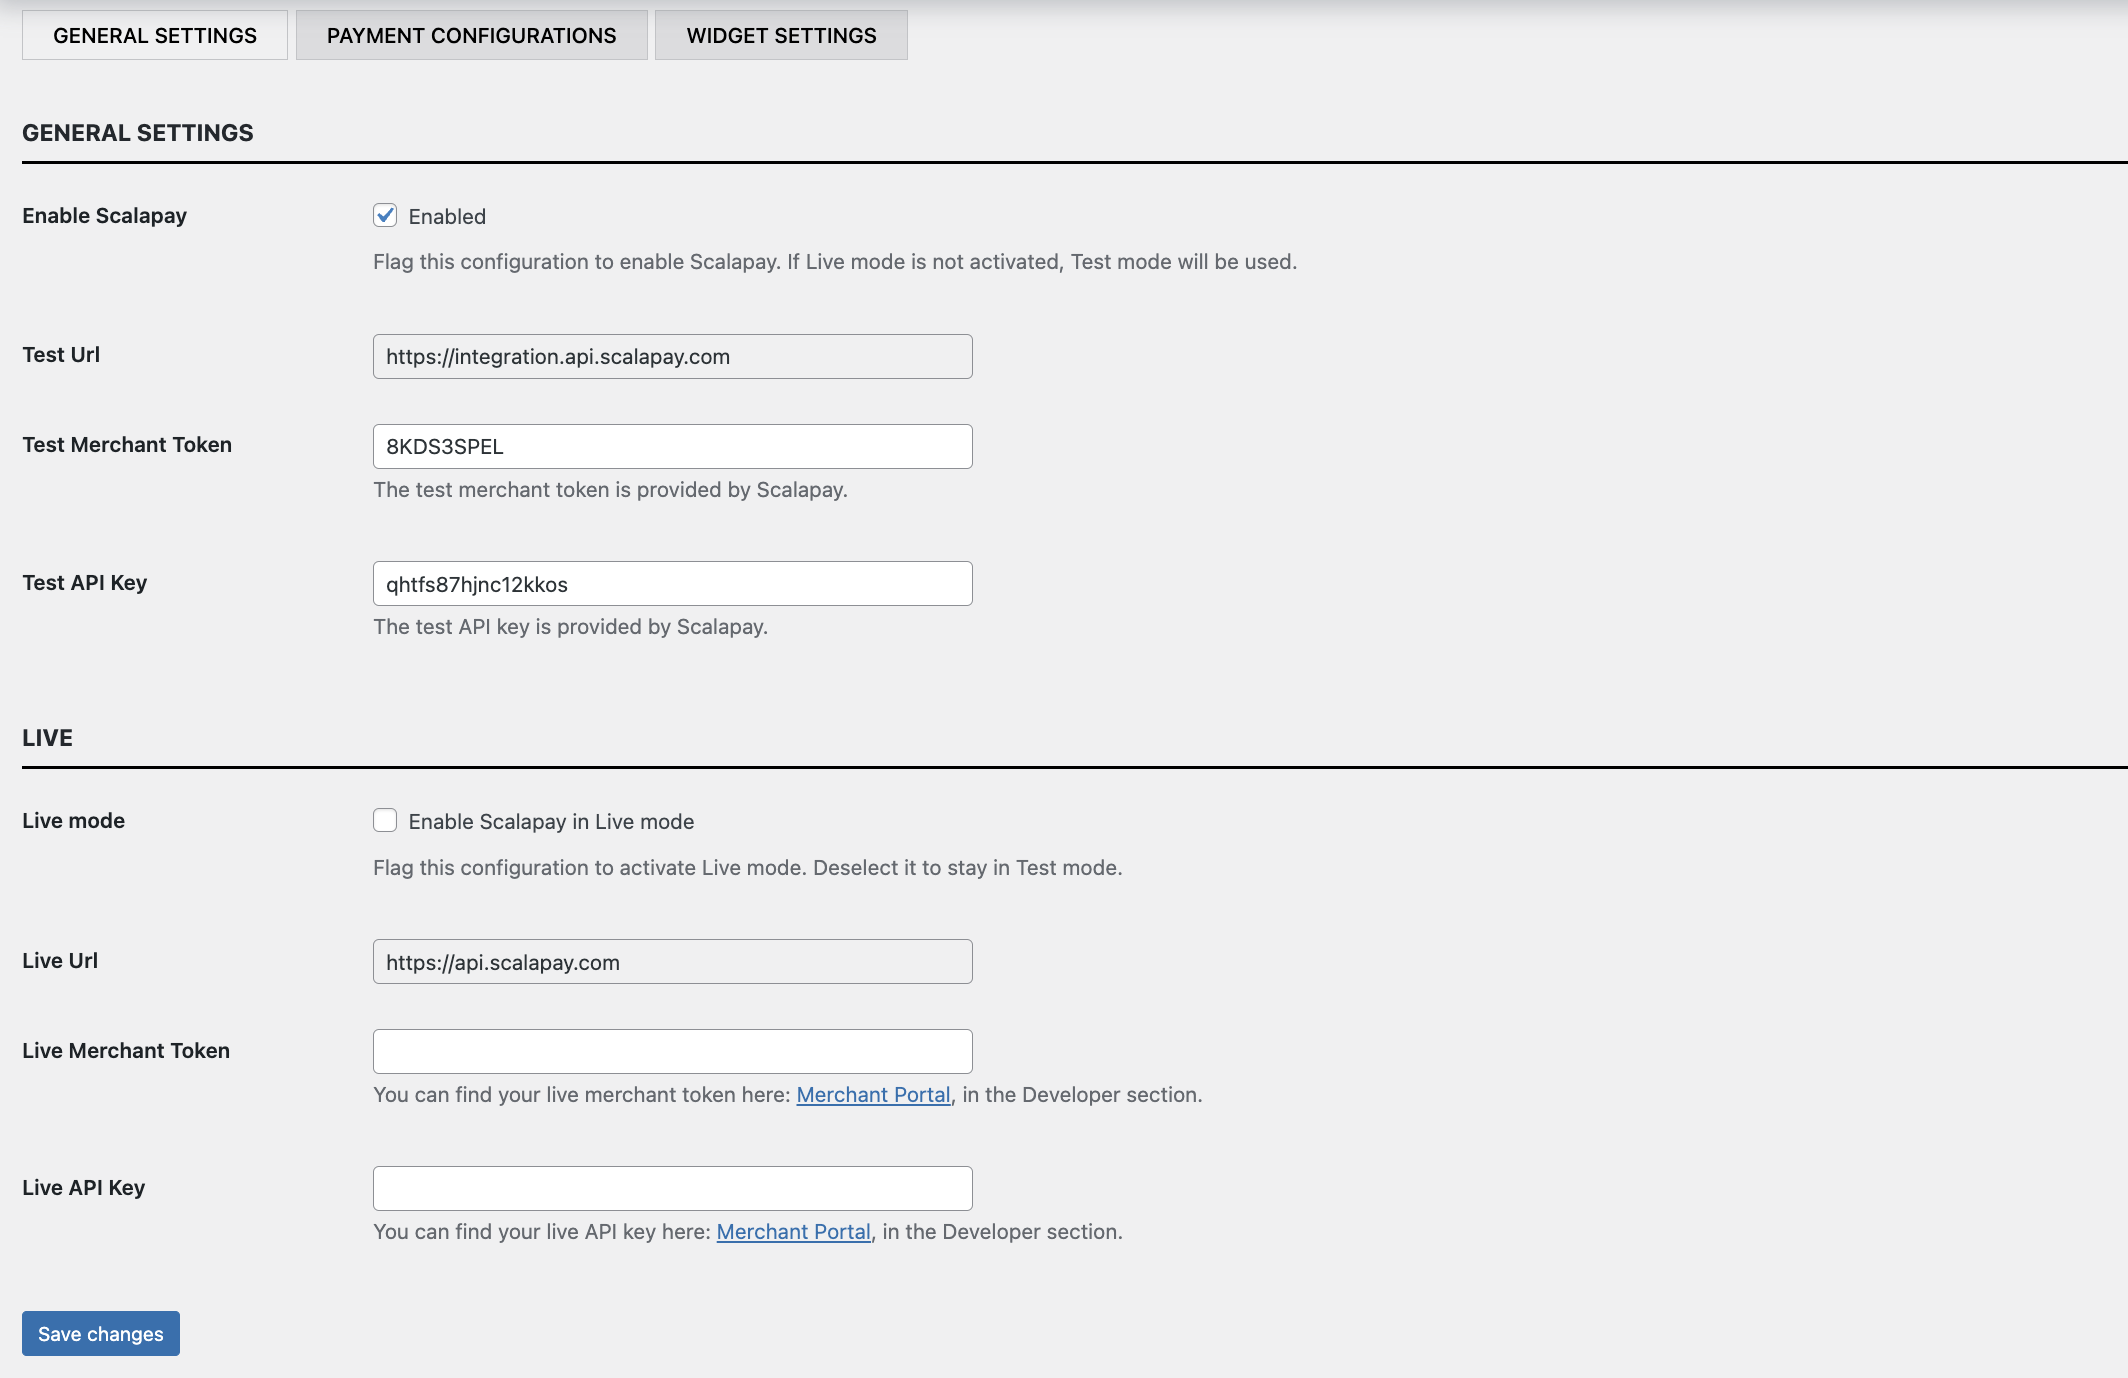
General settings
Payment configurations
Here is the list of all configurations that allow setting up, testing, and then activating the plugin in Live mode.
- Scalapay minimum amount and Scalapay maximum amount
These fields allow adjustment of the default minimum and maximum amounts, according to contractual terms. The minimum amount for displaying the Scalapay plugin and accepting payments is set to 5€. - Disable Scalapay for specific countries
Select the countries where Scalapay should not appear. The authorised countries are Austria, Belgium, Finland, France, French Guiana, Germany, Guadeloupe, Italy, Martinique, Mayotte, Netherlands, Portugal, Réunion and Spain. - Disable Scalapay for specific categories
This field allows selection of product categories in which Scalapay should not appear.
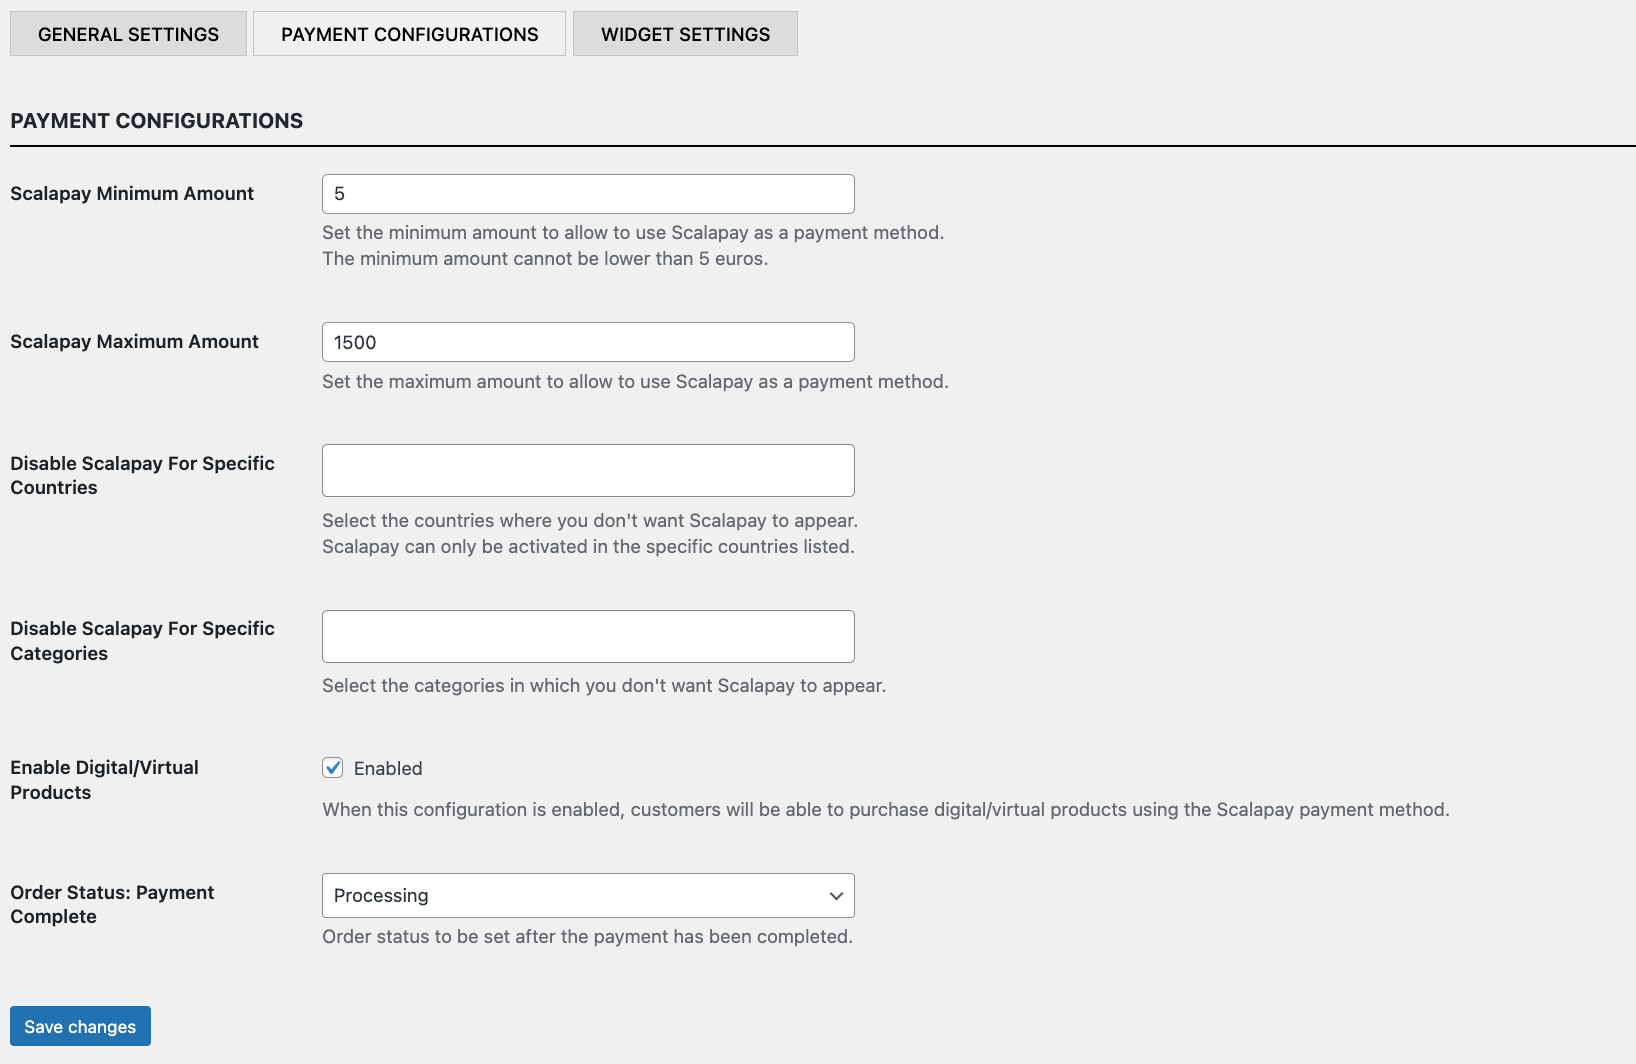
Payment configurations
Widget settings
1. Product page settings
The settings in this section allow customisation of the Scalapay widget on the Product page.
- Widget amount selectors and Widget position
These fields are set by default. If the theme is customised, it is recommended to verify the correct selectors. - Hide widget
This field is available but its use is not recommended, as the Scalapay widget is an important asset for increasing conversion rates and average order value. - Alignment
This field allows selection of the widget alignment: left, center, or right. - Dark mode
This field enables a version of the widget optimised for dark backgrounds. Selecting "System" allows the widget to automatically detect the device or browser's dark mode and adjust accordingly.
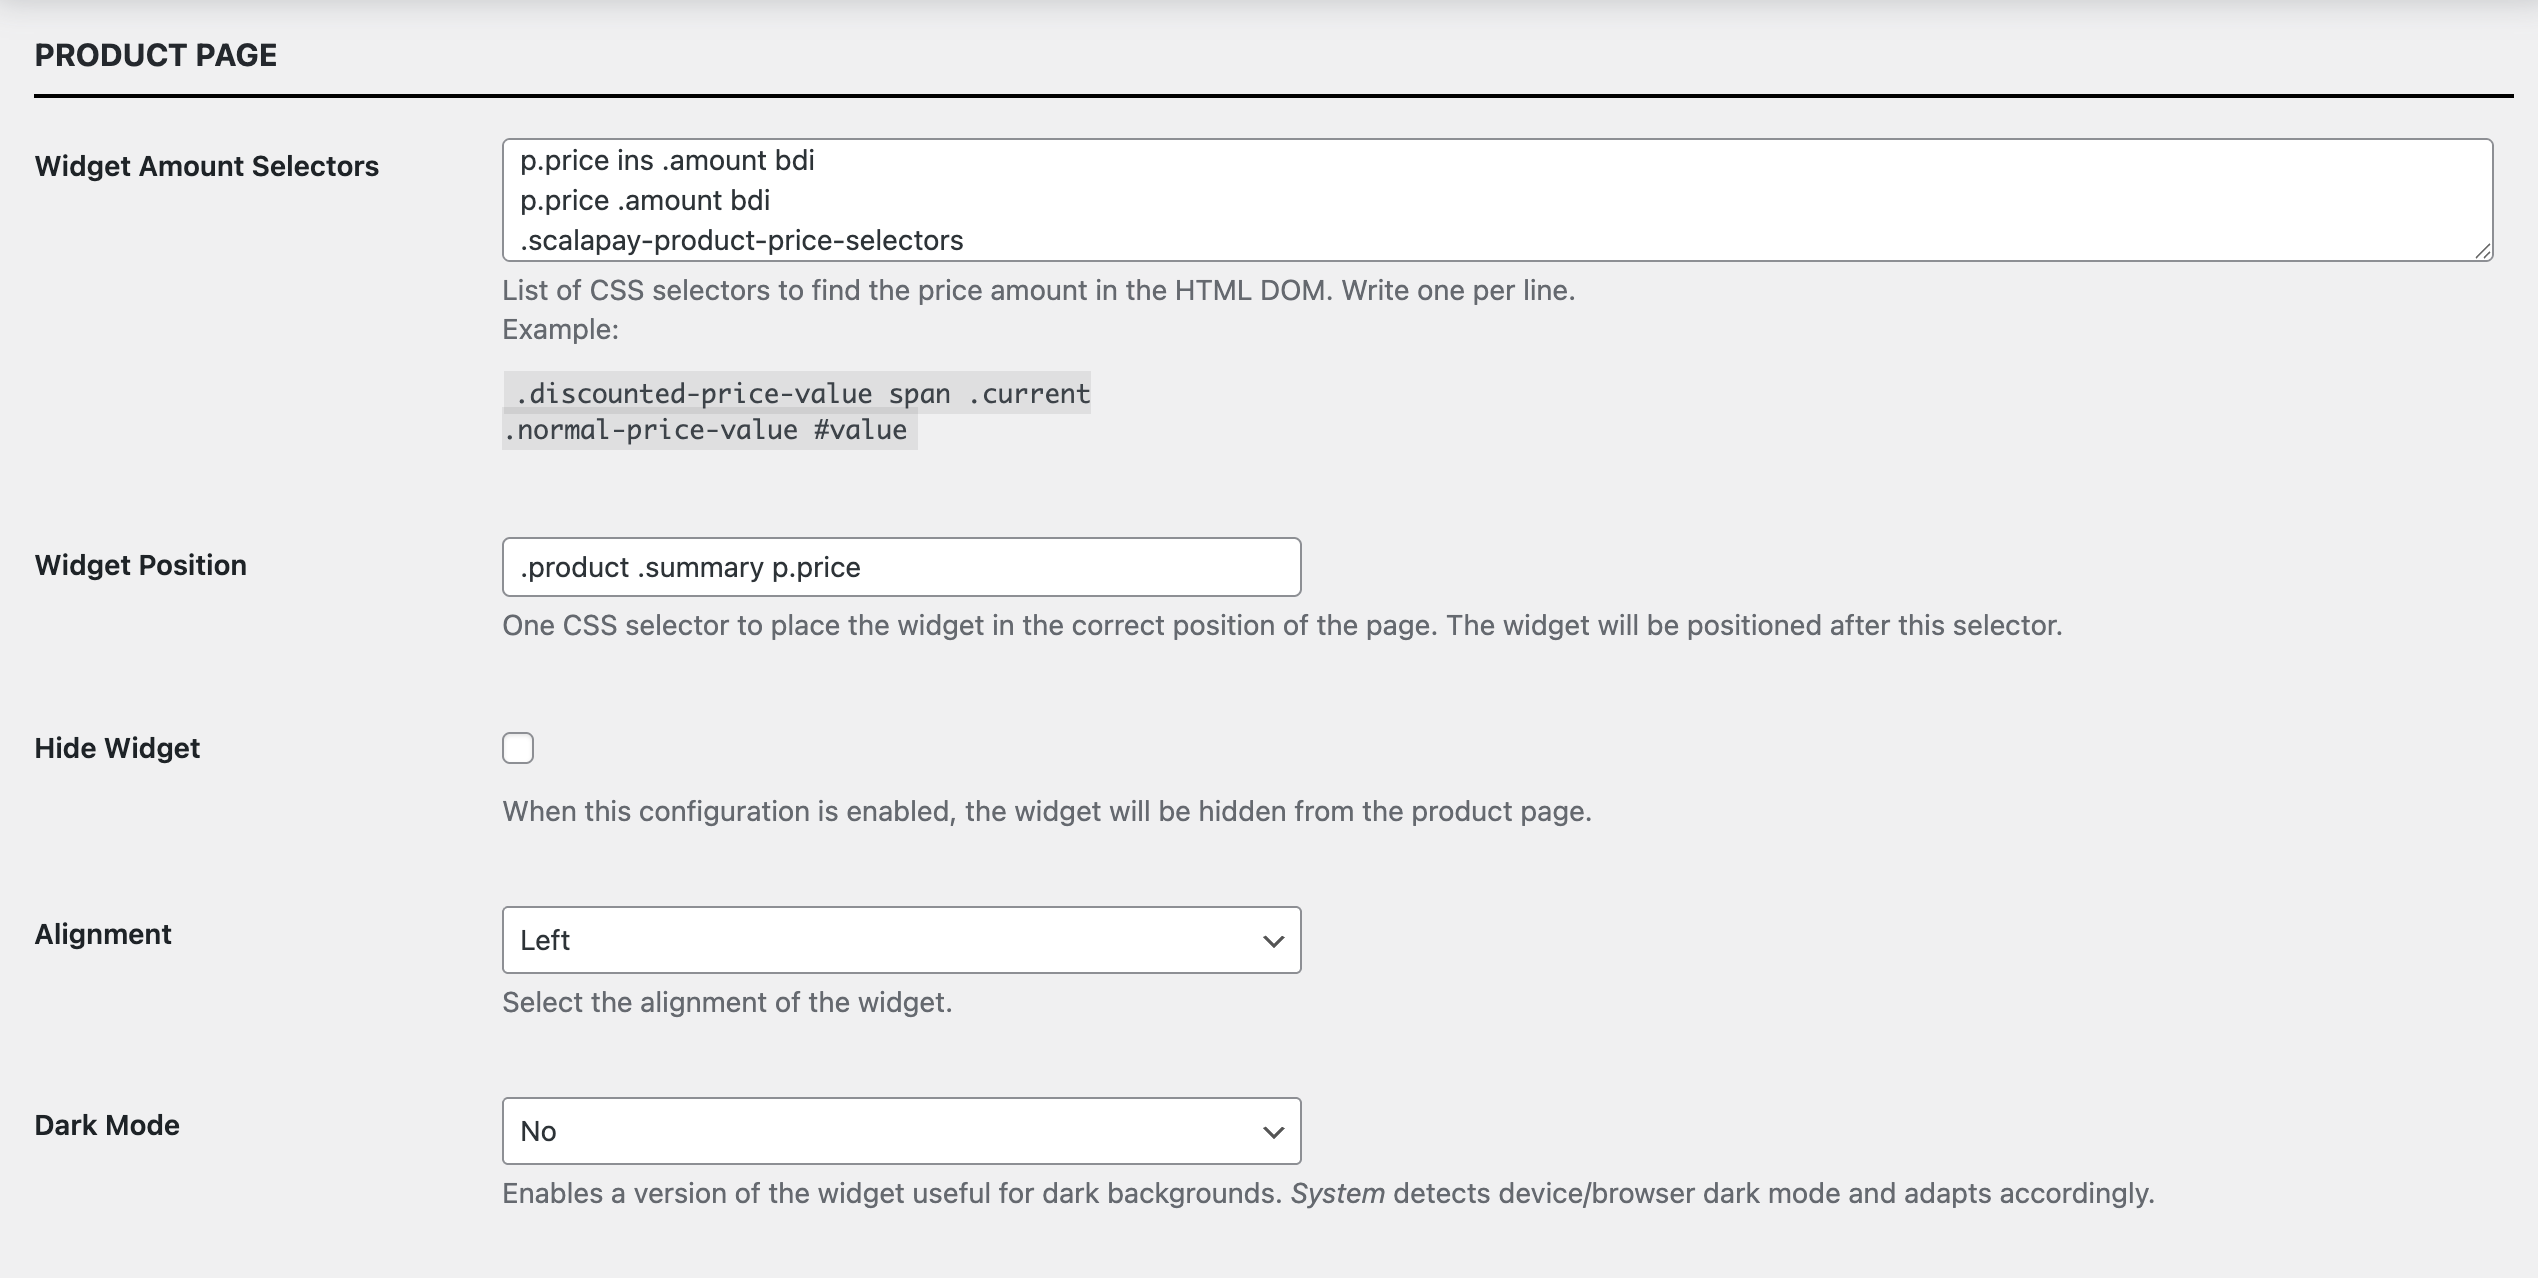
Product page settings
2. Cart page settings
The settings in this section allow customisation of the Scalapay widget on the Cart page.
- Widget amount selectors and Widget position
These fields are set by default. If the theme is customised, it is recommended to verify the correct selectors. - Hide widget
This field is available but its use is not recommended, as the Scalapay widget is an important asset for increasing conversion rates and average order value. - Alignment
This field allows selection of the widget alignment: left, center, or right. - Dark mode
This field enables a version of the widget optimised for dark backgrounds. Selecting 'System' allows the widget to automatically detect the device or browser's dark mode and adjust accordingly.
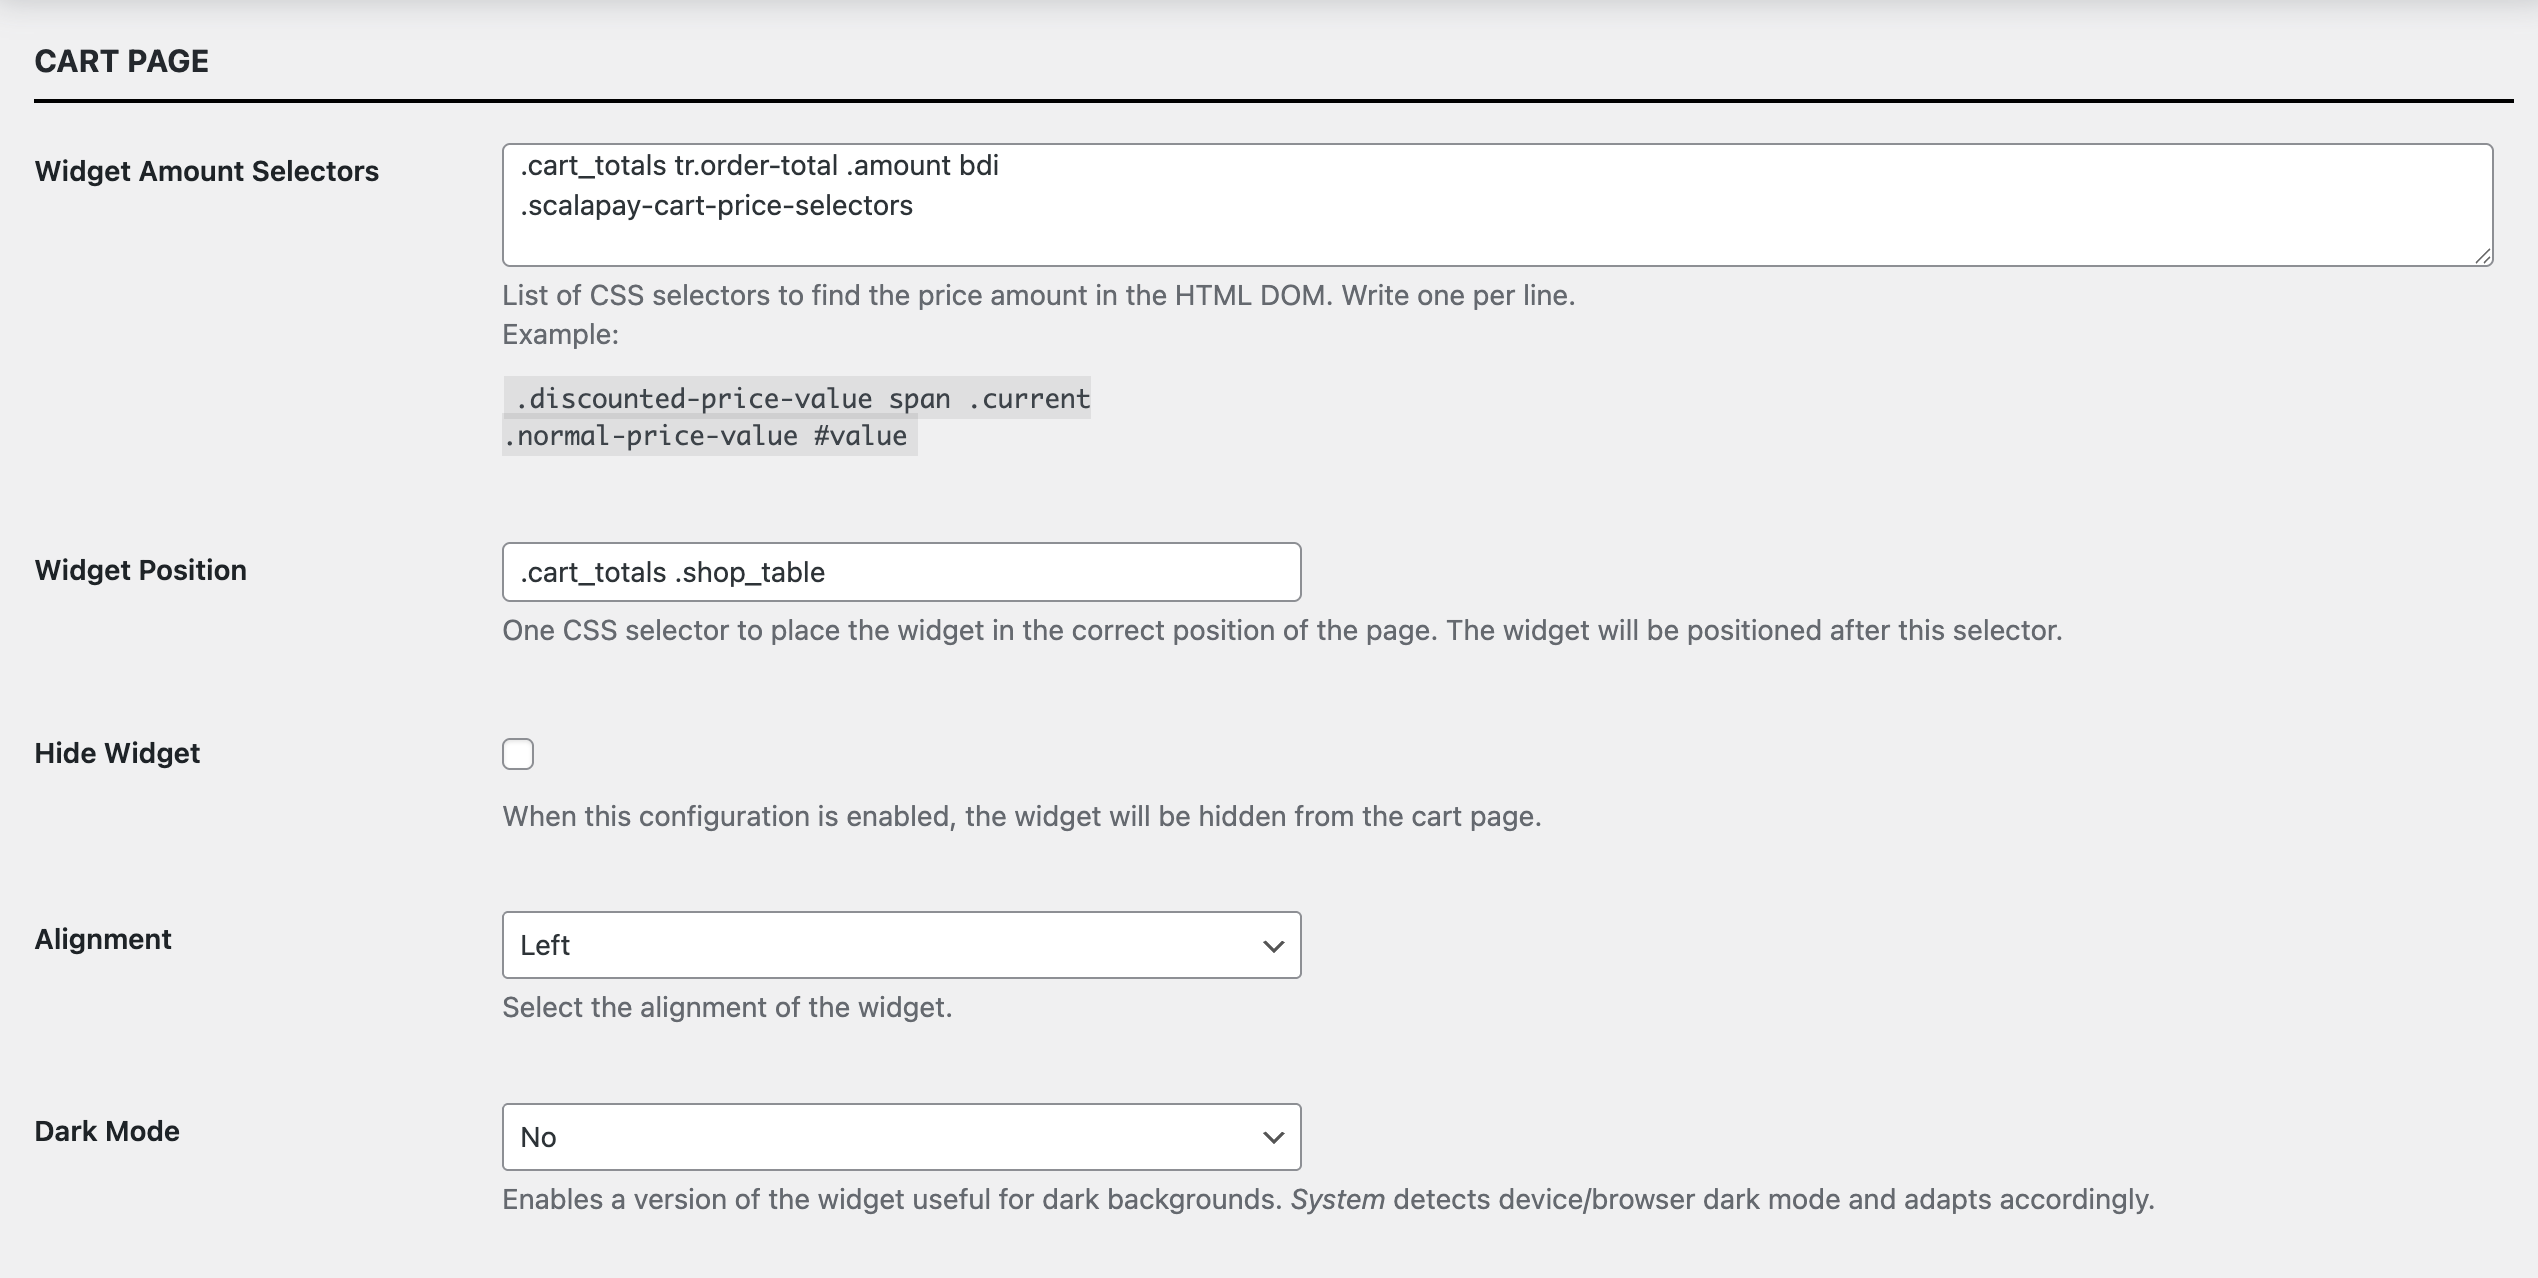
Cart page settings
3. Checkout page settings
The settings in this section allow customisation of the Scalapay widget on the Cart page.
- Widget amount selectors
These fields are set by default. If the theme is customised, it is recommended to verify the correct selectors. - Alignment
This field allows selection of the widget alignment: left, center, or right. - Dark mode
This field enables a version of the widget optimised for dark backgrounds. Selecting 'System' allows the widget to automatically detect the device or browser's dark mode and adjust accordingly.
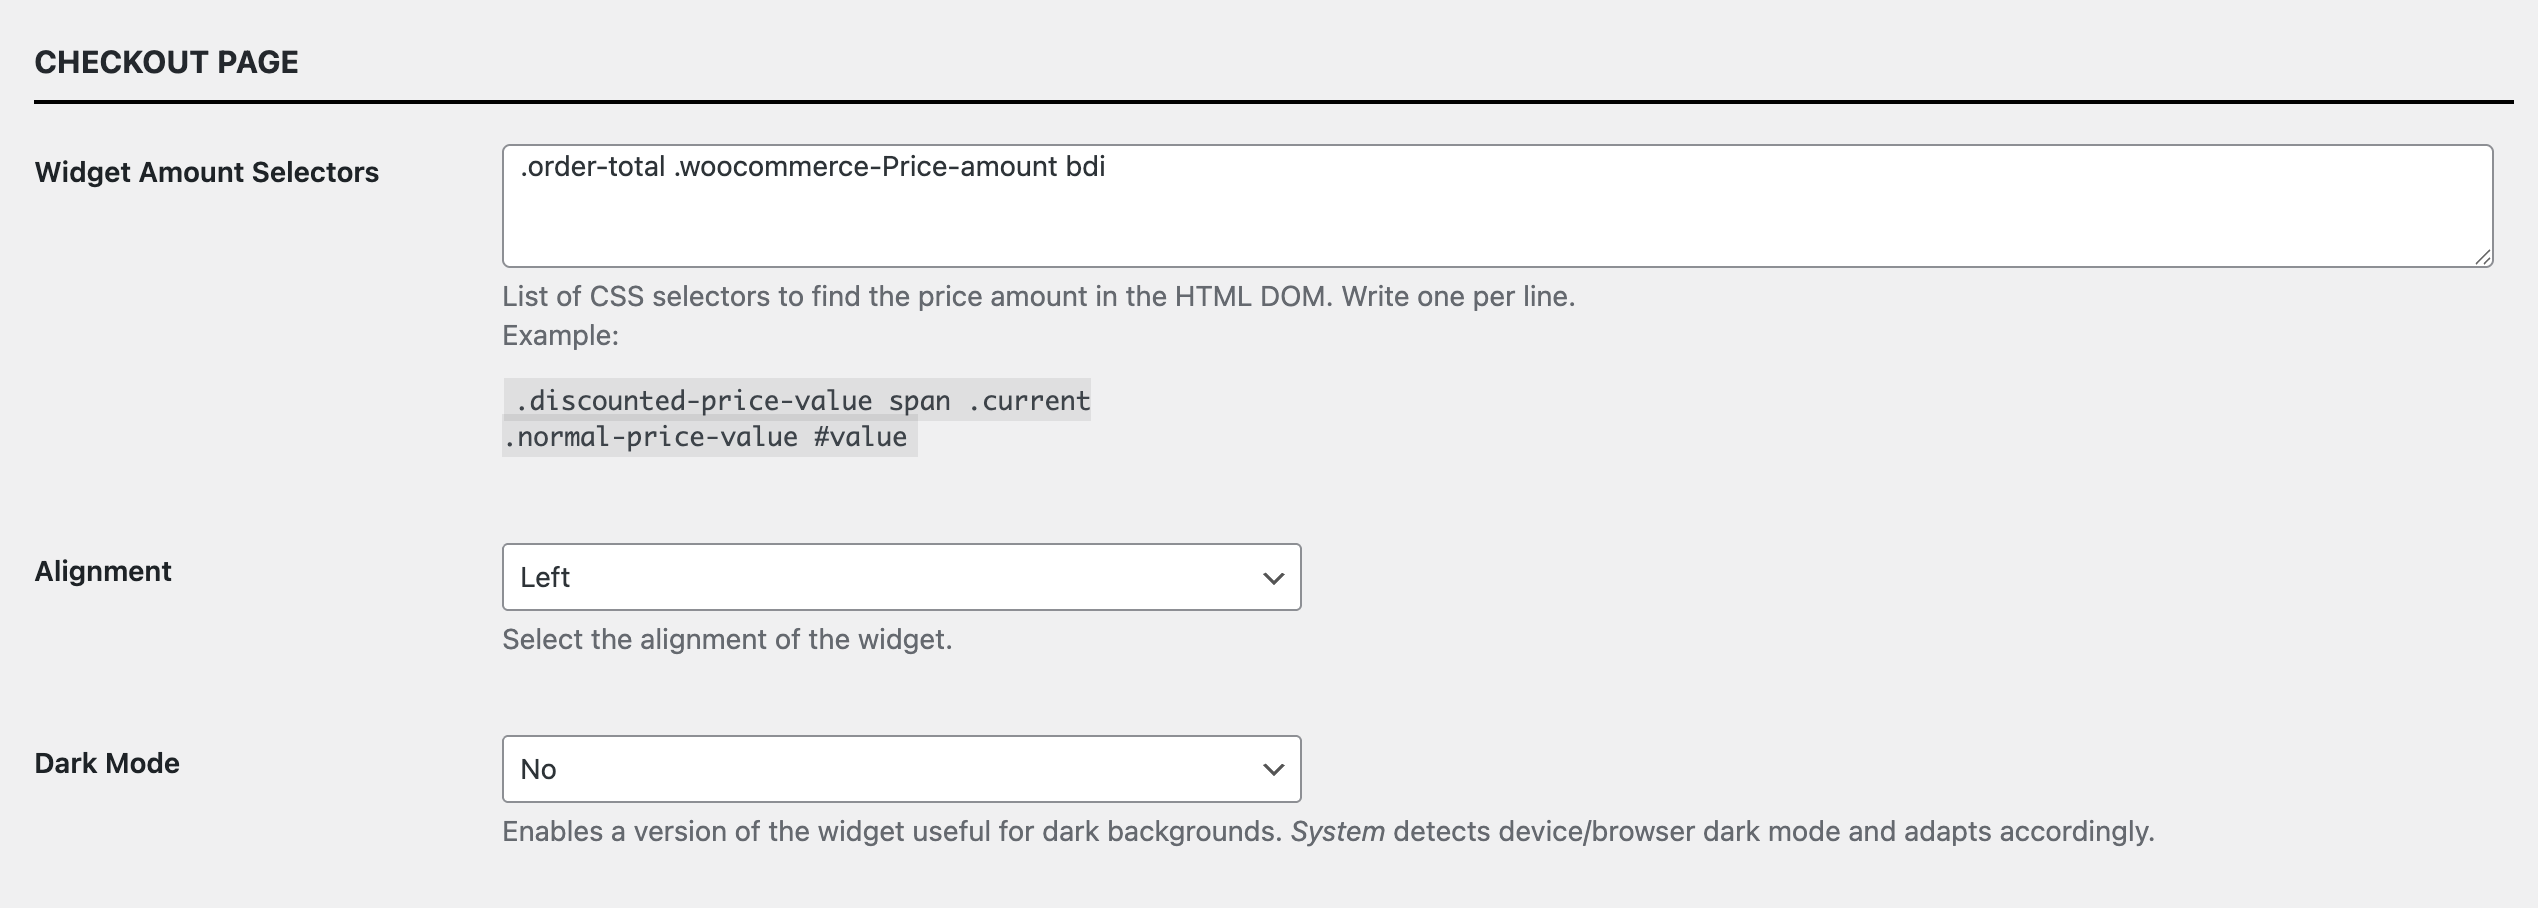
Checkout page settings
4. Widget general settings
Here it is possible to modify the widget’s general settings.
- Custom CSS
This field allows adding custom CSS to apply a specific style to the widget. - Currency Position
This field allows selecting the position of the currency symbol in the widget. - Currency Display
This field allows selecting the currency symbol to display in the widget. - Amount Separator
This field allows choosing the amount separator to use in the widget. Leave it set to 'Auto' if unsure. - Hide Instalments
When enabled, the instalment amount will be hidden in the widget. - Hide Learn more
When enabled, the "Learn More" button will be displayed as an 'i' icon instead of text.
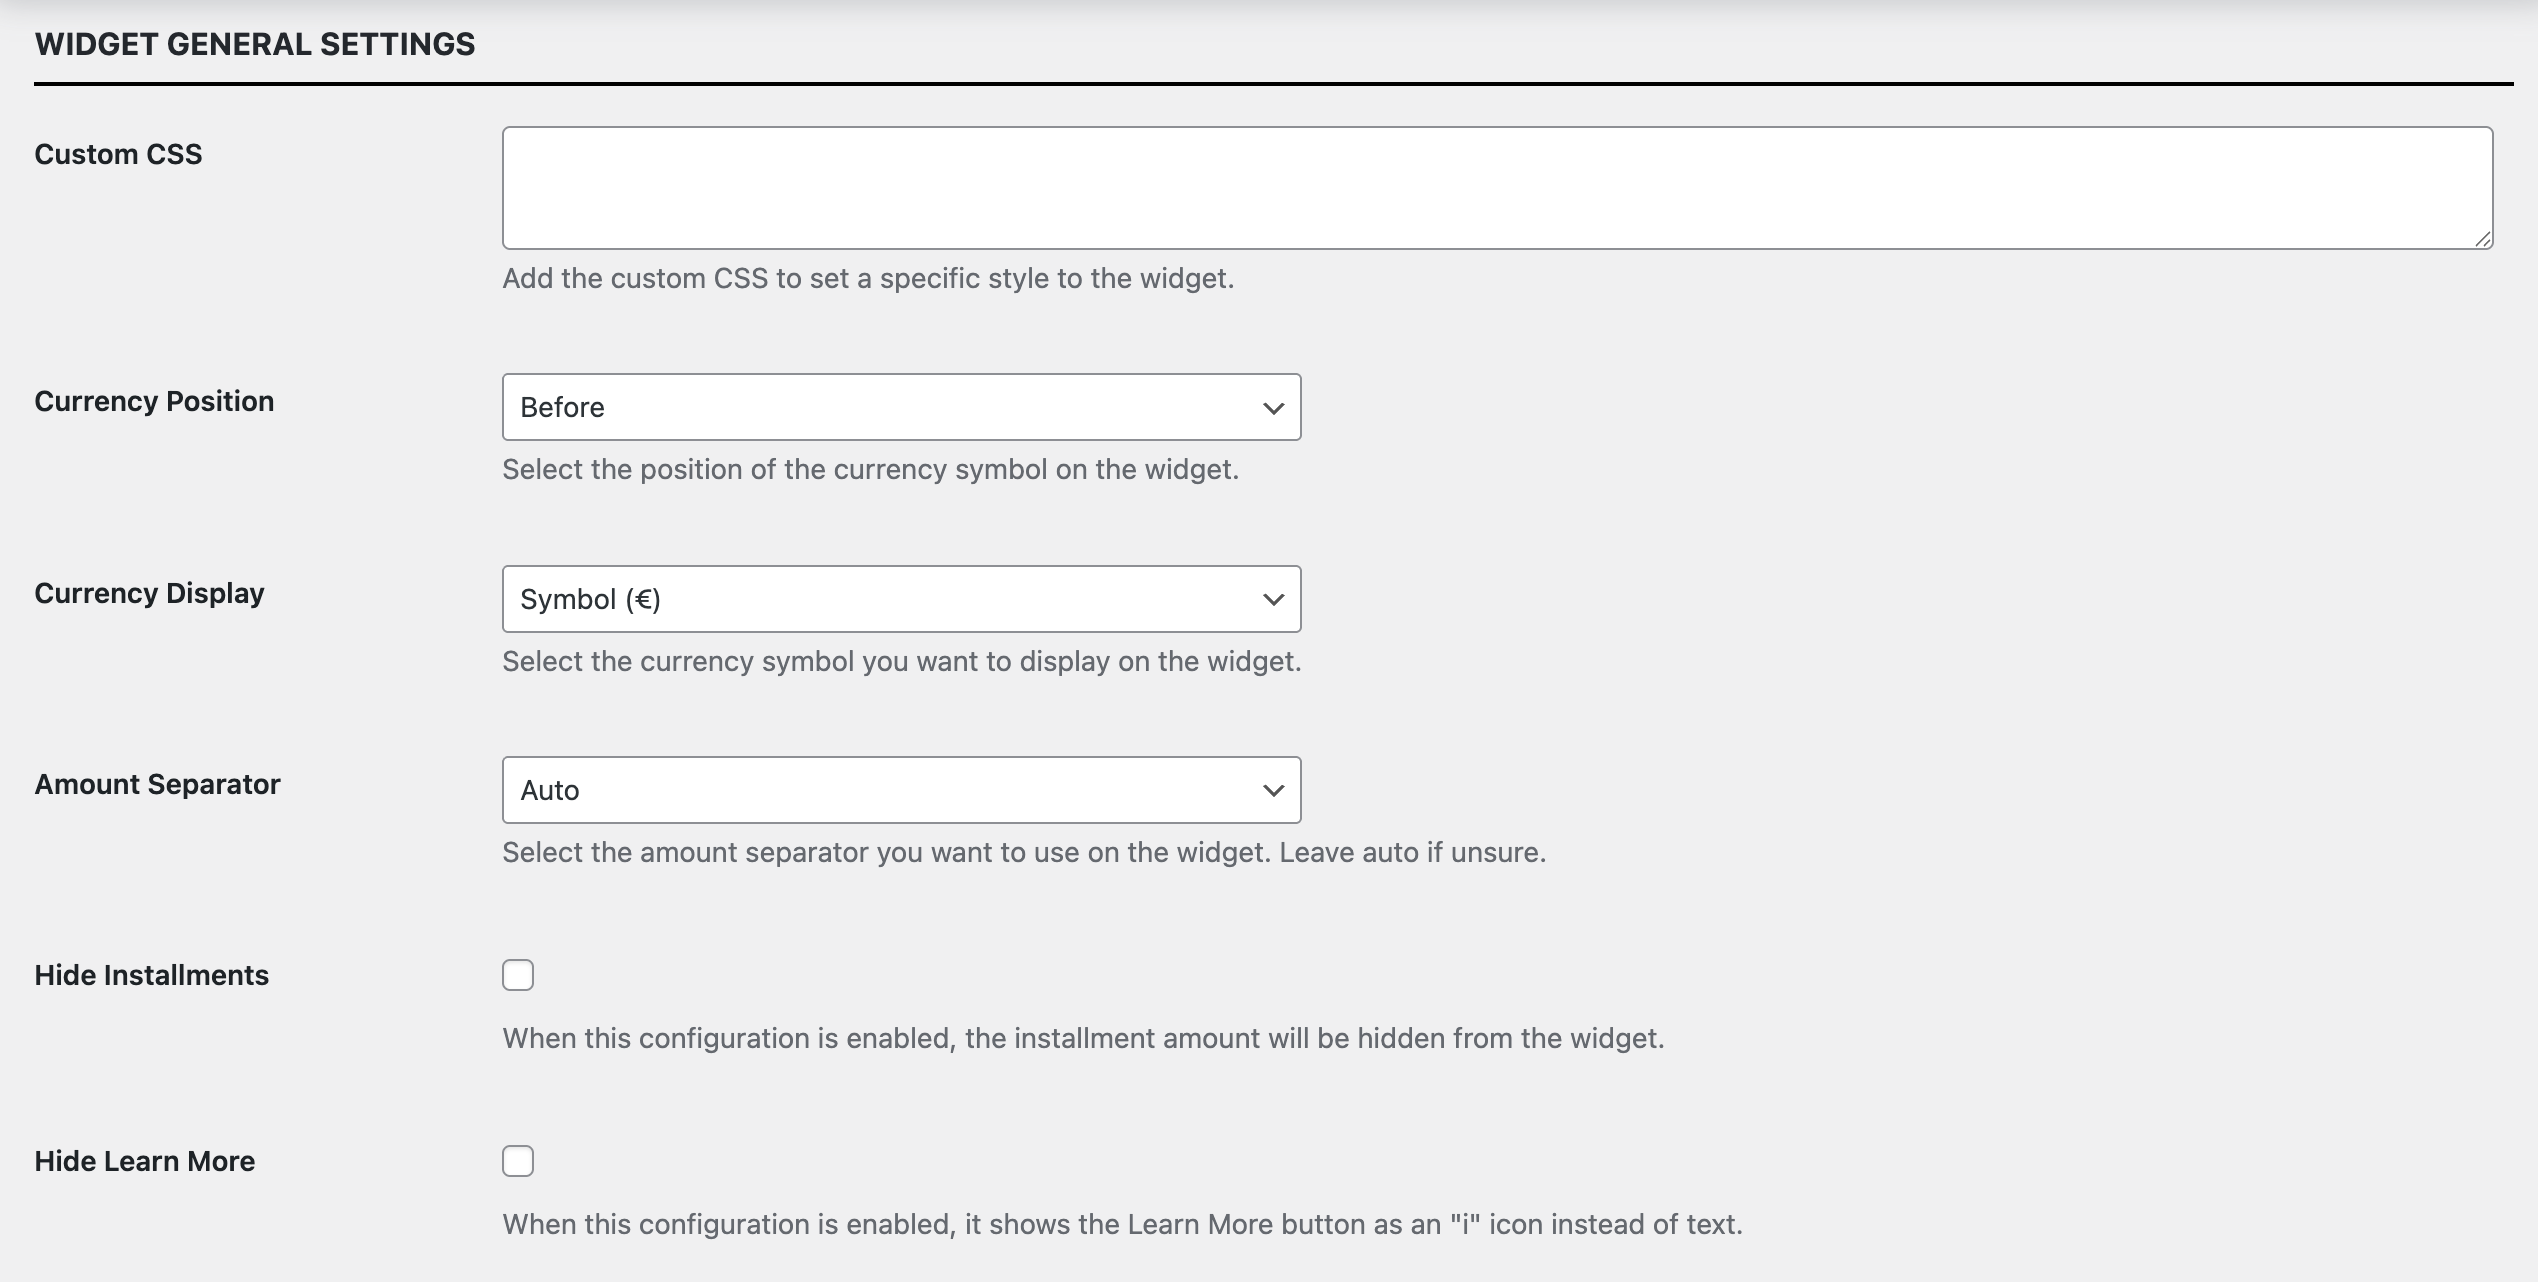
Widget general settings
Updated 4 months ago
