Magento 2.3 or higher versions
Scalapay provides a ready-to-install extension for your Magento 2 store. Setting up Scalapay it's fast and easy: just follow this steps!
⇲ [Plugin Installation] (https://developers.scalapay.com/docs/pluginstall-magento2#pluginstall-magento23-or-higher-versions)
✔ [Plugin Configuration] (https://developers.scalapay.com/docs/pluginstall-magento23-or-higher-versions#-configure-your-plugin)
⚠ [Category Restriction] (https://developers.scalapay.com/docs/pluginstall-magento23-or-higher-versions#-category-restriction)
❤ [Scalapay Widget] (https://developers.scalapay.com/docs/pluginstall-magento23-or-higher-versions#-scalapay-widget)
⇲ Install your plugin
N.B: This procedure is not compatible with Magento versions less than to 2.3.
- Login via SSH into your server
- Go to the Magento root
- Run
composer require scalapay/scalapay-magento2-new - Run
php bin/magento module:enable Scalapay_Scalapay - Run
php bin/magento setup:upgrade - Run
php bin/magento setup:static-content:deploy - Run
php bin/magento setup:di:compile - Run
php bin/magento cache:clean
✔ Configure your plugin
CONFIGURE AND ENABLE SCALAPAY PLUGIN
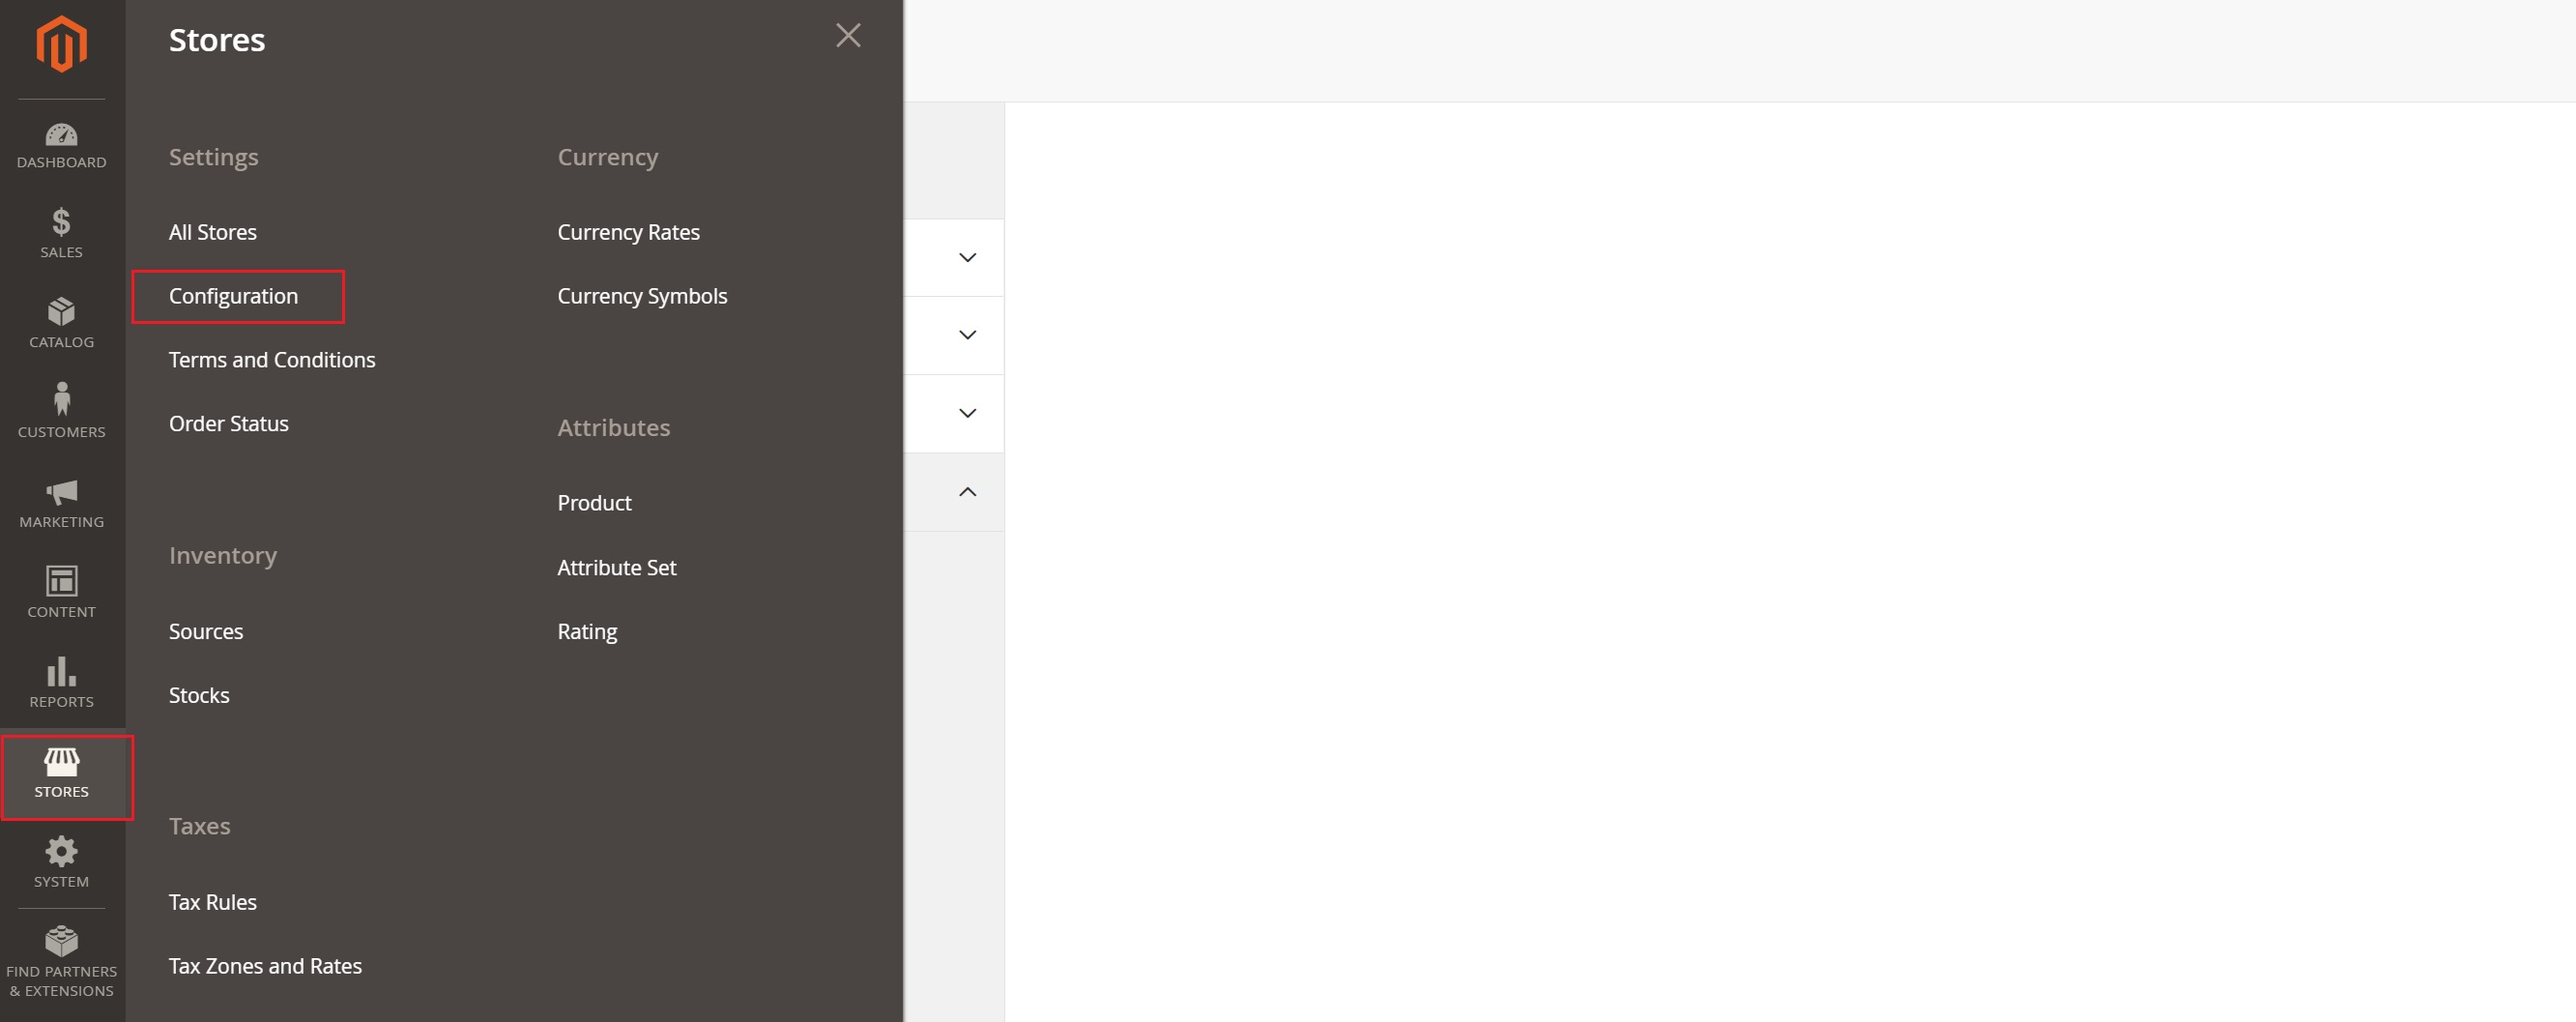
To configure and enabled Scalapay plugin, please follow this path: Stores(in left side menu header) → Configuration
Sales→ Payment Methods
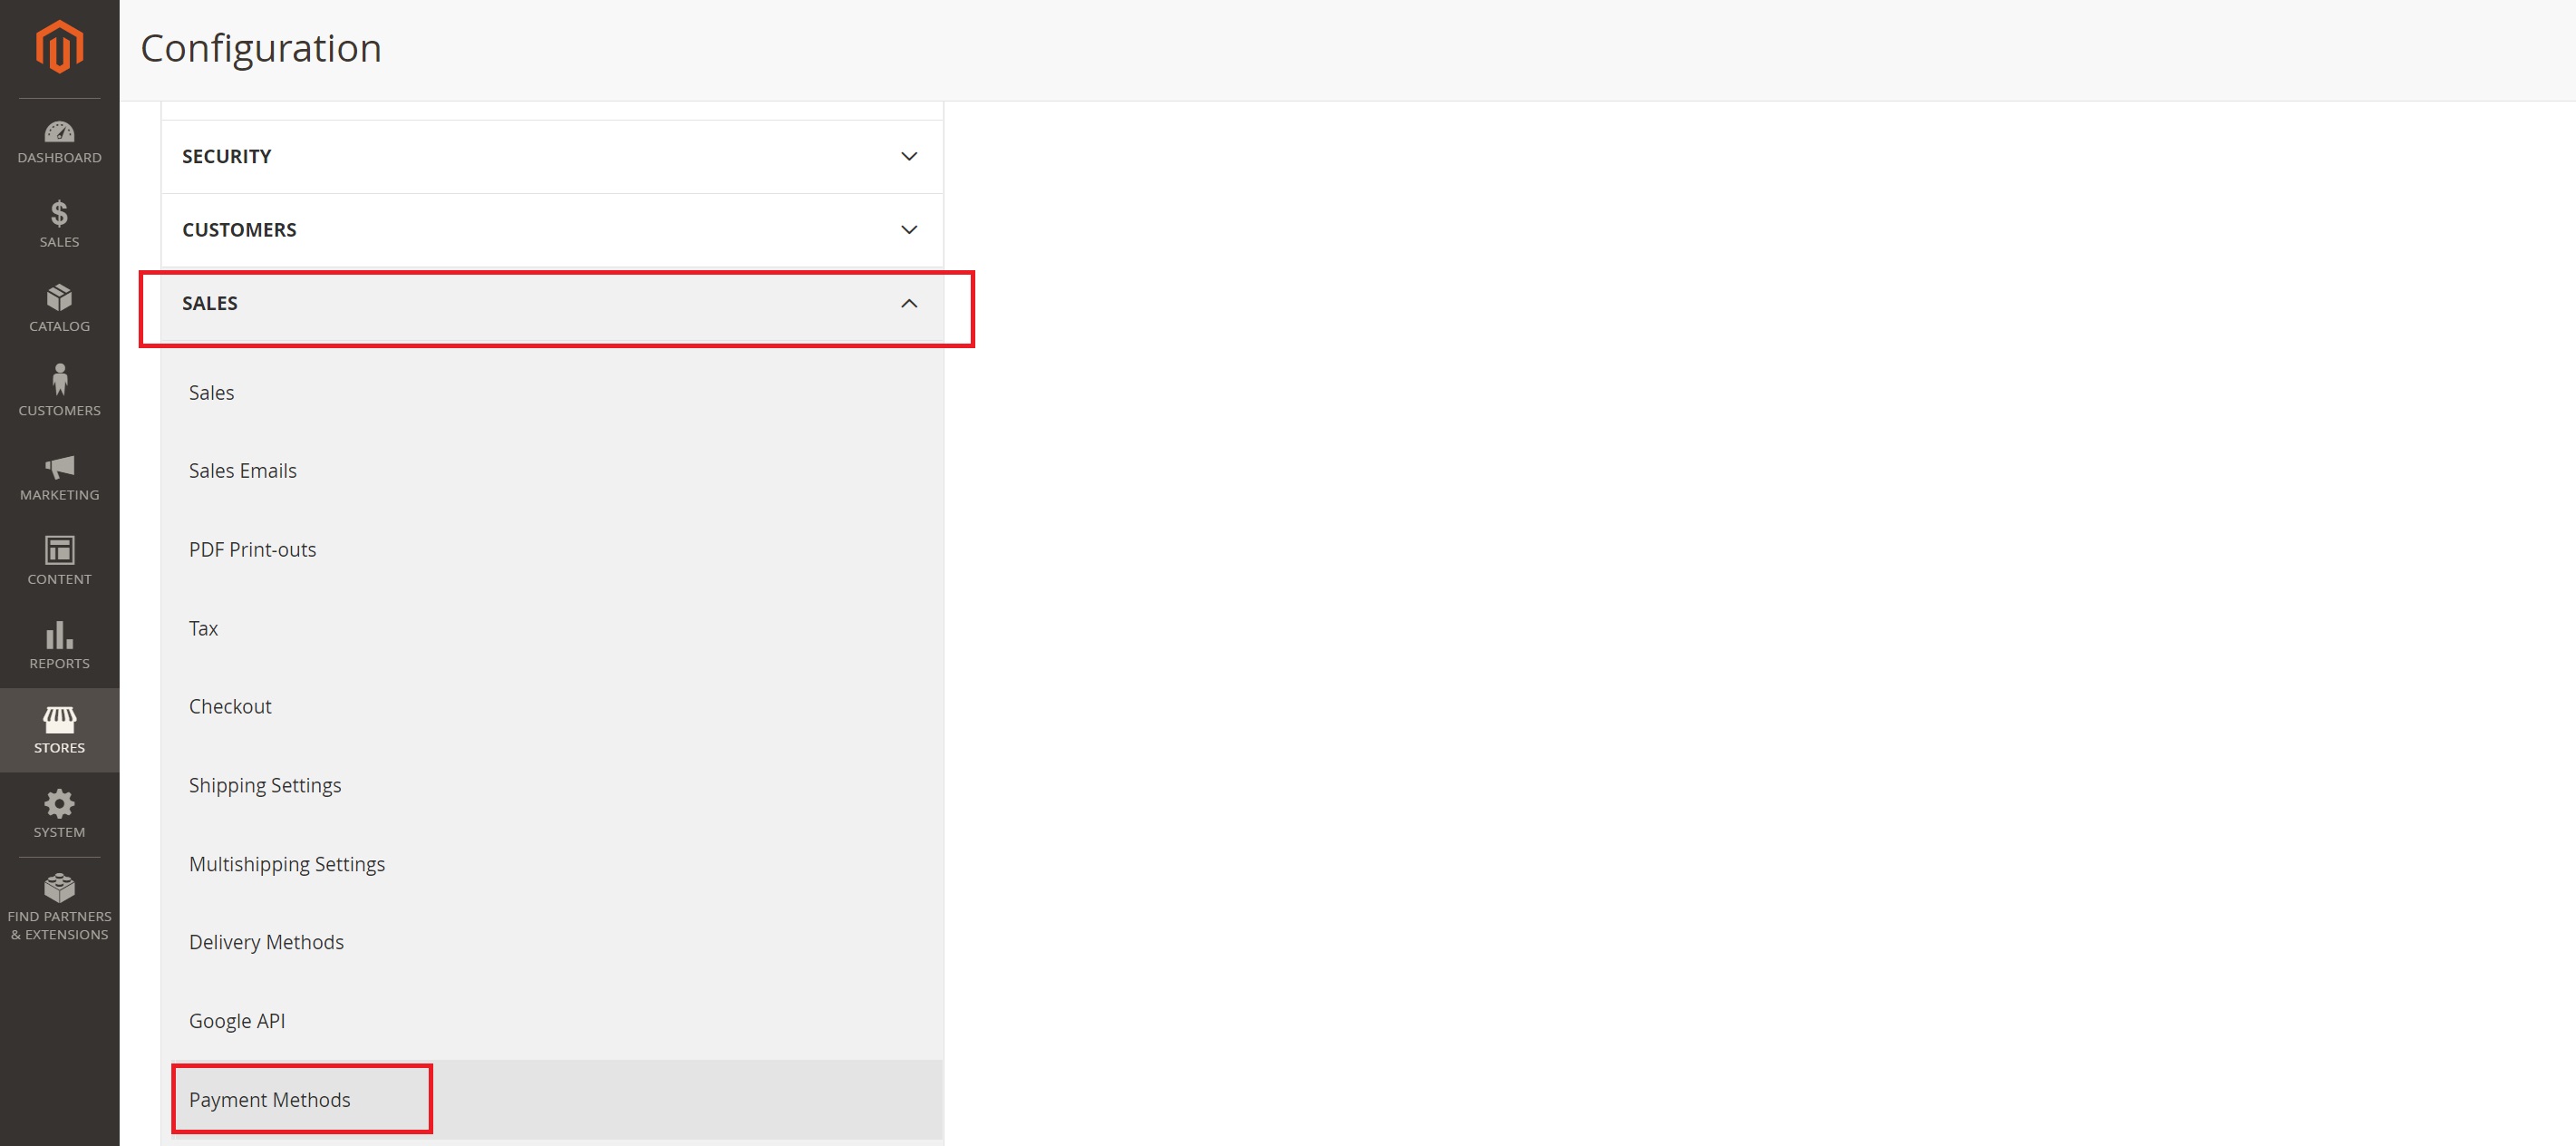
There you will find a dedicated dropdown section for each of the Scalapay available products: Pay in 3, Pay in 4 and Pay Later.

IMPORTANT!
When the plugin is installed, by Default, all products (PAY IN 3, 4, LATER) are Disabled.
You need to:
Enter the product tab of your interest (as per contractual terms) ->
Enable the product ->
Configure it and test the plugin (for the configuration please, keep reading the document)
Once the testing phase is completed, you will be provided with the Live API Key and you will be able to activate the plugin in Live mode.
PLEASE NOTE
Only product agreed as per contractual terms can be activated.
For any information or clarifications about the actionable products, please refer to your Scalapay Sales referent.
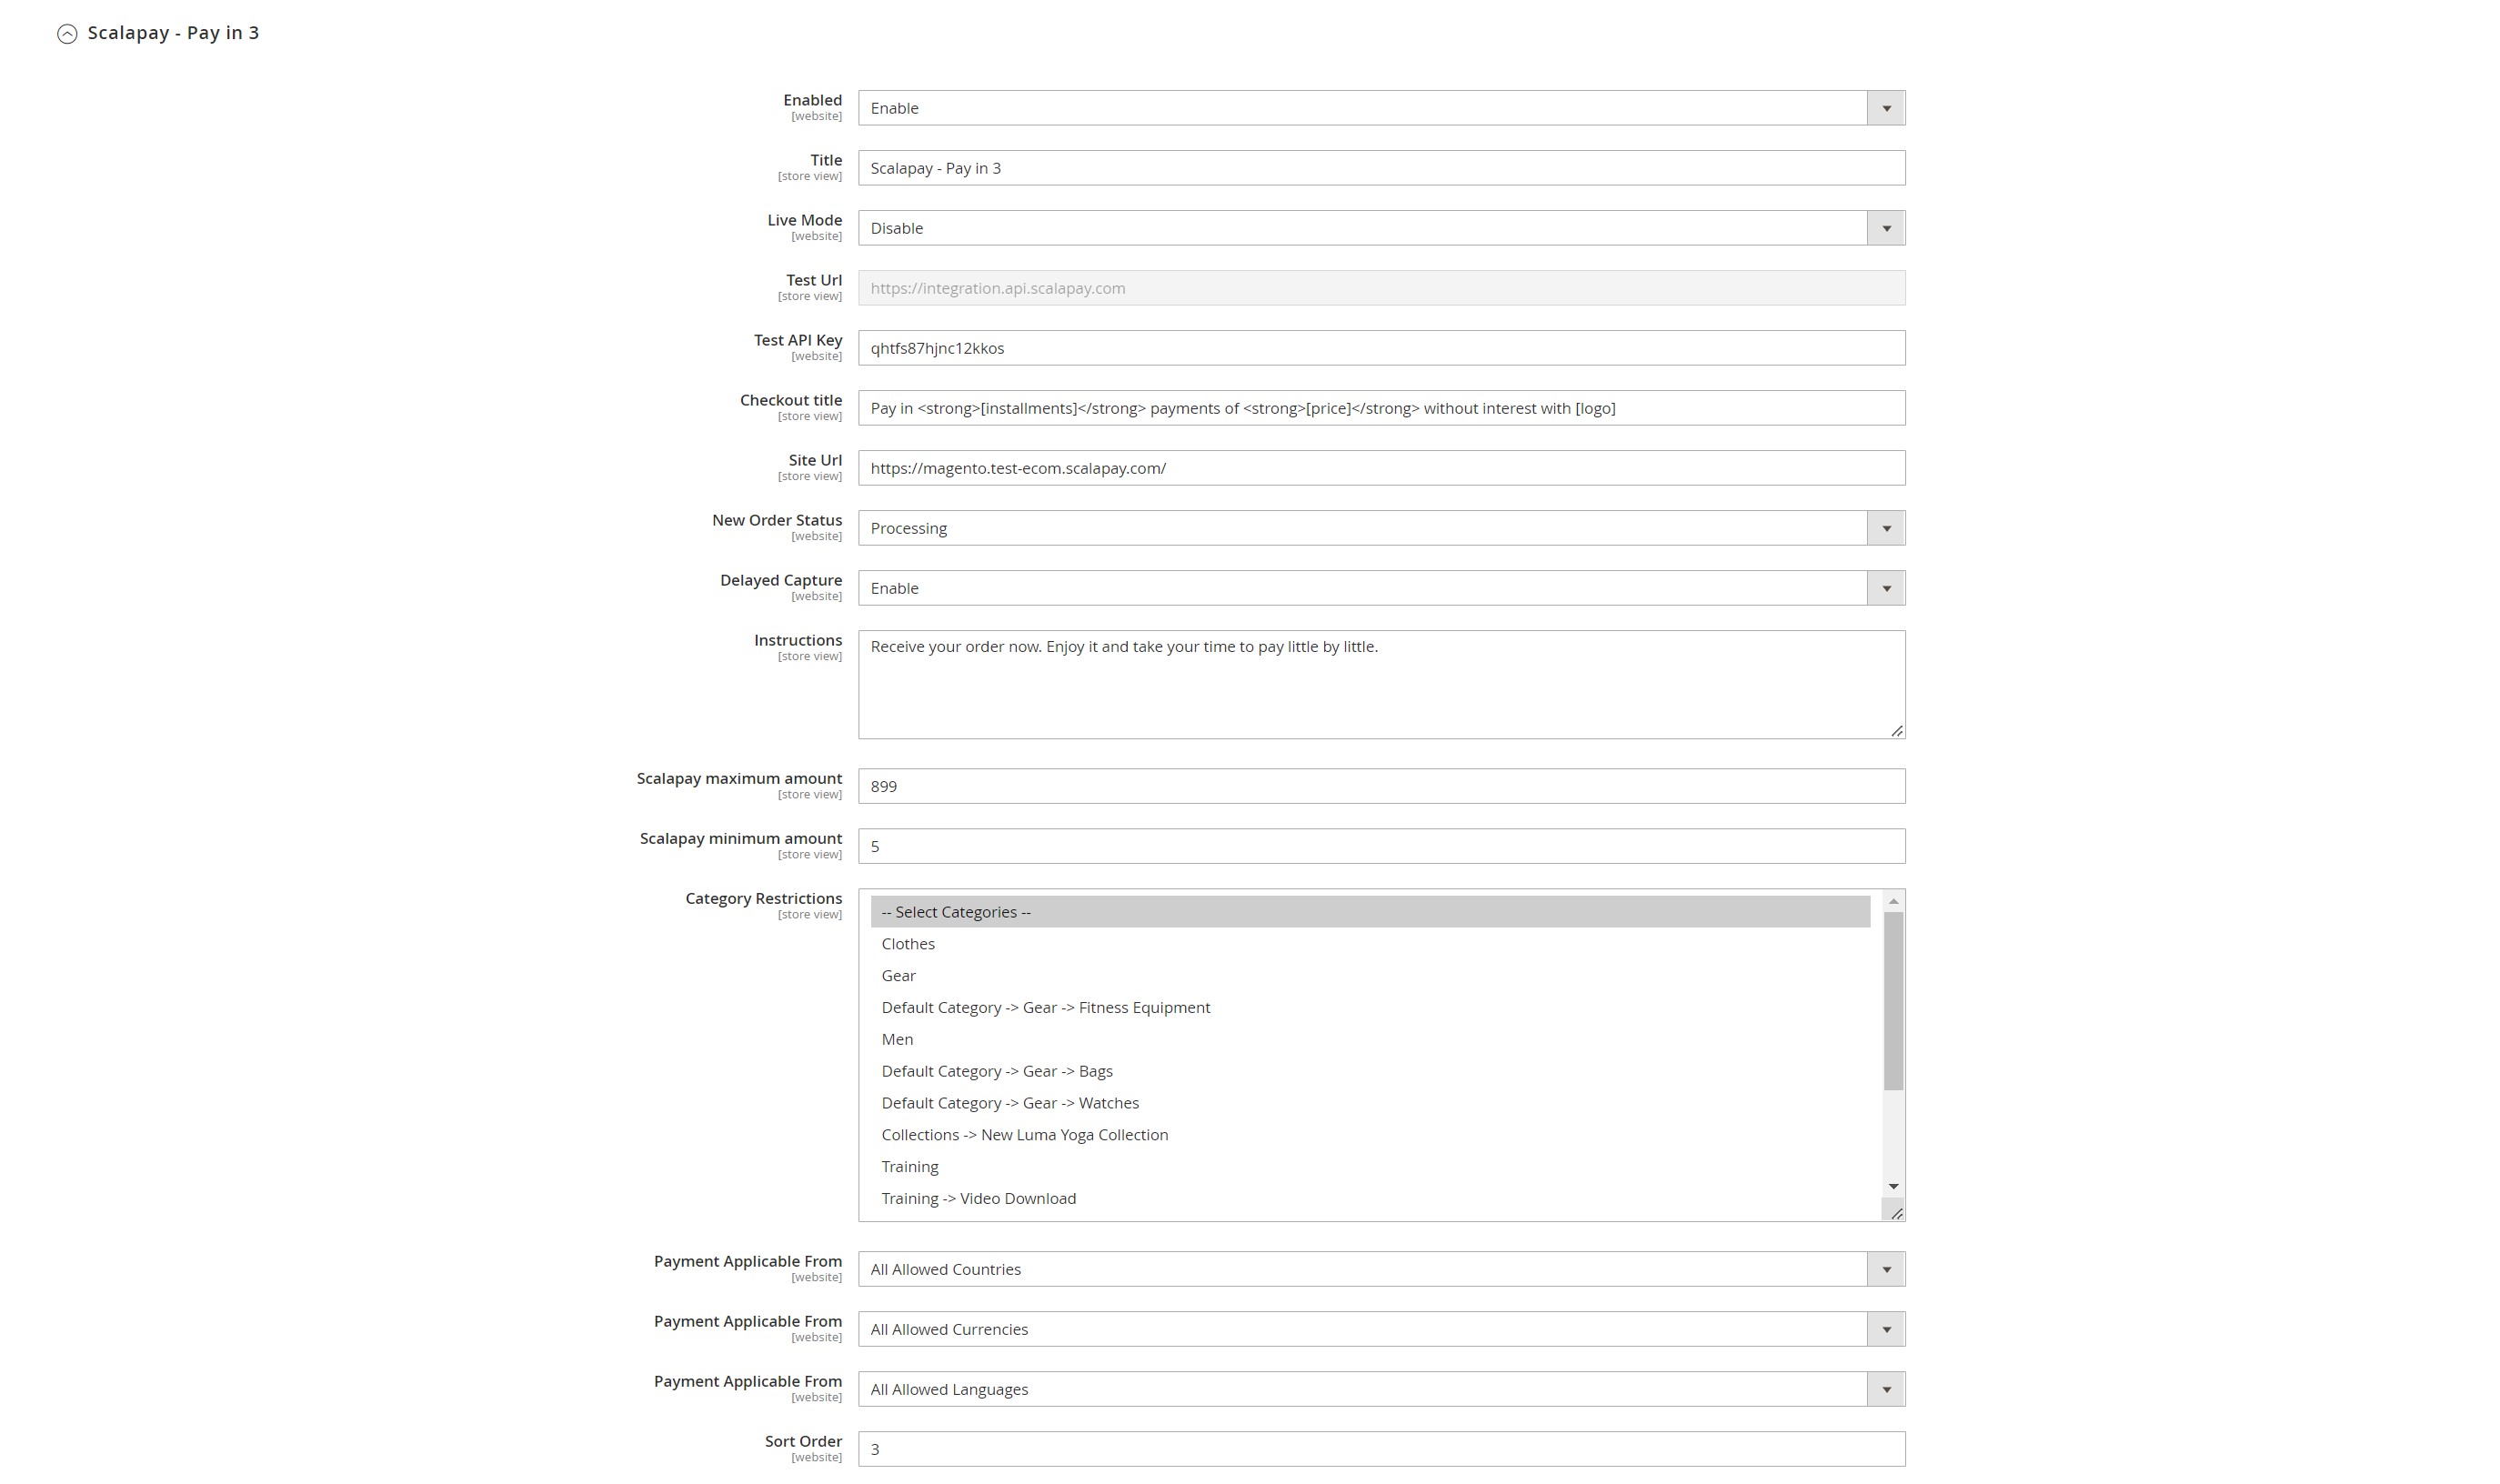
Each product section features settings that allow you to configure, test and then activate in live mode the plugin.
● Enable disable Scalapay in live mode
The Test API key is present by Default and will allow you to test the correct plugin functioning.
Once the testing phase is completed, you will be provided with the Live API Key and you will be able to activate the plugin in Live mode.
● Enable disable Delayed capture
The plugin features the Delayed Capture option
⚠ Category Restriction
● Scalapay Maximum amount and Scalapay minimum amount
These fields allow you to adjust the default minimum and maximum amount, according to your contractual terms. The minimum amount for displaying the Scalapay plugin and accepting payments is set to 5€.
● Category restrictions
This field allows you to select the categories you want Scalapay to be activated on (we suggest that you activate Scalapay on all categories),
● Payment Applicable From
The only authorized countries are Austria, Belgium, Holland, Finland, France, Germany, Italy, Portugal, Spain
For Pay Later, the Frequency number" field is correctly set as Default (14), please do not change the Default value.**
PLEASE NOTE that the only authorized currency is EURO
❤ Scalapay Widget
To configure and customize Scalapay widget, please follow this path: Stores(in left side menu header) → Configuration → Sales→ Scalapay
There you will find a dedicated dropdown section for each of the Scalapay available products: Pay in 3, Pay in 4 and Pay Later.
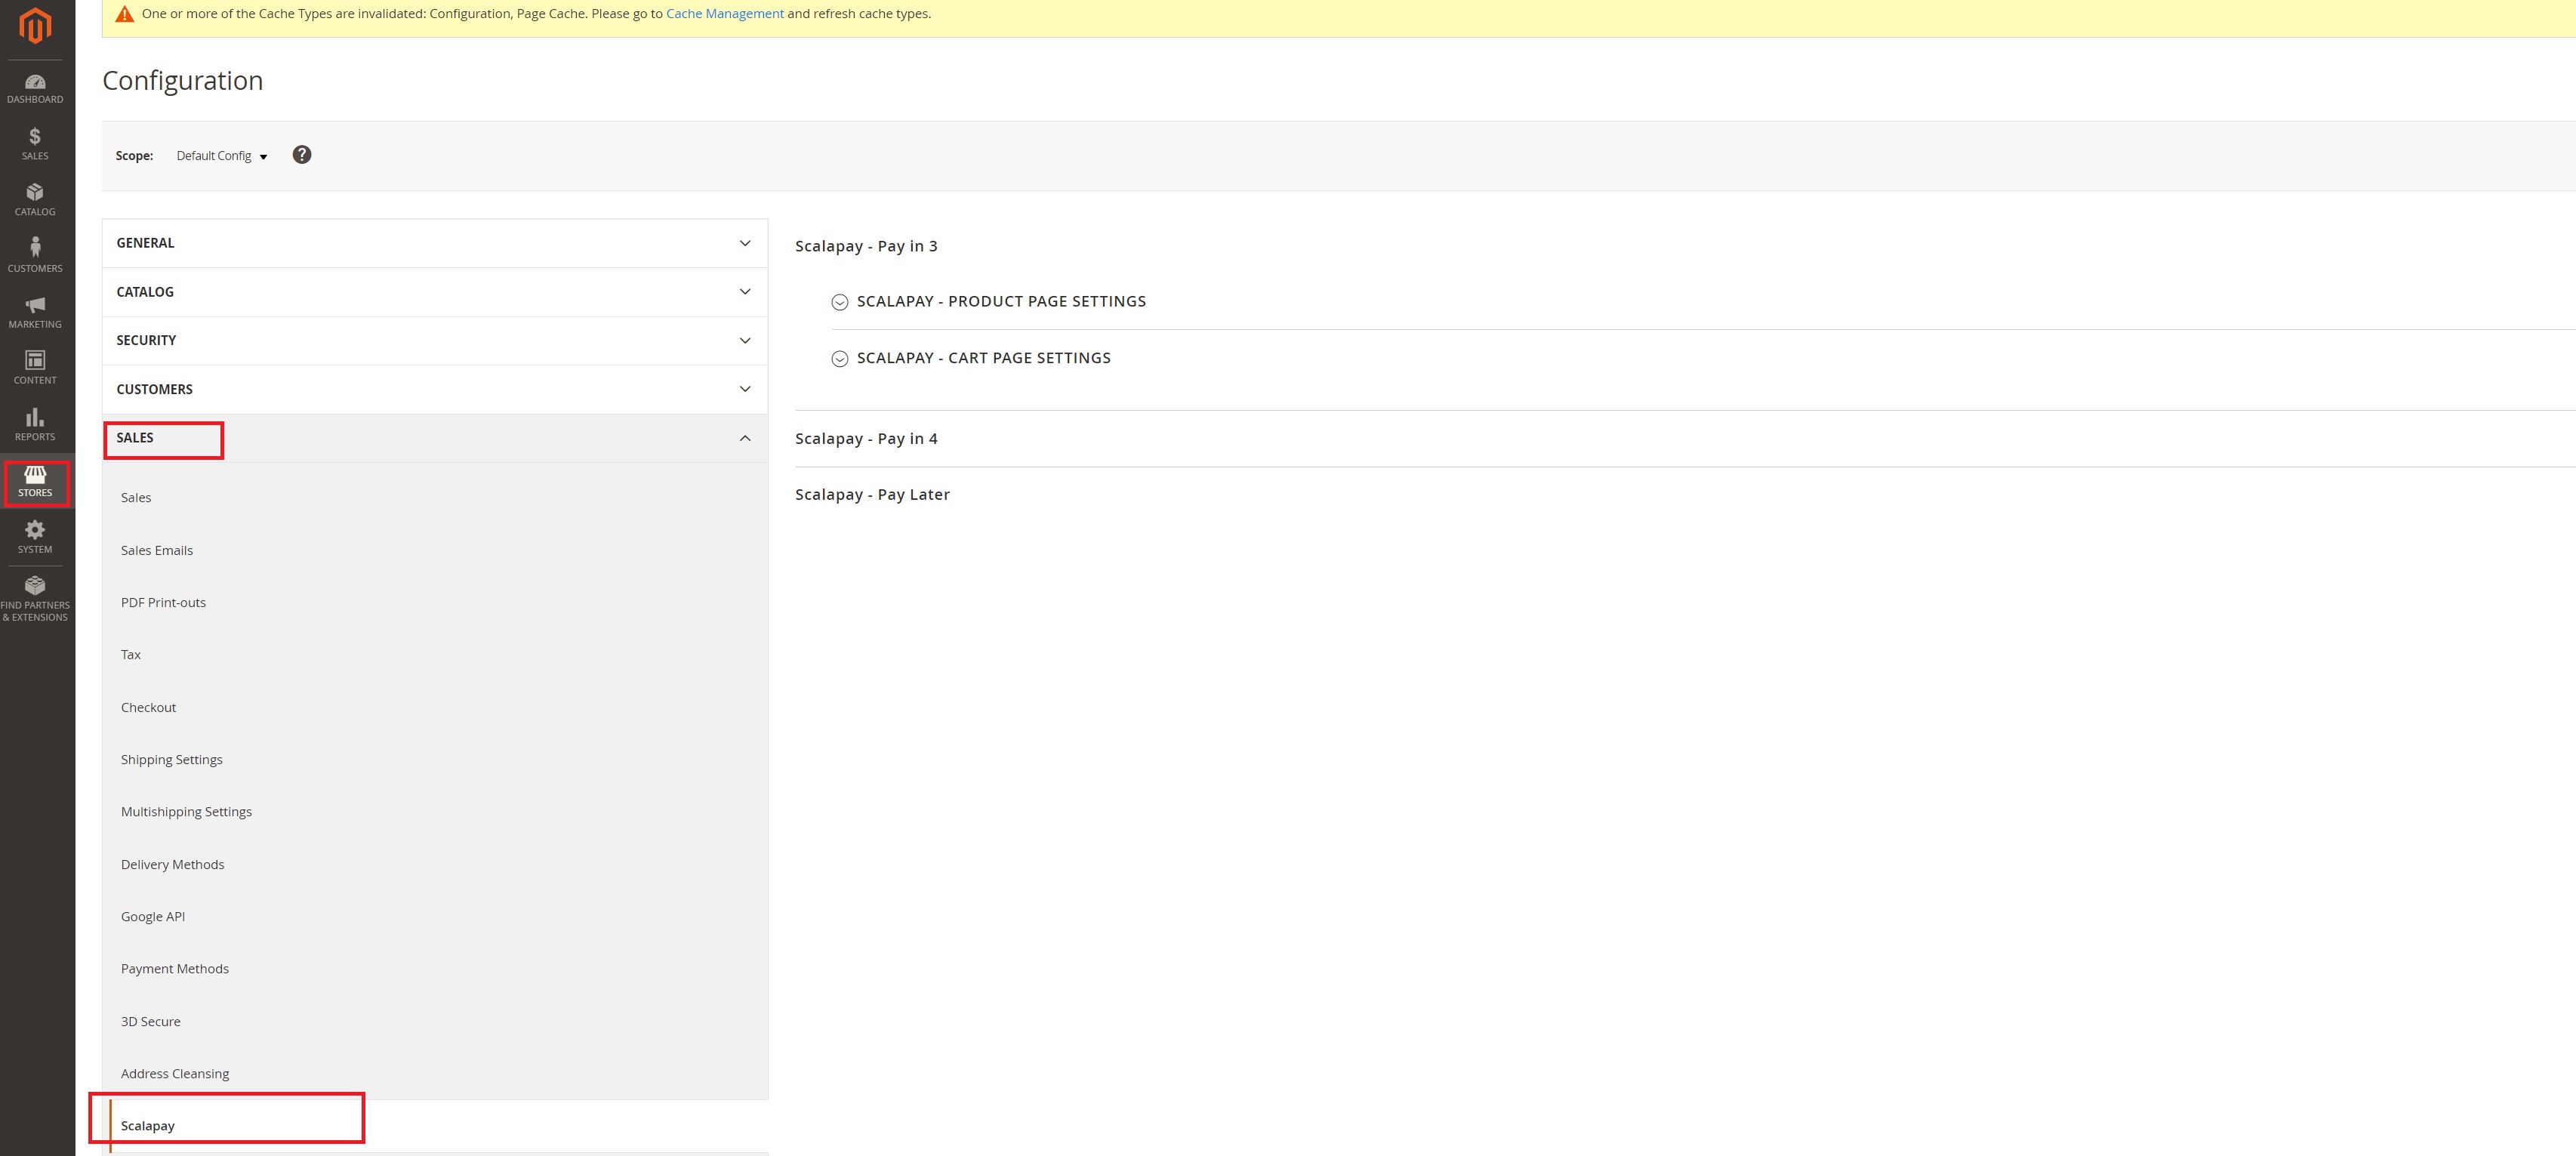
This section allow you to configure and customize Scalapay widget in Product page.
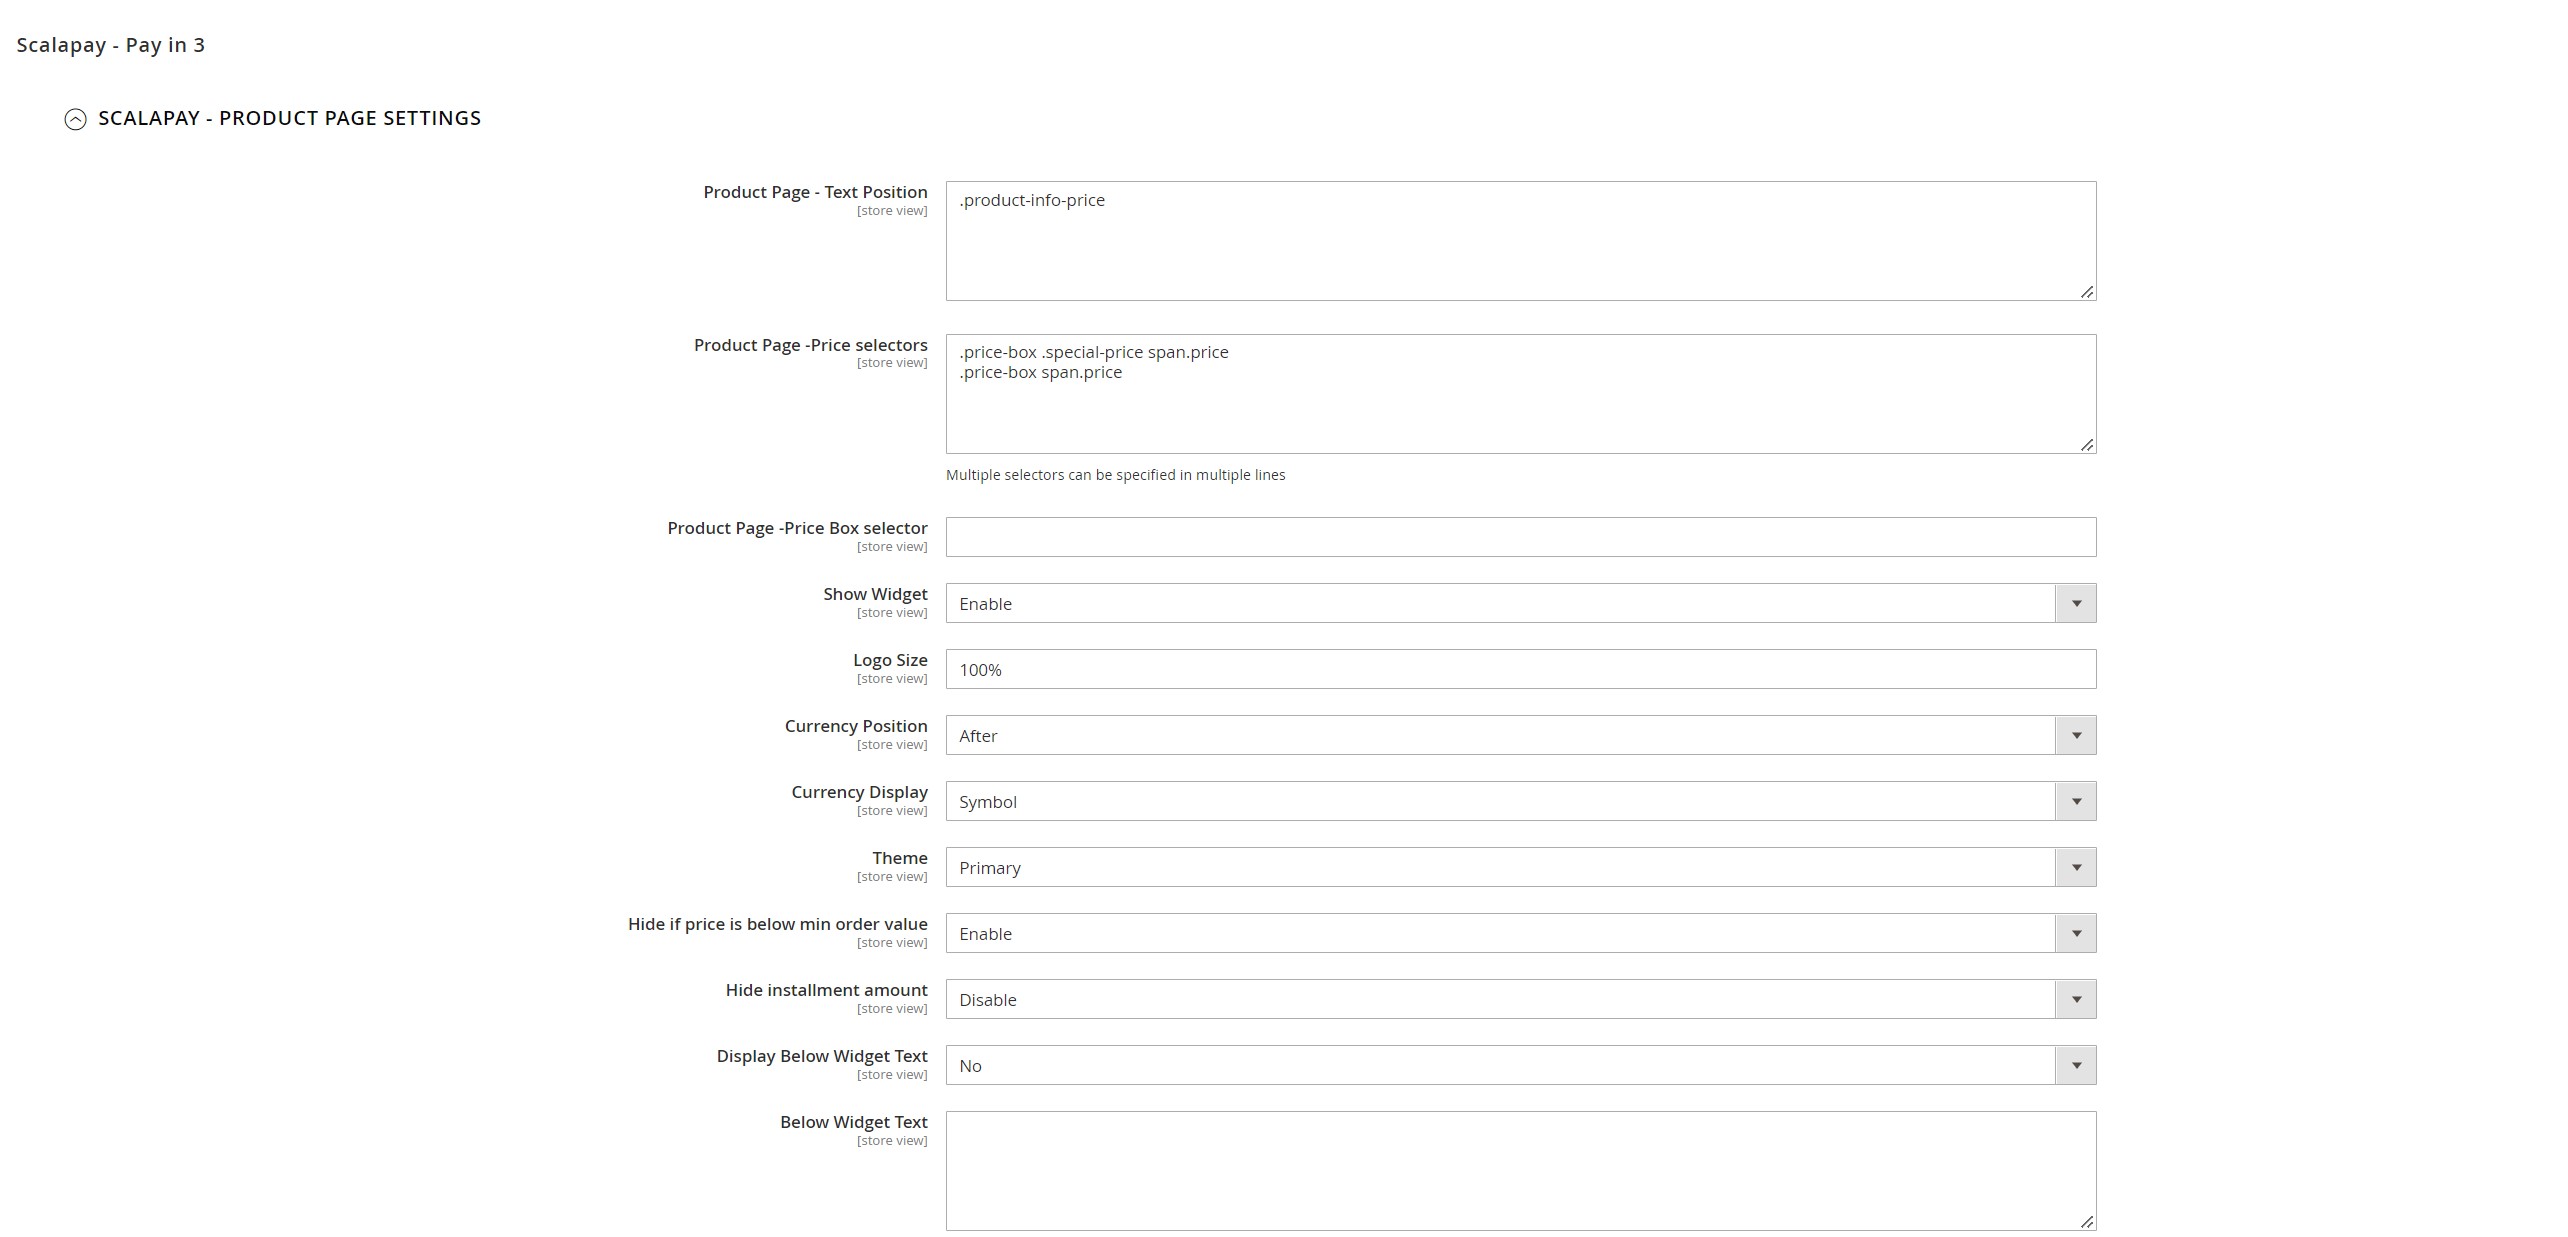
To configure the widget the product page use the fields Price selectors and/or Price Box Selector.
Product page - Price selectors
Price selctors field is used to add class or combination of class pairs to get the final product price on which to apply Scalapay installments.
To identify and set correct selectors, inspect the price element to retrieve the correct price class name: current-price > span.
In the example case, Scalapay module will get the price within the span tag which is 28,72 and divide it by the number of installments to be displayed in the Scalapay installments description. You can also add multiple price selectors by separating them with commas.
To add new price css selector add new selectors in order of priority to use. Find all your price selectors (normal price, special price etc) and paste them in the box, separated by comma.
Use the second box Product Page - Price Selector when prices are loaded by ajax. We recommend using the selector that doesn’t change dynamically.
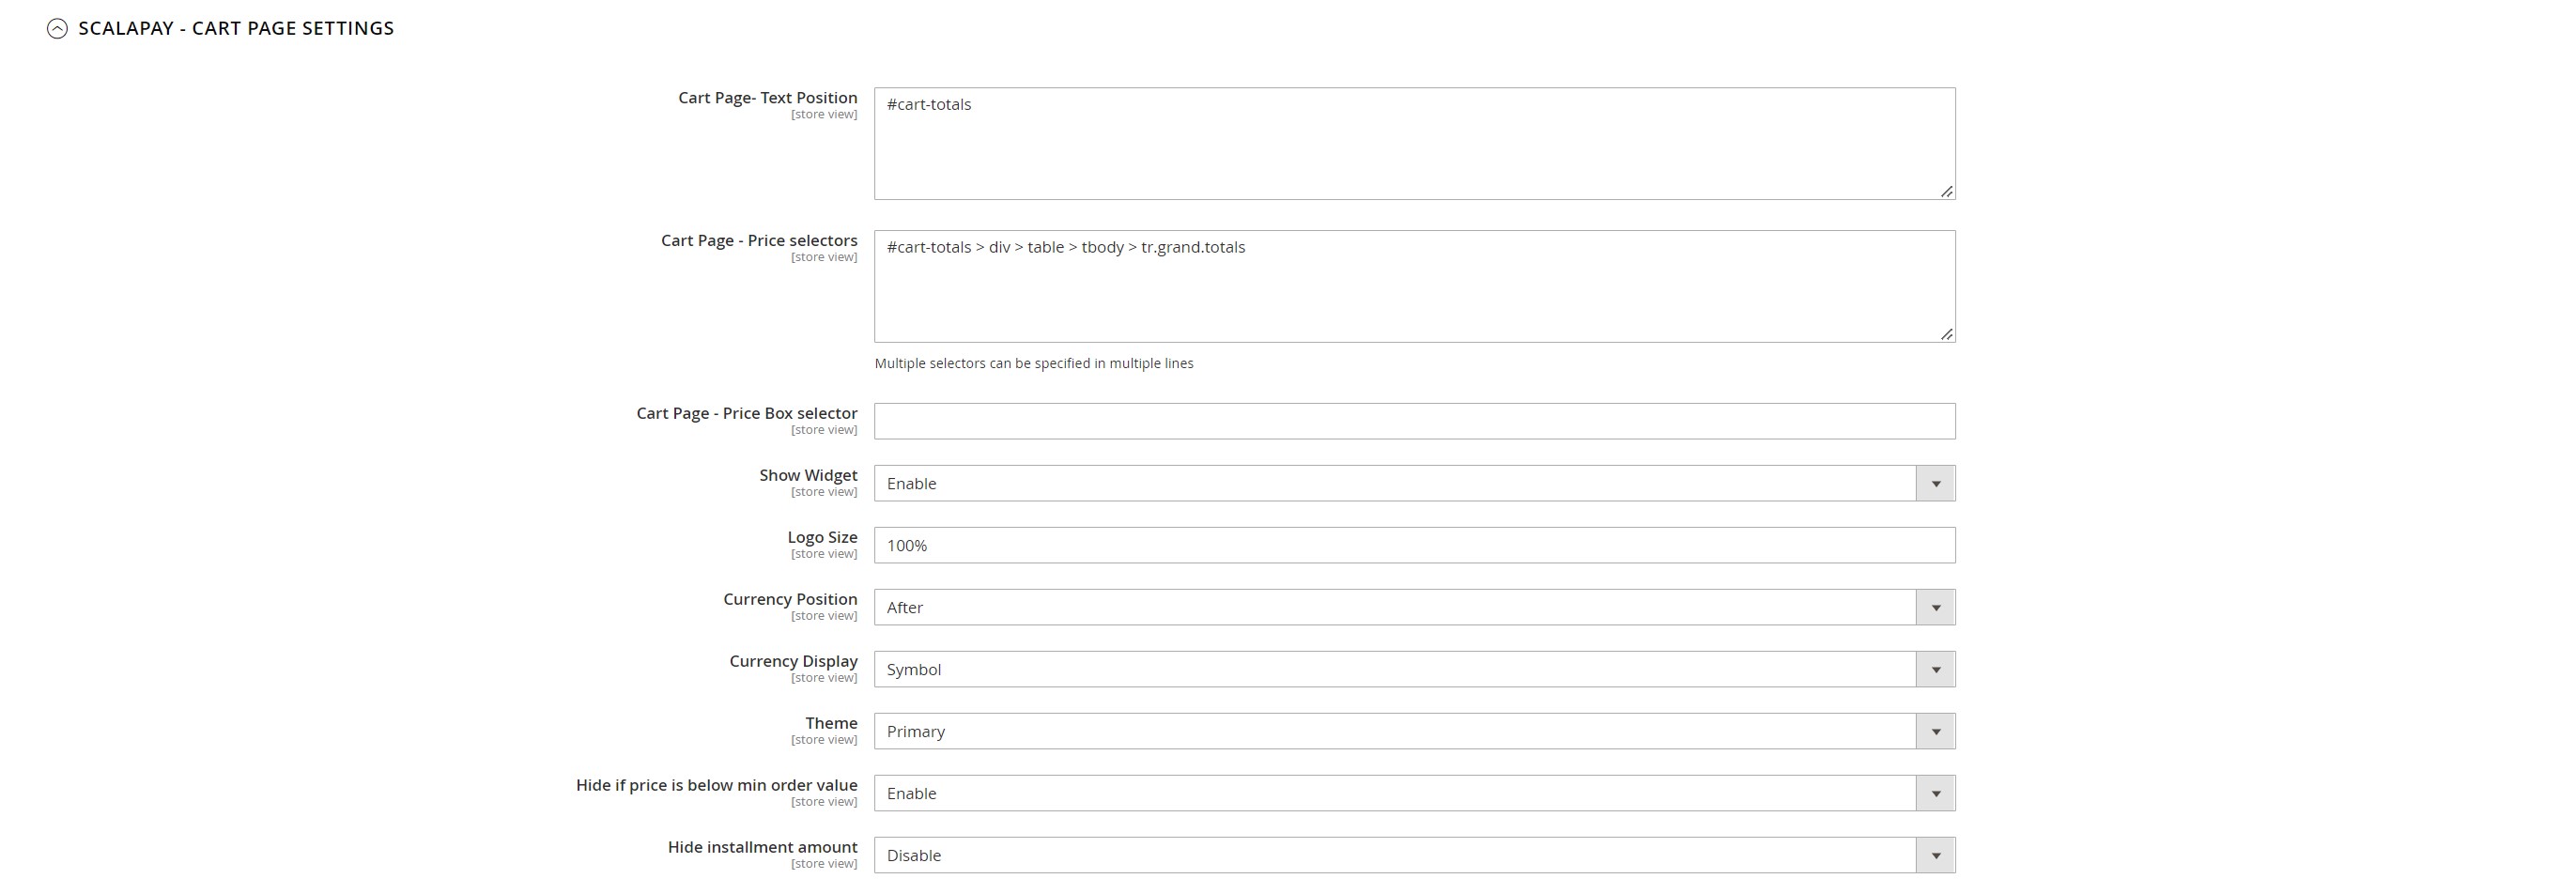
CART PAGE
Refer to the above instructions to configure the Scalapy widget in Cart page
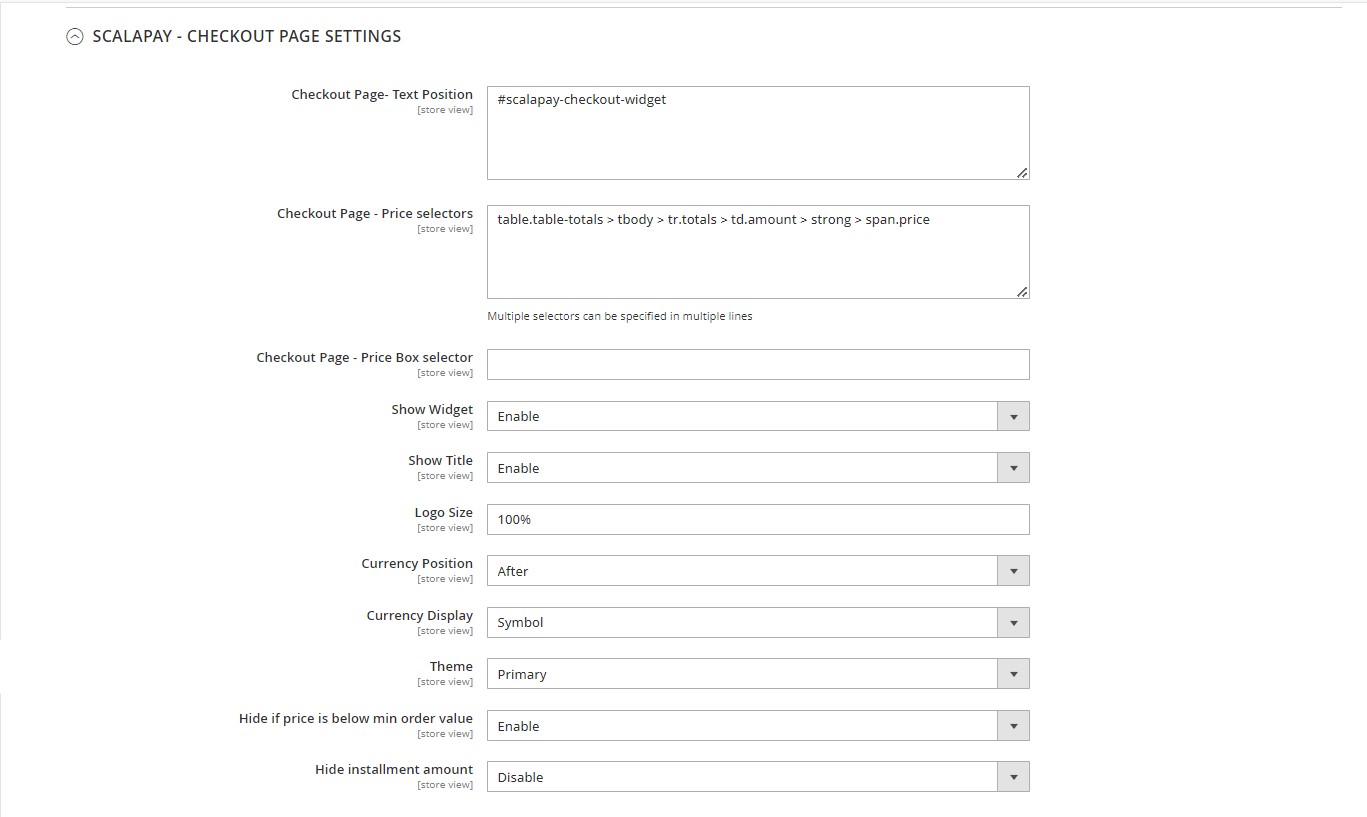
CHECKOUT PAGE
For Magento it is possible to add the widget also in the checkout page.
After the Cart and Product Page Settings section, you can find the settings related to the widget in checkout Page.
“In Page Checkout” feature
The “In page checkout” gives customers the possibility to finalize the Scalapay payment steps in a pop-up, without being redirected outside the merchant’s site. Below you can find the steps to configure this feature.
Go to Sales → Scalapay → Scalapay - In Page Checkout section, open the accordion and select “Yes” value from the “Enabled” list
Save the Configuration clicking on the orange button and then clean the properly Magento cache layer (the Configuration one)
| Field | Value | Required | Editable |
|---|---|---|---|
| Enabled | Y/N | Y | Y |
| Checkout Place Order Button Selector | HTML selectors (pre-filled with default selector) | Y | Y change if a different Place Order Button selector is used |
| Scalapay Place Order Button Wrapper Style | CSS inline style to manage the button dimension | N | Y |
Updated 7 months ago
